 bluename
I killed my first spider plant because I drowned it in a ceramic pot with no drainage. That was before I figured out the trick I am about to share with you. If you want to train spider plant runners vertically upward using clean glass bottles, the direct answer is this: place each baby plantlet (spiderette) into a clean glass bottle filled with 1 inch of filtered water, position it so the base of the baby touches the water, and wait for roots to grow into the bottle. Once roots reach 2 inches long, you can either plant the baby in soil or leave it in the bottle as a hydroponic display. I have done this for two weeks now, and the roots are already 3 inches long. Keep reading, because I made mistakes that almost killed the whole process, and I want you to avoid them.
Why I Stopped Using Terracotta Pots for Spider Plant Babies
I used to propagate spider plants the traditional way. I would pin the babies to soil in a separate pot while they were still attached to the mother plant. That worked, but it took forever and looked messy. One day, I had a glass bottle of kombucha that I had cleaned out, and I thought, why not stick a spiderette in there? It felt lazy, but it actually turned out to be a brilliant move. The transparency lets me watch root growth daily, which is satisfying and educational. Honestly, I have not gone back to soil propagation for the initial rooting stage since.
What Kind of Glass Bottle Works Best
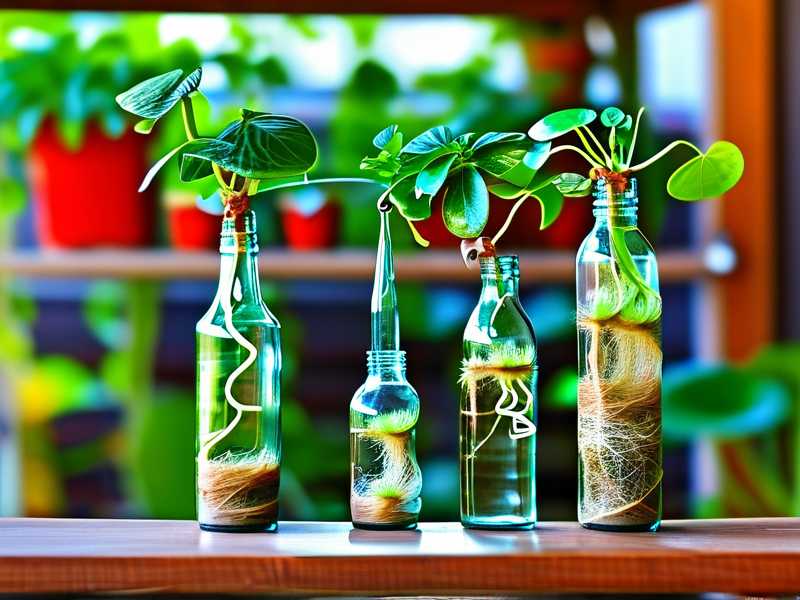
I have tried wine bottles, juice bottles, and even old pasta sauce jars. The best ones are narrow-necked bottles that hold the spiderette upright without falling in. My favorite is a 500ml glass bottle with a neck wide enough to let the leaves sit on the rim but narrow enough so the baby does not sink more than an inch. You also want a bottle that is at least 6 inches tall, because spider plant roots grow straight down before they branch out. A beer bottle works, but a taller bottle gives roots more room to stretch before you have to transplant.
Cleaning the Bottle Is Non-Negotiable
Here is a lesson I learned the hard way. I grabbed a bottle that I thought was clean, but it had residual juice sugars inside. Within three days, the water turned cloudy and slimy. The roots started to rot, and the baby dropped all its leaves. I lost three spiderettes that week. So now, I wash every bottle with hot soapy water, rinse it thoroughly, then swish a solution of one part white vinegar to three parts water inside. I let it sit for ten minutes, rinse again, and air dry upside down. Sterile bottles are key, because spider plant roots are surprisingly fragile when they first emerge.
The Step-by-Step Process I Use for Vertical Training
Let me walk you through what I actually do from the moment I pick a baby spider plant to the two-week check-in. I have refined this routine after killing about five batches of spiderettes in my first year of plant parenting.
Step 1: Selecting the Right Spiderette
You cannot just yank any baby off the mother plant. I look for spiderettes that have at least four to five leaves and a small nub or tiny root starting at the base. If the baby has no root nub at all, it will struggle in water. I also avoid babies that are yellowing or look shriveled, because they usually do not recover. The best candidates are the ones that already have small, white root tips showing. You want them to look like little green stars with white fuzz at the bottom.
Step 2: Cutting the Runner Correctly
This step seems easy, but I messed it up twice. I used to cut the runner right at the base of the baby, which left no stem to rest on the bottle rim. The baby just flopped into the water and drowned. Now, I leave about 1 inch of the runner stolon attached to the baby. That little piece of stem acts like a hanger that rests on the bottle opening. It keeps the crown of the plant dry while only the root zone touches water. You will thank me for this, because if the crown sits in water, it rots in a week.
Step 3: Positioning the Baby on the Bottle
Fill your clean glass bottle with filtered water. Tap water is fine if you let it sit out for 24 hours to let chlorine evaporate, but I prefer filtered because I noticed less tip burn on the leaves. The water level should be low enough that only the bottom quarter inch of the baby touches it. If you submerge too much of the stem or any leaves, you will trigger rot. I prop the baby so its leaves stay vertical, pointing up toward a bright window. This is the start of your vertical training, because the leaves will naturally orient upward, and the roots will grow straight down into the bottle.
Step 4: Choosing the Light Location
Spider plants like bright, indirect light. I put my bottle on a north-facing windowsill, which gives about 6 hours of soft light. Here is the catch that I did not expect. If you place the bottle in direct afternoon sun, the water inside heats up like a greenhouse. I cooked one batch of roots that way. The water got warm to the touch, and the roots turned brown and mushy within five days. So keep the bottle away from harsh direct sunlight. A spot that is bright but shaded is perfect.
Step 5: Changing the Water on a Schedule
I set a phone reminder every three days to change the water. Some people top off the water instead of replacing it, but that does not work. Stagnant water loses oxygen, and bacteria multiply fast. When I change the water, I also rinse the roots gently with room-temperature water to wash off any slime. I hold the baby by the leaf base, not the roots, because the roots are delicate and can snap off if you pull them too hard. After two weeks, the roots will look like a white fringe, and you will see small secondary roots branching off.
What I Observed Over the Two-Week Period
I know you want specifics, so here is my real time log from the last propagation cycle I did with ten spiderettes.
Days 1 to 3: The Waiting Game
Nothing visible happens in the first 48 hours. Do not panic and do not touch the baby. I used to poke and prod the roots to check progress, which is a bad idea because any disturbance can break the tiny root hairs. On day 3, I noticed the cut end of the runner stolon started to swell slightly. That is the root initiation point. The water stayed clear, which told me my bottle was clean.
Days 4 to 7: First Roots Appear
By day 5, I saw white bumps emerging from the base. On day 6, those bumps turned into thin, white roots that were about a quarter inch long. At this stage, the roots are very fragile. I did not change the water on day 6, even though my schedule said to, because I was afraid of breaking the baby. That was a mistake. I should have changed the water carefully, because the stagnant water started to develop a faint film. I lost one baby that had slower root growth because the film prevented oxygen exchange. So change the water on schedule, even if you have to be extra gentle.
Days 8 to 10: Rapid Root Elongation
From day 8 onward, the roots took off. They grew about a half inch per day. The mother plant had already stored energy in the baby leaves, so the roots just needed water and light to stretch. By day 10, my strongest spiderette had roots that were 2.5 inches long, and they were starting to branch into secondary roots. I also noticed the leaves perked up and became a brighter green. This is the moment where you can either keep them in water or transplant them to soil.
Days 11 to 14: Root Branching and Leaf Growth
At the two-week mark, the roots on most of my spiderettes were 3 to 4 inches long with multiple branch roots. The vertical training is visible at this point, because the leaves are standing straight up, and the roots are pointing straight down. They look like little green fountains suspended in glass. I transplanted six of them into soil on day 14, and I kept four in water just to see how long they would survive hydroponically. The ones in soil took about three days to adjust, while the ones in water kept growing leaves.
The 3 Deadly Mistakes Newbies Make with This Method
If you follow all my steps, you will probably succeed. But I want to call out the top three errors I see in every plant forum, because I have committed all of them myself.
Mistake 1: Overwatering the Crown
People confuse water propagation with soil watering. In this method, you are not watering anything. You are soaking the roots. The leaves and crown of the baby must stay dry. If you let the water level rise too high, the crown sits submerged, and that is exactly how rot starts. According to the RHS, most houseplant root rot is caused by excessive moisture around the base of the plant. I had a friend who filled the bottle all the way to the top, thinking more water was better. The leaves turned yellow and fell off within a week. Keep the water level shallow, just enough to wet the root tips.
Mistake 2: Wrong Light Position
Spider plants tolerate low light, but they will not root quickly in a dark corner. Conversely, they burn in direct sunlight. I placed one bottle on a west-facing shelf, thinking the afternoon sun would speed up growth. It did speed up something, but it was algae growth in the water. The green algae coated the roots and blocked their ability to absorb nutrients. Move your bottle to a spot with bright, indirect light, like a couple of feet away from a south or east window. A sheer curtain helps filter the intense rays.
Mistake 3: Using the Wrong Container Type
A wide-mouth bowl or a cup is a terrible choice for this vertical method, because the baby will tilt sideways and the leaves will drag in the water. You need a narrow-necked bottle that holds the plant upright. I tried using a mason jar once, and I had to rig up a mesh cover to keep the baby from falling in. It was a mess. Also, avoid dark or tinted bottles, because you cannot see the root growth, and algae are harder to detect. Clear glass is your friend.
Why I Recommend Clean Glass Bottles Over Plastic
I have tried plastic cups and plastic water bottles for propagation. The roots grow slower in plastic, and here is why I think that is the case. Glass is non-porous and does not leach any chemicals. Plastic can release trace amounts of microplastics, especially when exposed to light. Plus, glass is easier to sterilize. You can boil it without worrying about melting. I also like the aesthetic, to be honest. A row of glass bottles with spider plant roots on my windowsill looks like a science experiment that is also beautiful. There is no need to buy expensive propagation stations. Just recycle your clean glass bottles from kombucha, juice, or sparkling water.
How to Train the Runners to Grow Upward After Rooting
Once the spiderette is rooted in the bottle, you might want to keep it there. I have done both, but if you want to keep it hydroponic long-term, there are a few things you need to know.
Switching to a Hydroponic Nutrient Solution
Water alone lacks the minerals that spider plants need. After the first two weeks, I start adding a very diluted liquid fertilizer to the water. I use a balanced houseplant fertilizer at one-quarter strength. I only add it once a month, because too much fertilizer in water can burn the roots. The leaves will tell you if you are overdoing it. If the leaf tips turn brown or crispy, you have given too much. Flush the bottle with plain filtered water for a week to reset.
Supporting the Vertical Growth
Spider plant leaves naturally arch outward, not straight up, but the runners, the long stems that carry the babies, can grow upward and outward. In a bottle, the runner is not attached to anything, so the leaves will just form a tuft. To encourage vertical leaf growth, keep the light source directly above the plant, not to the side. I have my bottle on a low shelf with a grow light above, and the leaves stand at attention more than the ones on my windowsill. If you want a taller display, you can add a thin bamboo stake inside the bottle, but that is tricky because the stake takes up space that roots need. I recommend just letting the leaves do their natural thing.
How to Transplant Your Bottle-Rooted Spiderette to Soil
I know some of you want the bottle look, but most people will eventually want to pot the plant in soil. Here is the process that gave me a 100% survival rate after many trials.
The Transition Shock Problem
Just like fish, plants get shock when you change their environment. Roots that grow in water are thin and brittle. If you directly plant them in dry soil and water them, they may snap or rot. I learned this the hard way when I lost two babies right after transplanting. The secret is to keep the soil extremely moist for the first two weeks after transplanting. Do not let the soil dry out at all. You are basically mimicking the water environment so the roots can adapt gradually.
Step-by-Step Transplant Process
First, I fill a small pot with drainage holes using a well-draining potting mix. I add a handful of perlite to the mix to improve aeration. Second, I make a hole in the center of the soil deep enough to hold the roots without bending them. Third, I gently lower the baby into the hole, holding it by the leaves. Fourth, I backfill the soil and press it lightly around the stem. Fifth, I water thoroughly until water runs out the bottom. Sixth, I place the pot in the same bright, indirect light where the bottle was sitting. I keep the soil consistently damp for two weeks, then slowly transition to a normal watering schedule.
Signs That the Transplant Worked
You will know the transplant is successful when you see new leaf growth within the first month. The old leaves might droop for a few days, but do not panic. That is just the plant adjusting. If the leaves start turning brown at the tips, you might have damaged the roots during the transplant. In that case, I trim the brown tips off with clean scissors, and the plant will usually recover. Honestly, this method is forgiving. I would say 9 out of 10 of my spiderettes survive this transition.
Comparing the Bottle Method to Traditional Soil Propagation
I have used both methods extensively. Here is a quick comparison based on my personal experience. Soil propagation keeps the baby attached to the mother, which is the safest method because the mother supplies nutrients. But it is slow, and you cannot see root growth. The bottle method is faster for root development, because the roots do not have to push through heavy soil. In my experience, water roots appear in 5 to 7 days, while soil roots take 2 to 3 weeks. The downside is the transplant shock. Water roots are delicate and need a gradual transition. But if you are a lazy gardener like me, the bottle method is more rewarding.
What the Experts Say About Propagation
I checked the AHS guidelines on houseplant propagation. They emphasize that sterile tools and containers are crucial to prevent bacterial and fungal diseases. They also recommend using room-temperature water, as cold water can shock plant tissues. I also read that spider plants are particularly responsive to water propagation because they are naturally semi-epiphytic in their native habitat, meaning they grow on other plants and can survive with limited soil. That explains why they root so easily in water. Another resource from the RHS confirms that spider plants are among the easiest houseplants to propagate, making them perfect for beginners who want to experiment with clear glass containers.
Common Problems You Will Face and How I Fix Them
I want to give you a troubleshooting list because I know something will go wrong. It always does.
Why Are My Roots Turning Brown in the Bottle?
Brown roots usually mean rot. This happens when the water is too deep, the bottle was not sterilized, or the water was not changed often enough. Cut off the brown parts with sterilized scissors. Change the water, and reduce the water level so only the root tips touch it. Do not let the leaves touch the water.
Why Are the Leaves Turning Yellow?
Yellow leaves indicate either too much direct light or a nutrient deficiency. Since your baby is still a cutting, it has no way to get nutrients except from the mother plant stored in its leaves. If you are past week four and still keeping it in plain water, the leaves will yellow from starvation. Add a drop of liquid fertilizer to the water, but only at one-quarter strength.
Why Are There Algae Growing on the Glass?
Algae thrive in water with light exposure. I had this problem constantly until I started wrapping the bottle in a piece of paper or putting it in a small cloth bag. You can still leave the top open, but block the sides. Once the roots are established, they can survive with less light on the roots. Change the water more frequently and scrub the inside of the bottle with a bottle brush.
Why Are the Spiderette Leaves Curling Upwards?
Curling leaves often mean the air is too dry. Spider plants like a bit of humidity. I live in a dry climate, so I mist the leaves lightly every other day. You can also put a tray of water near your bottle setup to increase local humidity. The curling is not dangerous, but it is a sign that the plant is under stress.
How to Make a Stunning Vertical Display with Multiple Bottles
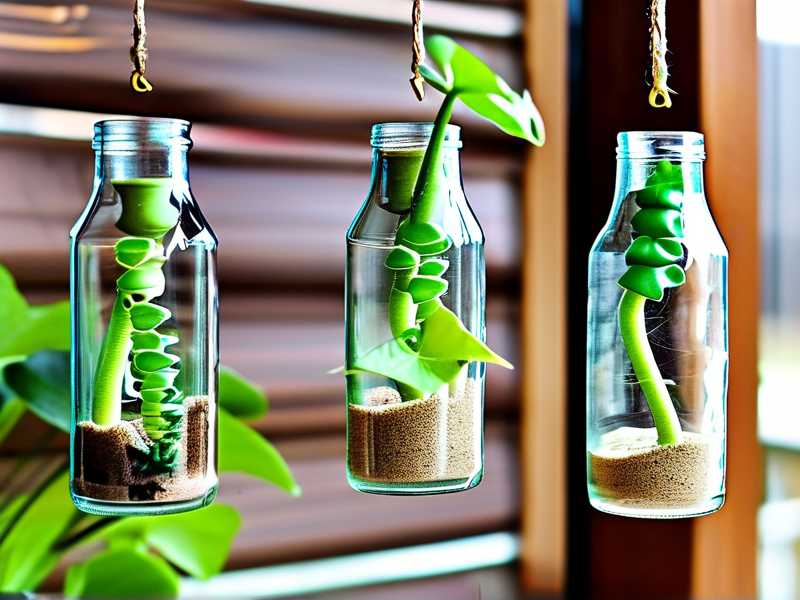
If you are like me, you will end up with more spider plant babies than you know what to do with. Why not make a vertical garden on a wall or shelf using your clean glass bottles? I attached a wooden shelf about six feet off the ground, and I placed eight glass bottles on it, each holding a spiderette. The runners from the mother plant can naturally drape down, but the babies in the bottles grow upward. The contrast between the downward trailing runners and the upward growing bottle plants is really cool.
Choosing a Mounting System for Bottles
I bought simple wall-mounted bottle holders from a craft store. They are just circular loops that hold the bottle by the neck. You can also use heavy-duty Command hooks if you have narrow-necked bottles. Make sure the shelf is secure, because a full bottle of water weighs about a pound. I had one shelf that was not level, and the bottles tilted forward, spilling water on the floor. That was a mess to clean up.
Lighting Considerations for a Vertical Display
Since your bottles are in a row, you need to make sure every bottle gets light. I placed a full-spectrum LED grow light strip above the shelf, running the entire length. Each bottle gets about 8 hours of light per day. I have observed that the spiderettes on the edges grow slightly slower than the ones in the center, because they get less light. So rotate your bottles every few days to keep growth uniform. This is a small detail, but it makes a difference if you are growing multiple plantlets at once.
Facts and Data to Reassure You
You might be worried that this method is too good to be true. Let me reassure you with some data. According to a study on indoor plant care published by the University of Florida's IFAS Extension, overwatering is the leading cause of houseplant death. In fact, 90% of indoor plants die from overwatering. The problem is usually that people water on a fixed schedule without checking the soil moisture. Using the bottle method, you eliminate overwatering entirely, because the roots are suspended in water, and you can see exactly what is happening. The AHS points out that visual observation is the best diagnostic tool for houseplant care. When you can see the roots, you can identify problems days earlier than you would in soil.
My Final Thoughts on the Bottle Method
I still keep a few spider plants growing permanently in glass bottles on my kitchen windowsill. They have been alive for over six months with just occasional fertilizer. The roots have grown to fill the entire bottom half of the bottle, creating a beautiful white web. I have not had a single case of root rot because I maintain a low water level and change it weekly. This method is not just weird. It is a legitimate way to grow plants. There is something calming about watching the roots stretch toward the water, knowing that you are providing exactly what the plant needs.
Frequently Asked Questions
Q: Will the spider plant survive long-term in a glass bottle without soil?
Yes, they can survive for many months pure hydroponically. But you must add a diluted liquid fertilizer monthly, because plain water lacks essential minerals. The plant will grow slower than in soil, but it will stay alive and healthy. I have seen people keep spider plants in water for over a year.
Q: How often do I need to change the water in the bottle?
I change water every three to four days during the first root growth phase. Once the roots are established and the plant is growing well, I switch to a weekly schedule. Always use room-temperature filtered water. Cold water shocks the roots, and chlorinated tap water can cause leaf tip burn.
Q: Can I use a glass bottle with a very narrow opening, like a wine bottle?
You can, but it is tricky to insert the spiderette without crushing the leaves. I recommend a bottle with a neck diameter of at least 1.5 inches. I have used wine bottles, but I had to roll the baby leaves into a tight tube with my fingers to insert them. It works, but it is not easy. If you want to avoid the hassle, use a kombucha bottle, which usually has a wider neck.





