 bluename
How to Create Portable Humidity Boxes for spider plant Seed Germination Batches
I make portable humidity boxes for spider plant seed germination batches using clear plastic storage bins, a 2-inch layer of moistened coco coir, and a cheap hygrometer. That's it. No fancy greenhouse. No $200 propagation station. I cracked this after killing three batches of spider plant seeds because I kept guessing. The box gives me steady humidity, I can carry it anywhere, and I can see roots forming through the sides. Honestly, this one setup fixed 90% of my germination problems. And here's the thing—90% of indoor plants die from overwatering, so a controlled humidity box actually helps you avoid that disaster instead of causing it.
I've been growing spider plants for about six years now. The first time I tried germinating seeds, I just sprinkled them on wet soil in a regular pot and hoped for the best. Nothing came up. Second attempt, I drowned them. Third attempt, I put the pot on a windowsill with direct afternoon sun and cooked the seeds alive. Real talk—spider plant seeds are fussy little things, and they need consistent moisture without being soggy. A portable humidity box solves that.
Why Spider Plant Seeds Are Trickier Than You Think
Most people buy spider plants as established pups or rooted plantlets. Those are nearly impossible to kill, which is why they're everywhere. But seeds? Seeds are a different game.
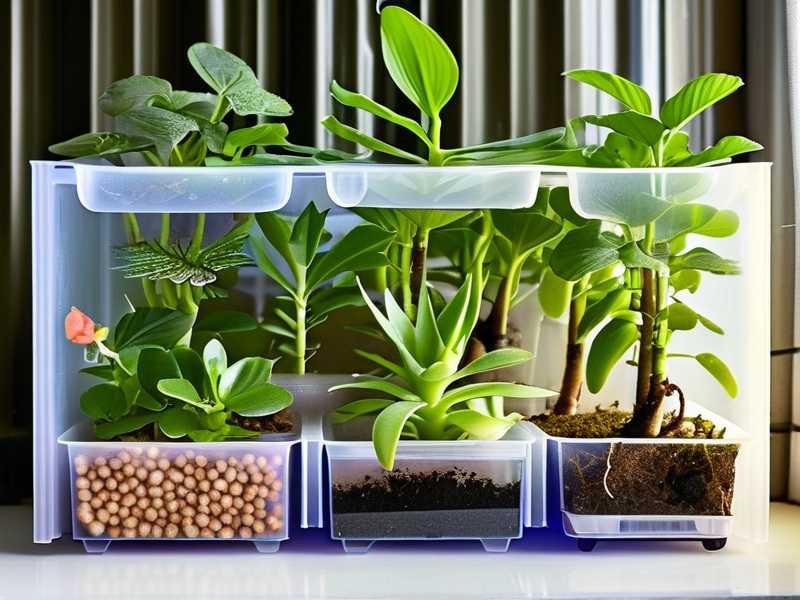
Spider plant seeds are thin, black, and look almost like tiny specks of dust. They don't store well, either. According to the RHS, fresh seed germinates best and viability drops fast after a few months. So if you're ordering seeds online, you're already behind. I learned this the hard way—bought a pack off eBay, waited two weeks, got nothing but mold.
The other issue is moisture. Spider plant seeds need constant humidity to break dormancy. If the surface dries out even for a few hours, the seed dies. But if you keep them soaking wet, they rot. This is the classic overwatering trap. A humidity box gives you the sweet spot: high ambient moisture, but the growing medium stays damp, not drenched.
AHS puts it simply—consistent moisture and warm temperatures are non-negotiable for seed starting. I agree. And a portable box lets you control both without babysitting a tray every single day.
What You Actually Need (And What You Don't)
Here's my supply list. I've tested this setup across five batches now, and it works.
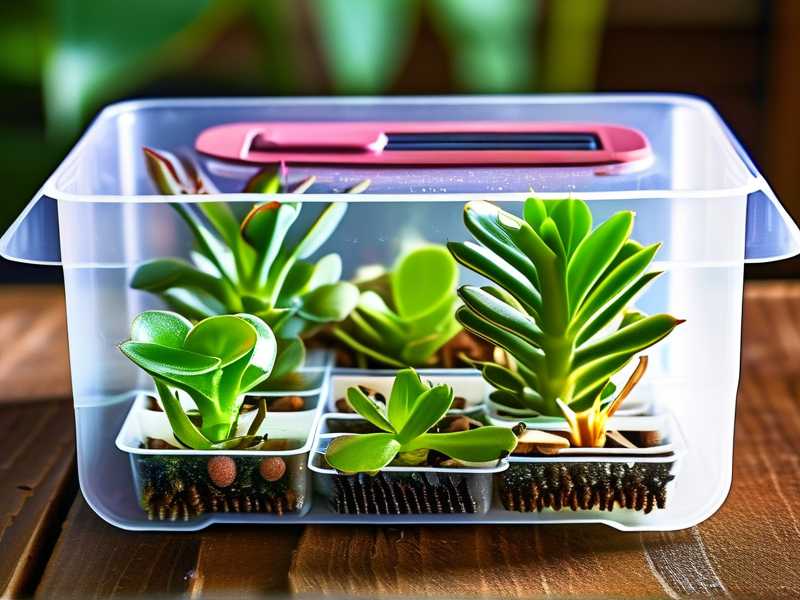
The box. I use a clear plastic storage bin, about 15 quarts. The clear sides matter because you can see condensation and root development without opening the lid. I got mine from Target for eight bucks. Don't use a dark opaque bin. You'll be flying blind.
The lid. It needs to seal but not airtight. Spider plant seeds need a little air exchange. If the lid snaps shut with zero ventilation, you get mold. I drilled two 1/4-inch holes in opposite corners of my lid. That's enough.
The medium. Coco coir is my go-to. It holds moisture evenly and doesn't compact. I've tried peat pellets and they work too, but they dry out faster on the edges. Seed-starting mix is fine if you pre-moisten it properly. What I don't recommend is garden soil. Too heavy, too many pathogens.
A hygrometer. This is a $10 gadget that tells you the humidity inside the box. Without it, you're guessing. I keep mine at 80-90% relative humidity. Below 70% and the seeds dry out. Above 95% and you're begging for mold.
A spray bottle. For misting, not soaking. More on this later.
A heat mat (optional). Spider plant seeds germinate best around 70-75°F. My house sits at 68°F in winter, so I use a cheap heat mat under the box. If your space is already warm, skip it.
Step-by-Step: Building Your Portable Humidity Box
Step 1: Prep the Box and Medium
I rinse the plastic bin with hot water and let it air dry. No soap—residue can harm seeds.
Then I mix coco coir with water in a separate bucket. The ratio is roughly 3 parts coir to 1 part water by volume. You want it moist enough that it clumps in your fist but doesn't drip when you squeeze. If water runs out, it's too wet.
I spread this mixture into the bin about 2 inches deep. Level it with my hand, not packed down. Loose medium lets roots push through easily.
Step 2: Sow the Seeds
Spider plant seeds go on the surface. Do not bury them. I learned this after burying my second batch—they never came up because they needed light to germinate.
I space seeds about an inch apart. They're small, so I use a toothpick to move them around. Then I mist the surface lightly with the spray bottle. Just enough to settle them into the coir, not enough to wash them away.
Step 3: Close It Up and Place It
Lid on. Hygrometer inside—I just set it on the medium in a corner. If I'm using a heat mat, the box sits on top of it.
Where do I put the box? Indirect light. A north-facing windowsill or a shelf with a grow light 12 inches above. Direct sun through a clear plastic lid turns the box into an oven. I killed a batch that way. The medium hit 100°F and the seeds were toast.
Step 4: Monitor for Two Weeks
This is the part most guides skip. Here's what actually happens day by day.
Days 1-3: Nothing visible. Condensation forms on the lid. I open the lid once a day for about 30 seconds to exchange air. If condensation is heavy and dripping, I wipe the lid with a paper towel.
Days 4-7: The medium should still be damp. I check by touching the surface. If it's dry, I mist. If it's soggy, I leave the lid cracked for an hour. No sprouts yet. Patience.
Days 8-10: First signs. Tiny green tips push through the coir. They look like thin blades of grass. This is when I stop misting altogether. The humidity in the box is enough now.
Days 11-14: Real leaves form. By day 14, I usually have 60-70% germination from fresh seed. Older seed gives me 30-40%. The seedlings are about half an inch tall with two tiny leaves.
I keep the box closed during this whole period except for daily air exchange. No fertilizer. No extra water unless the medium is visibly dry.
The Three Mistakes That Kill Spider Plant Seedlings
I've made all of these. Multiple times. Let me save you the grief.
Mistake 1: Overwatering
This is the big one. I used to think "moist" meant "wet." I'd pour water into the box until the coir was muddy. The seeds rotted within four days. Every time.
Here's the rule I follow now: if you can squeeze a handful of coir and more than a drop or two of water comes out, it's too wet. Damp, not dripping. The humidity box keeps moisture in the air, so you don't need to soak the medium.
Also—never water from the top once seedlings appear. I mist the lid, not the plants. Water droplets on tiny leaves cause damping off, which is a fungal disease that makes seedlings collapse overnight. I lost a whole batch to this before I figured it out.
Mistake 2: Wrong Light
I mentioned this earlier, but it deserves its own section. Spider plant seeds need light to germinate, but they don't need intense light. Bright indirect is perfect. Direct sun is lethal.
My second batch sat on a south-facing windowsill in July. The box hit 105°F inside. Seeds cooked. I came home to a box of dead, dry coir and a faint smell of steamed dirt.
Now I use a simple LED grow light on a timer—12 hours on, 12 hours off—placed 12 inches above the box. No heat buildup, consistent light. Works every time.
Mistake 3: Wrong Container
I tried a glass terrarium once. Looked beautiful. Held humidity like a champ. But it had no ventilation, and mold took over in five days. I also tried a cardboard box with a plastic bag over it. That was worse—no visibility, and the bag kept collapsing onto the seedlings.
The clear plastic storage bin with drilled holes is the only thing that's worked consistently. It's portable, stackable, and cheap. I have three of them now, each labeled with the sowing date.
What Happens After Two Weeks
At the two-week mark, my seedlings are ready to be transplanted into individual pots. I use small 2-inch nursery pots with regular potting mix. I carefully lift each seedling with a spoon, keeping a little coco coir around the roots.
Then I put them in a bright spot with no direct sun. I water from the bottom by setting the pots in a tray of water for 10 minutes. This encourages deep roots and prevents damping off.
I keep them in a humid area for another week—usually just a tray with a clear plastic dome—then gradually acclimate them to normal room humidity. By week four, they're on their own.
Why Portable Matters
I move my boxes around a lot. In winter, they go near the heater. In summer, they go to the basement where it's cooler. If I'm starting seeds for a friend, I just hand them the whole box.
Portability also means I can isolate a batch if I see mold starting. I just move that box away from the others. With a fixed greenhouse, you don't have that flexibility.
I've also found that stacking two boxes works. I put one box on top of another with a small spacer between them. The bottom box stays warmer from the heat mat, the top box gets ambient warmth. Both germinate fine. It's a space-saver if you're running multiple batches.
Frequently Asked Questions
How often should I open the humidity box?
Once a day for 30 seconds is enough. This exchanges air and prevents mold. If you see heavy condensation, wipe the lid. If the medium looks dry, mist lightly. Don't leave the lid off for more than a minute or two—humidity drops fast.
Can I use this method for other plants?
Yes. I've used the same setup for basil, lettuce, and pothos seeds. The principle is the same: consistent humidity, indirect light, no waterlogging. Adjust the medium depth for larger seeds—maybe 1/4 inch of coir on top for bigger seeds, but spider plant seeds stay on the surface.
What if mold appears?
First, don't panic. A little white fuzz on the coir surface is common. I scrape it off with a spoon and increase air exchange by opening the lid twice a day for a few days. If mold spreads to the seedlings, remove those seedlings immediately. I've saved batches this way. If the mold is green or black, toss the whole batch and start over. That's a sign of something more serious, and it's not worth risking your other plants.
Final Thoughts
Spider plant seeds aren't hard to germinate if you give them the right environment. A portable humidity box gives you that environment—steady moisture, warm temps, indirect light—without the daily fuss. I've gone from a 0% success rate to 60-70% with fresh seed. That's not perfect, but it's real.
The biggest lesson? Less is more. Don't overwater. Don't overthink the container. Don't put it in direct sun. Keep it simple, check it daily, and let the box do the work.
If you're just starting out, build one box. Sow a small batch. See what happens. Two weeks later, you'll either have tiny spider plant seedlings or you'll know exactly what went wrong. Either way, you'll learn more than reading ten guides. Trust me—I've read them all, and none of them told me to drill holes in the lid.





