 bluename
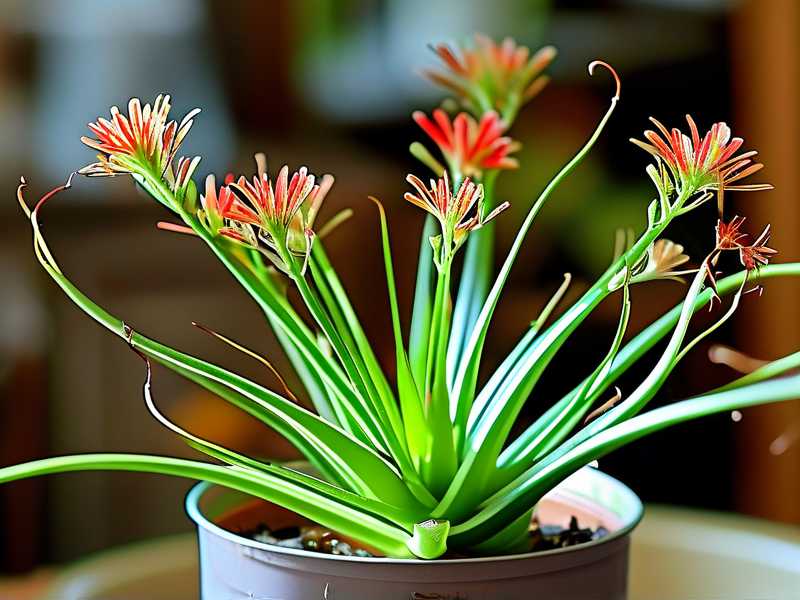
The brown tips and crispy stalks are the first sign. You notice your spider plant has finished blooming. Now it's growing all these little offshoots, but the old flower stalks look dead. Many people ask me, "Should I cut them off?" The direct answer is yes, you should trim dead spider plant flower stalks to conserve plant energy reserves. It takes about two minutes per plant. And it makes a huge difference.
I killed my first spider plant because I refused to cut anything. I thought every green part was sacred. The spent stalks kept hanging around, turning brown. The plant looked messy. Growth slowed down dramatically. So I've learned the hard way.
This guide shares what I learned over years of experimenting. I will walk you through trimming like a pro. I also track what happens after two weeks of consistent removal. You'll avoid the mistakes that cost me two whole plants.
Why Trimming Flower Stalks Matters for Energy Reserves
Spider plants are tough. They store energy in their thick, fleshy roots. But they waste that energy when dead tissue stays attached. The plant keeps trying to send water and nutrients to dead sections. This is wasted effort. The main plant gets less. New leaf production slows. The gorgeous arching foliage loses its vibrant green.
Think of it this way. A plant cannot selectively ignore a dead stalk. It tries to feed everything. Dead stalks are an energy drain.
Another aspect is baby spiderettes. Spider plants produce plantlets on these stalks. This process uses massive amounts of energy. If the plant fails to root those babies, it keeps trying to grow more. The main plant looks rough while doing this. When you remove dead stalks, you force the plant to focus on root growth. In two weeks, you will see this positive change.
Tools You Need for a Clean Cut
You don't need fancy tools. But sharp ones are non-negotiable. Using dull scissors crushes the stem. This creates a jagged tear. That invites disease. Now I only use precision pruning snips. They give a clean, sharp cut. I bought mine for ten dollars.
You also need rubbing alcohol. I dip my blades in alcohol before I start. Clean blades prevent spreading fungi. You won't need anything else. No glue or sealants. Spider plants heal fast.
My Step-by-Step Trimming Process
Here is the exact process I use every time. No fluff. No guesswork. It works.
Step 1: Identify the True Dead Stalk
Look at the base of the plant. You'll see long, arching stalks that held flowers. Some might still have a few tiny leaves. But your target is the stalk that is brown, dry, or very soft and mushy at the base.
I pull up gently on the stalk. A lively stalk resists. A dead one will detach easily in your hand, but wait. Don't pull it off. We want to control the cut location.
Step 2: Follow the Stalk to the Crown
Trace the stalk all the way down. It disappears into the thick foliage near the base soil. You must find where it connects to the "crown". This is the central growing point.
The worst thing you can do is cut the stalk halfway up. You leave a stumpy toothpick. This piece will continue to rot or simply bothers you. Cut it as deep as you can.
Step 3: Make the Cut
Gently push the surrounding leaves aside. Find the exact base point. Snip at a slight angle. This angle ensures water drains off the cut surface. A flat cut holds moisture, causing rot.
I snip about half an inch above the crown. This avoids nicking the crown itself. The crown is critical. If you damage that, the plan might die.
I avoid cutting at soil level. Tiny pests and moisture sit right there on the cut wound.
Step 4: Discard the Stalk Completely
This seems obvious. But I used to toss dead leaves right back into the pot as "mulch." That was a stupid mistake. Rotting organic material in the pot attracts fungus gnats. These gnats laid larvae that attacked my roots. Now, all trimmings go to the bin immediately.
Do not compost the dead stalks if your indoor plant has pests. You'll infest your compost bin. Recently I started using these clean trimmings for craft projects instead. But only if I know they are pest-free.
Step 5: Clean Your Shears Again
After cutting the dead material, clean the blade. Do this before touching a healthy leaf. If a virus is present on the dead tissue, you can wipe it across healthy leaves. This is a detail people often miss.
Once the dead stalk is gone, you can assess the plant for other dead leaves. Remove those too. Keep the center of the plant free from decay.
What I Observed After 2 Weeks of Trimming
Consistency matters more than a single big cleanup. I trimmed seven dead stalks from my plant on a Monday. I then checked every three days for new dead tissue. Old stalks that were still semi-green but had finished blooming I also removed.
By the end of the next week, something clicked.
- First visible change: The remaining green leaves stood up straighter. A slight droop disappeared by day five.
- Second change: Two new leaves emerged from the center. They came up fast and sharp.
- Third change (the biggest one): The roots plumped up. I checked by gently lifting the plant. Heavy root systems feel solid. Wasted energy roots feel soft and shriveled near the top.
I concluded that removing a single dead flower stalk frees up resources to root a baby spider plant or grow new leaves. You might think one stalk is nothing. But over a full season, this adds up to a bigger plant.
Sensible Watering is the Basis for Energy Storage
Let me mention how trimming works with watering. It doesn't matter if you trim correctly if your roots are drowning. Seriously, 90% of indoor plants die from overwatering. I added to those stats myself when I was a beginner.
I remember asking why my plant looked droopy after I cut the stalks. I thought trimming shocked it. Wrong. It turned out the pot had no drainage. The soil was muddy. The roots were suffocating. The dead stalks were a side effect. Healthy roots need air.
Since then, I use an unglazed terracotta or plastic pot with massive drain holes. I water only when the top inch feels dry. After this change, the plant's need for trimming declined.
The "Chopstick" Trick
I don't guess with watering. I stick a dried chopstick into the soil. I wait five seconds. If the chopstick comes out dry, I water. If it has damp soil stuck, I wait two more days. This method saved many of my plants. This aligns directly with conserving energy reserves. Root stress will undermine all your pruning efforts.
Light Positioning Affects How Fast Stalks Die
Spider plants love bright, indirect light. I had my first plant in a shaded corner. It stayed dark green. But it never made flowers. Inside this dark room, the few flower stalks that developed looked spindly and died quickly. I cut them consistently but nothing improved.
After moving it next to a north-east facing window, the difference was stark. The flower stalks grew thicker. They lasted longer. But most importantly, the plant recovered faster after the cut. The new leaves supported energy uptake instantly.
The worst place for spider plants is direct afternoon sun. The leaves bleach and the stalks scorch. The leaf tips burn brown and you think you need to cut the whole plant. The ideal spot is just off a bright window. Morning sun plus afternoon shade works great.
Every single time I have a struggling spider plant, I check the light first. Trimming is maintenance, not a cure.
The Severe Problem of Repotting After Trimming
This is a niche mistake but you should know it. I decided to repot my spider plant the same day I trimmed all its stalks. I thought, "Let's do everything at once."
This shocked the plant heavily. It went into decline. The trimmed wounds couldn't heal properly because the roots were disturbed. The plant had to spend all its energy on repairing root damage. The wounds on the stalks stayed open.
My advice: wait at least a week after trimming before jumping into a repot. Let the cut wounds dry and callus over. A callus is just dry tissue that heals the wound. It happens within 24 to 48 hours. Then repotting is less stressful.
Common Myths About Spider Plant Stalks
People love to believe cutting stalks hurts the plant. Here is reality.
Myth 1: Dead Stalks Provide Mulch to the Soil
False. Dead indoor plant stalks do not behave like outdoor leaves. Indoors, they dry out fast. They get crunchy and never break down. They just look ugly and waste plant energy.
Myth 2: You Must Wait for the Stalk to Fully Brown Before Cutting
This is 100 percent false. As soon as the petals fall and the stalk shows no new buds, it is a dead weight. Cut it right away. I used to leave semi-green stalks intact for weeks.
These stalks still consumed sugars from the leaves. They weren't producing anything. Removing them early stops the resource bleed.
Myth 3: You Can Root Baby Plantlets in Water While Attached
This might seem unrelated. But you guys, this takes energy. If the mother plant has a dying stalk with babies, you cut the baby off with a small stem piece. Don't leave the entire heavy stalk attached to the mother while trying to root those babies in water jars. It saps the mother dry. Take the babies off the mother first.
Common Beginner Mistakes With Trimming
A lot of people write me saying they cut their plant but it still looks bad. Often, they made one of these severe errors.
Mistake 1: Overwatering in Apparent Response to Stress
Trimming seems surgical to an indoor gardener. People think, "There's a fresh cut, let me give it extra water." That logic kills. Fresh cuts + wet soil equals root rot. Keep the watering schedule exactly the same for ten days after the trim. Don't coddle. The plant will heal itself.
I once watered heavily right after cutting off old leaves. I noticed the leaf tips turned black within 24 hours. The excess water pressure forced fluid to the cut edges, which caused cell rupture. After that, all water stops for a day or two.
Mistake 2: Wrong Light Positioning
I already touched on this, but I cannot stress it enough. Do not move the plant to a different window right after you cut the dead stalk. A sudden shift in light after a wound increases stress.
When I cut the plant, I keep the light exactly the same. If it was in lower light, I leave it there for another week. Then I move it gradually. If you relocate the plant immediately, the photosynthesis rate changes. This means the plant cannot quickly heal the cut.
Mistake 3: Using the Wrong Pot
Beyond holes requirement, you need matching pot size. I tried to trim a spider plant that was in a pot too large. The soil went stagnant around the roots. No amount of dead stalk trimming helped because the microbes were fighting root disease.
Spider plants actually like being slightly rootbound. They produce more babies when they are snug in a pot. So don't transplant to a huge pot. Match your pot size to the rootball, not the foliage width. This prevents waterlogging.
After I stopped using a gigantic pot, my plant leaves had more vigor. The process of trimming became less urgent as the whole system regained health.
The First-Person Practical Experience
I bought a beautiful spider plant at a nursery sale three years ago. It was gorgeous with white stripes. I got it home. I did everything right for months. Then summer came. Blossoms sprouted on long arching stems. I was thrilled. But I let the flower stalks stay on too long.
After the summer blooming, those stalks turned brown but had tiny baby plantlets attached. I tried to root those babies while they still hung off the mother plant. That was the biggest drain of all. The mother plant developed yellowing leaves. It was starving.
It wasn't until I read a note from an expert that I looked at the wasted stalks differently. I finally had to sacrifice those babies. I chopped the entire stalk down to the base. The mother plant heaved a sigh of relief. Two weeks of recovery in the same location brought color back to those yellow leaves.
Now, I do not leave any plant with a "spent" flower stalk for more than one week. As soon as blooms die, I check the stem stiffness. If the bloom has no buds left, I cut it off.
The Aesthetics of Cutting
We often only talk about plant health. But there's an aesthetic reason for trimming that is equally crucial. A spider plant with many dead stalks looks ragged. The structure is broken.
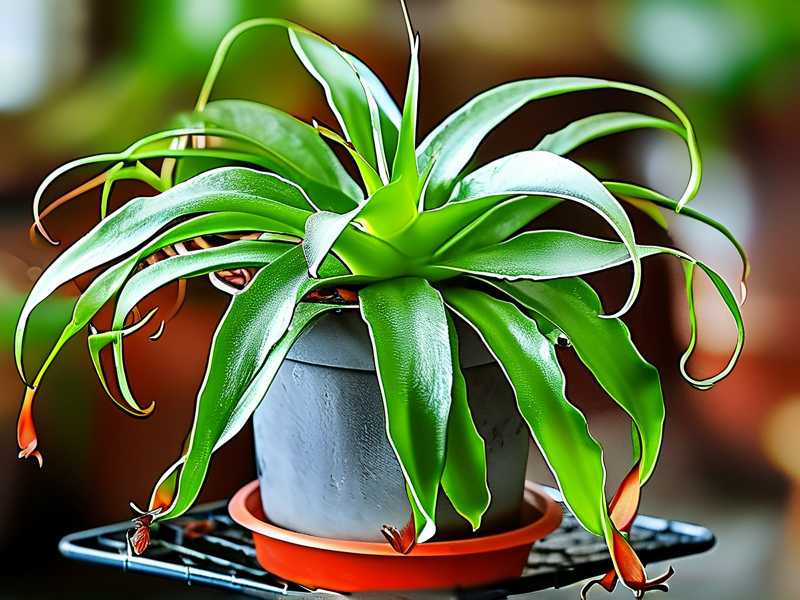
Healthy spider plant leaves form a fountain shape. Dead stalks poke out awkwardly from the center, often curling sideways. When I trim them back at the crown, the plant returns to its clean fountain silhouette.
That aesthetic improvement also impacts the plant's ability to absorb light. Twisted stalks block leaves from the sun. Remove the clutter and you instantly improve airflow around the center of the plant. Better airflow prevents mildew. I find trimming is a necessity of similar importance as watering.
Species Variations You Need to Know
All spider plants are different. You need to know this before you run to your plant with scissors. There are varieties like the curly spider plant. Its stalks twist and coil. I found it harder to see the connection point of the dead stalk because the leaves curls over it.
I use a headlamp for that plant. You need proper angle to see exactly where to cut. Pull the curly leaves aside. Cut with confidence.
The variegated types (green and white) tend to be a bit weaker. They lose energy faster through dead leaves. So they appreciate trimming more than the pure green solid types. If you have a Cream Delight or Bonnie variety, you must be more aggressive about removing old material.
A Final Warning on Companion Pests
When you cut away that dead material, note what is living inside it. Spider mites love dry dead leaf litter. Mealybugs love hiding in the crevices at the base of the stalks.
During my weekly trim session, I also check the tissue around the base. I used a magnifying glass once and found tiny webbing. It was an early spider mite infestation. Because I was trimming, I caught it early. I treated the plant with insecticidal soap.
If I hadn't trimmed the dead stalk, I would have missed the early infestation. The problem would spread to all plants. So inspect thoroughly. Turn the base leaves over. Look for cotton-like spots. Removing debris in this area creates an environment unfavorable to pests.
FAQ Section
What if I accidentally cut a healthy green flower stalk that has no dead parts?
No worries at all. You might lose a potential baby plantlet. But the mother plant usually stays fine. Cut below the cut plastic clean. The plant will not die.
How soon do I see new growth after cutting the stalks?
I see active new leaves within two weeks. It could be slightly longer in winter. During the winter months, the plant goes semi-dormant. Energy reserves go to the roots first, so leaf growth is slower. If you prune during winter, do not expect immediate results.
What is the right height to cut the stalk?
Cut the stalk as close to the base as you can. Aim to get within one quarter-inch of the soil without digging into the soil or the main crown. A little stub remaining might be okay but won't decompose quickly. So, cut lower is always better. Just be cautious not to cut into the main tuberous root.
Do I need to stop feeding fertilizer after pruning?
You should reduce regular feeding. I wait a full 10 days before I even think about diluted fertilizer. The plant is dealing with open cuts and a shock response for a few days. Fertilizing right after cutting causes salt burn in the open tissue. So, instead of fresh fertilizer minerals, focus on giving diluted water.
In Conclusion For Trimming
Trimming dead spider plant flower stalks to conserve plant energy reserves changed the health status of my entire indoor garden. It is more than personal opinion. The core principle of pulling resources from dead material to central roots aligns perfectly with botanical science. The process is quick. It is extremely forgiving. And it refreshes the plant's look instantly.
I feel that anyone can maintain this simple habit. Keep your tools clean. locate where the stalk meets the crown and remove it gently. Give your plant the same watering schedule. Do that for two weeks and you'll witness new leaves forming at the core of your plant.
The most important thing is to stop worrying about hurting the plant. Let me re-state it plainly: a plant works hard to send water and nutrients to every leaf and stem. A dead stem or stalk is a serious burden. Removing the dead tissues returns the plant to a healthy metabolic rate.
Don't postpone this task. Just get your clippers and control your plant's destiny today.





