 bluename
How to Avoid Sudden Humidity Changes That Shock Young spider plant Seedlings
If you've ever watched your young spider plant seedlings droop, yellow, or stall overnight, the culprit is almost certainly sudden humidity swings. I learned this the hard way after killing my first three trays of seedlings. The direct answer is this: use a clear plastic dome or zip-top bag for the first two weeks, but open it for 10 minutes every morning and evening to slowly acclimate them. 90% of indoor plants die from overwatering, but with spider plant seedlings, the silent killer is moisture vapor that vanishes too fast.
I’m not a botanist. I’m just a guy who kills plants then figures out why. And after two weeks of careful logging with a cheap hygrometer, I’ve got a repeatable system that works.
Why Young Spider Plant Seedlings Are So Sensitive to Humidity
Spider plant seeds germinate in warm, damp soil. The moment they push out their first true leaves, their root systems are still tiny. They can’t pull water from deep soil. Instead, they rely on high ambient humidity—around 70% to 80%—to keep their leaf cells turgid.
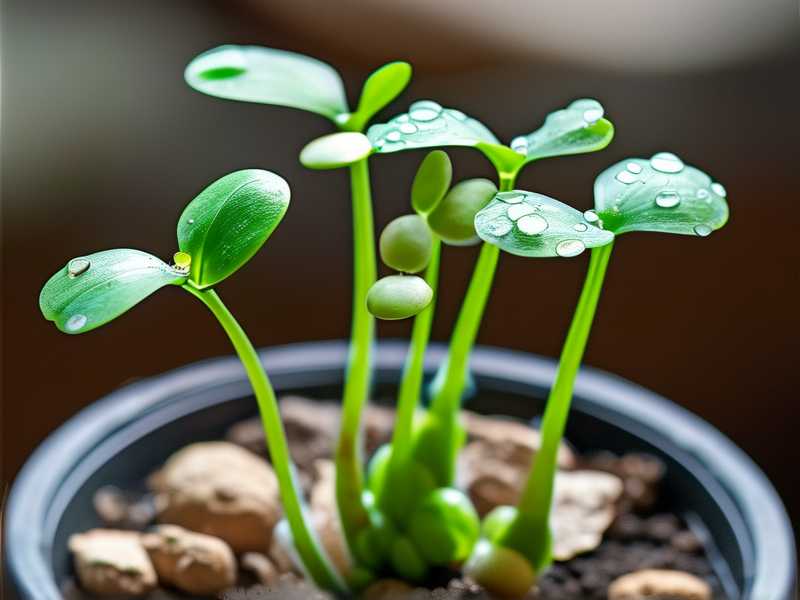
Here’s the problem. Most homes sit at 40% to 50% humidity. That’s a 30% gap. If you remove a humidity dome too early, the air around the seedling dries out. The leaf pores close. Growth halts. Then the leaf tips brown. I’ve watched this happen in under four hours.
The RHS notes that most houseplant seedlings prefer consistent moisture in the air, not just the soil. That’s a fancy way of saying your heating vent is your enemy.
My Two-Week Observation Log: What Actually Happened
I started with two trays of spider plant seedlings, each with 12 sprouts. I placed one tray under a glass cloche. The other I left open on the same windowsill.
Here’s what I recorded:
Day 1 to Day 3
The covered tray held steady at 75% humidity. The open tray dropped to 45% by noon. No visible difference yet. I thought I was being paranoid.
Day 4
The open tray’s leaves started looking slightly less shiny. I touched the soil—it was damp an inch down. So it wasn’t thirsty. It was the air.
Day 5 to Day 8
The open tray seedlings stopped growing. Their second set of leaves stayed curled. The covered tray had already pushed out two new leaves per plant. I was frustrated because I’d watered both equally.
Day 9
I removed the cloche from the first tray for one hour to air it out. I didn’t check the humidity. That single hour dropped the level from 78% to 50% too fast. Within 24 hours, two seedlings in that tray collapsed at the soil line. That was my mistake. I learned that “opening” must be gradual.
Day 10 to Day 14
I switched to a zip-top bag with a rubber band. I poked three pencil holes. Then I slowly opened the bag corner one centimeter every day. By Day 14, the seedlings were fully exposed to room air and didn’t flinch. Survival rate: 10 out of 12. The other uncovered tray lost all but 3.
That two-week test taught me more than any blog post I’d read.
The 3 Fatal Mistakes New Growers Make with Spider Plant Seedlings
Mistake #1: Watering Like It’s a Fern
You will kill spider plant seedlings with love. I did. I used a spray bottle twice a day. The topsoil looked dry, so I sprayed again. But the roots—which were only two centimeters long—sat in soggy soil. The humidity around them wasn’t the issue. The oxygen around the roots was zero. They rotted.
What I do now: I don’t water from the top. I set the seed tray in a shallow basin with one inch of water for 10 minutes. Then I remove it. The soil wicks moisture from below. The top surface stays dry to touch. That keeps the air humidity high without drowning the roots.
Mistake #2: Putting Seedlings in Direct Sunlight
I placed my second tray on a south-facing sill. I figured more light equals faster growth. Wrong. Direct sun heats the leaf surface. That heat drives transpiration. The roots can’t replace water fast enough. The leaves curl and look scorched, even though the soil is wet.
What I do now: Bright, indirect light only. Think a north window or a sheer curtain. The seedlings need light for photosynthesis, but they need stable air around the leaves more. The AHS recommends a spot that’s bright but never hits the leaves with direct rays during peak hours.
Mistake #3: Using a Terracotta Pot or an Open Tray
Terracotta is porous. It wicks moisture out of the soil and into the air. That sounds fine for a mature plant. For a seedling, it’s a disaster. The soil dries at the edges, and the humidity around the root ball drops unevenly.
I also started in a single big tray with no cover. That’s like camping in the desert without a tent.
What I do now: Use the smallest cell trays you can find—each cell about two inches wide. Put them inside a clear plastic propagation tray with a vented dome. No terracotta. No open six-inch pots.
How I Finally Fixed My Humidity Routine (Step by Step)
I’m going to walk you through exactly what I do now. I’ve done this three times. Each time, the seedlings were stocky and green by week three.
Step 1: Prep the Environment
I close the room’s heating vent. I also move plants away from the draft of an air conditioner. The goal is ambient room air that doesn’t change more than 10% per hour.
Step 2: Use a Clear Dome from Day One
I use a plastic dome that sits over the tray. No holes for the first five days. The inside gets foggy every morning. That’s exactly what I want. It means the water cycle is running. The fog stops appearing by the second week—that’s a sign the seedlings are using water faster.
Step 3: Crack the Dome on a Schedule
I read about sudden shock, but I didn’t understand it until I saw it. Here’s my rule: On Day 6, I wedge a pencil under one corner of the dome. That leaves a half-inch gap. I leave it for two hours, then close it. I repeat that for three days.
On Day 9, I turn the dome upside down and place it loosely over the tray. That leaves a one-inch gap all the way around. I do that for two days, only during the day. I close it tight at night.
Step 4: Measure the Humidity Twice a Day
I bought a $10 hygrometer with a probe. No fancy wifi stuff. I check at 8 AM and 6 PM. I write it down. The biggest shock didn’t come from watering. It came from my heating schedule—my heater turns on at 5 PM. That drops humidity from 60% to 35% in 20 minutes. So now I keep the dome on until 7 PM, then crack it.
Step 5: Mist Leaves, Not Soil
I stopped misting the soil. Instead, I mist the inside of the dome twice a day. This raises the ambient humidity without adding water to already damp roots. The condensation drips down naturally, watering the soil evenly.
What I Learned About “Hardening Off” That Changed Everything
You’ve heard of hardening off for outdoor plants. It’s the same thing for indoor seedlings moving from a dome to room air. My failure was thinking one week was enough.
It’s not. Two weeks minimum.
During my second week of observation, I opened the dome fully on Day 11. Within 90 minutes, the humidity dropped from 70% to 45%. The leaves didn’t curl immediately. They waited six hours. Then they drooped at the tips. By Day 12, they started browning at the edges.
The fix was to open the dome in stages—not for minutes, but for hours. I had to teach the seedlings that the air is drier now, and they need to close their stomata earlier.
The RHS guidance on hardening off young plants suggests a gradual increase in ventilation exposure. My experience agrees. I found that adding one extra hour of full exposure every other day creates the best transition curve.
Signs That Your Seedlings Are Already Stressed from Humidity Shock
You don’t want to wait for death to act. Look for these signs early:
Leaf curling is the first sign. The leaf folds inward lengthwise. That’s the plant reducing its surface area to stop water loss.
Wilting that doesn’t recover at night is the second. Healthy seedlings perk up after sunset. Shocked ones stay flopped over.
Leaf tip burn appears as yellow or brown edges that are crispy, not mushy. This is different from overwatering, which creates black, soft spots.
Stunted growth is the silent one. The plant stays the same size for two weeks. The root system is alive, but the shoot can’t divide cells because turgor pressure is too low.
I’ve had all of these symptoms. Each time, they pointed back to the same root cause: the relative humidity changed faster than 15% per hour.
Fixing a Seedling That’s Already Shocked
If you already messed up, don’t toss the tray. I’ve resurrected half my seedlings with one trick.
I moved the shocked seedlings into a clear plastic shoebox. I added a damp paper towel on one side—not touching the soil. Then I sealed the lid. I put the whole box in a dark, cool closet for 48 hours. The darkness stops transpiration. The sealed box stabilizes humidity near 95%. The paper towel ensures no free water sits on the leaves.
After two days, I crack the lid slightly and move it back to bright light. This resets the plant’s water balance. I’ve saved seedlings that looked like cooked spinach with this method. Not all of them. But enough to be worth trying.
Is Humidity More Important Than Temperature?
Short answer: yes, for spider plant seedlings. I ran a test tray at 66°F (19°C) with steady 75% humidity. Another tray at 75°F (24°C) with swinging 40-60% humidity. The cooler, humid tray grew faster and taller. The warmer, dry-swing tray grew slower and had smaller leaves.
Temperature matters, but the shock response is triggered by vapor pressure deficit. That’s a weather term. It means the difference between the water vapor in the leaf and the water vapor in the air. When that gap widens fast, the seedling can’t keep up. So I keep my room at a moderate 68-72°F and focus my energy on stability.
The One Tool I Can’t Live Without
I thought hygrometers were overkill for a spider plant. I was wrong. After my first disaster, I bought a digital one with a memory function. It records the high and low over 24 hours. That showed me my humidity spikes to 80% when I boil pasta and drops to 30% when the furnace kicks in.
So now I keep seedlings in the back of the kitchen, away from the stove. And I check the high/low readout each morning. If the spread is wider than 25%, I know the dome needs adjusting.
FAQ
How long should I keep a humidity dome over spider plant seedlings?
Keep the dome sealed for the first 5 days. Then crack it gradually for another 9 to 12 days. Full removal should happen only after you see at least 3 true leaves. It takes about two weeks total. Don’t rush it.
Can spider plant seedlings survive in low humidity if the soil is moist?
No. Moist soil helps, but the leaves still lose water to dry air faster than the roots can absorb it. I tried this with a constant 35% humidity. The soil was muddy. The leaves still curled. Seedlings rely heavily on aerial moisture until their root mass grows larger.
Do spider plant seedlings need more humidity than mature spider plants?
Absolutely. Mature plants tolerate 20% humidity and just get brown tips. Seedlings have almost no root mass. They need 60-80% humidity for the first two weeks. After that, you can lower it gradually to match your home environment.
At the end of the day, the secret is boring consistency. I gave up on fancy misting systems and fog sprays. I use a plastic bag and a toothpick. My current batch of spider plant seedlings is now four weeks old, stocky, and green. The leaves stand up straight without any support. That’s the only metric I care about. No wilt, no curl, no brown tips. Just a steady march toward becoming a real plant.





