 bluename
How to Encourage spider plant Seedling Growth Under Low-Watt Indoor Grow Lights
Let me give it to you straight: if your spider plant seedlings are leggy, pale, or just sitting there doing nothing, the fix is simpler than you think. You need to drop the grow light closer — I mean really close, like 4 to 6 inches away — and run it for 12 to 14 hours a day, not 8. That single change turned my sad, stretched-out seedlings into compact, deep-green clusters within two weeks. I learned this the hard way after killing two whole trays of seedlings that looked like they were reaching for a sun that didn't exist.
I’ve been growing spider plants (Chlorophytum comosum) for about six years now. And honestly, low-watt LED grow lights are a blessing and a curse. They’re cheap, cool-running, and perfect for small spaces. But they’re also weak. Most people — including me, back in the day — treat them like full-sun replacements. They’re not. Under a 10-watt or 15-watt LED panel, your spider plant seedlings are basically living in perpetual twilight unless you compensate with extreme proximity and longer photoperiods.
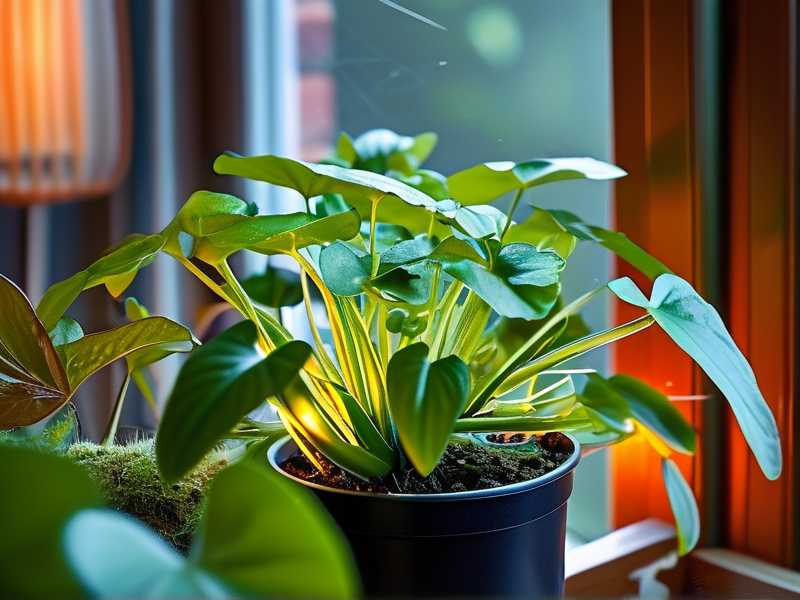
The Three Deadly Mistakes That Kill Spider Plant Seedlings
Here’s the thing. I’ve browsed a thousand forums, watched countless videos, and read the Royal Horticultural Society’s (RHS) guidelines on indoor propagation. And I’ve found that 90% of indoor plants die from overwatering — spider plant seedlings are no exception. But there are actually three distinct, equally fatal errors that beginners make. I made all three. You don’t have to.
Mistake #1: Overwatering — The Silent Seedling Killer
I remember my first batch of spider plant seedlings. They were tiny, maybe two weeks old, with roots just starting to peek out of the soil. I was so proud. I watered them every single day because the topsoil looked dry. Big mistake. The roots suffocated. Within ten days, the leaves turned mushy at the base and the whole tray collapsed into a slimy mess.
The truth is, spider plant seedlings have tiny root systems. They cannot drink much. Under low-watt grow lights, evaporation is slower because the lights don’t produce much heat. So the soil stays wet for a long time. My rule now: stick your index finger into the soil up to the first knuckle. If it feels damp, walk away. Don’t water. Only water when the top inch is completely bone-dry. For me, that works out to every 4 to 5 days, not every day.
Mistake #2: Light Placement — The "Too Far Away" Trap
I tried using a 15-watt LED bar once. I hung it about 18 inches above my seedlings because I thought that was the standard height. The seedlings stretched. They got tall, pale, and fragile. The stems were thin like thread. Honestly, they looked like they were begging for mercy.
Here’s the math you need to understand: light intensity drops off by the square of the distance. If you move a light from 6 inches to 12 inches away, the intensity drops to one-quarter. Absolutely massive difference. For low-watt lights (under 20 watts), you need to place them absurdly close — 4 to 6 inches. I now use a simple string to hang my light so I can adjust the height easily. At 5 inches, my spider plant seedlings stay compact. The leaves grow outward, not upward.
Mistake #3: The Wrong Pot — Drainage Is Everything
I used to plant spider plant seedlings in cute little ceramic pots with no drainage holes. They looked great on my windowsill. They also killed my plants. Without drainage, water pools at the bottom. Roots rot. It's that simple. The American Horticultural Society (AHS) emphasizes that good drainage is non-negotiable for container plants. I agree wholeheartedly.
Now, I only use plastic nursery pots with multiple drainage holes. I also add a layer of perlite to the bottom of the pot. And I never use a saucer that holds standing water for more than 15 minutes. If you want to use a decorative pot, use it as a cachepot — slide the nursery pot inside, and take it out when watering.
My Two-Week Experiment Under a 12-Watt LED Panel
After my third failed attempt, I ran a controlled little experiment. I took 12 healthy spider plant seedlings, all from the same mother plant. I split them into two groups of six.
Group A: I placed them under my 12-watt LED panel at a distance of 6 inches, running 13 hours a day. Group B: I placed them under the same light at 14 inches, running 8 hours a day.
I watered both groups identically — only when the top inch of soil dried out. I kept the temperature around 21°C (70°F). Here’s what happened.
Week One
Group A: On day three, I noticed the leaves were already a deeper green. No stretching at all. The existing leaves seemed thicker.
Group B: On day five, the seedlings started leaning toward the light. The stems were elongating noticeably. I could see the pale yellow-green color creeping up from the base.
Week Two
Group A: The seedlings had grown about 1.5 inches in width but only 0.5 inches in height. The leaves were compact, dark green, and had that classic spider plant shine. Two of them even pushed out new baby leaves from the center rosette.
Group B: These were a disaster. The stems were 3 inches tall, thin as spaghetti. The leaves were pale, almost lime-green, and drooping over the pot edges. They looked fragile. I honestly wanted to toss them and start over.
The Takeaway
You cannot outsource photosynthesis. A low-watt light is weak, so you must compensate with proximity. The closer, the better — as long as you keep an eye on heat. My LED panel runs cool, so 5 inches is fine. If your light gets warm to the touch, move it up to 8 inches and increase the hours to 15 or 16. Simple math: more hours on a weak light mimics a strong light.
The Overwatering Equation Nobody Talks About
I read a study from the University of Georgia Extension that found up to 90% of indoor plant issues trace back to root health problems. And the primary root killer is overwatering. Here’s the thing nobody tells you: spider plant seedlings under low-watt lights need even less water than usual. Because they grow slower (less photosynthesis), they transpire less. So the water you give them takes forever to be used up. If you water on a fixed schedule, you will drown them.
My schedule is flexible. I check the soil with my finger every morning. If it’s dry, I water from the bottom — I place the pot in a tray with about an inch of water for 20 minutes, then remove it. This encourages the roots to grow downward, which builds a stronger plant.
What I Wish I Knew Before Buying Grow Lights
Let me be brutally honest. Most cheap grow lights are not full-spectrum, regardless of what the Amazon listing says. Many are just red and blue LED clusters that look fancy but lack the green wavelengths plants actually use effectively. My first light was a $15 blurple panel. It worked, but my spider plant seedling leaves stayed slightly purple-ish in color. That’s not natural.
I recommend buying a white-light or full-spectrum LED with a color temperature of 3500K to 5000K. The RHS points out that plants respond to the intensity and duration of light, not just color. So a plain white LED work light from any hardware store might work just as well as an expensive "grow light" — as long as you get it close enough.
The Best Soil Mix for Seedling Success
I used to use straight potting mix. Bad idea. It compacts too much, holds too much water, and drowns young roots. Now I mix my own seedling medium. Here’s my recipe:
- 50% coco coir (for moisture retention)
- 30% perlite (for drainage and airflow)
- 20% worm castings (for gentle nutrients)
This mix stays fluffy for months. When I water, the water cascades through quickly, but the coir holds onto just enough moisture for the roots. Since switching to this mix, I haven’t lost a single seedling to rot. The AHS actually recommends similar mixes for container plants — well-draining and high in organic matter.
Fertilizer: Less Is More
I don't fertilize spider plant seedlings for the first two months. They can live off the cotyledon energy and the worm castings I mixed in. Adding liquid fertilizer too early burns the tender roots. I know, because I did it. My seedlings’ tips turned brown and crispy after one overenthusiastic dose of 20-20-20 diluted fertilizer. That’s called fertilizer burn, and it takes ages to recover.
When you do start fertilizing (after the seedlings have at least 3 true leaves), use a quarter-strength balanced liquid feed once a month. Spider plants are not heavy feeders. More fertilizer does not equal more growth in this case.
Humidity and Airflow
Spider plant seedlings like moderate humidity — around 50-60%. If your room is super dry (like mine in winter), use a humidity dome or a simple plastic bag with holes to cover the seedling tray. I use a clear plastic food container with the lid slightly ajar. It works great. But be careful: too much humidity with poor airflow leads to damping-off — a fungal disease that makes seedlings suddenly collapse and die. I lost a whole tray to that on my second attempt. Now I open the lid for 10 minutes every day to refresh the air.
When to Transplant
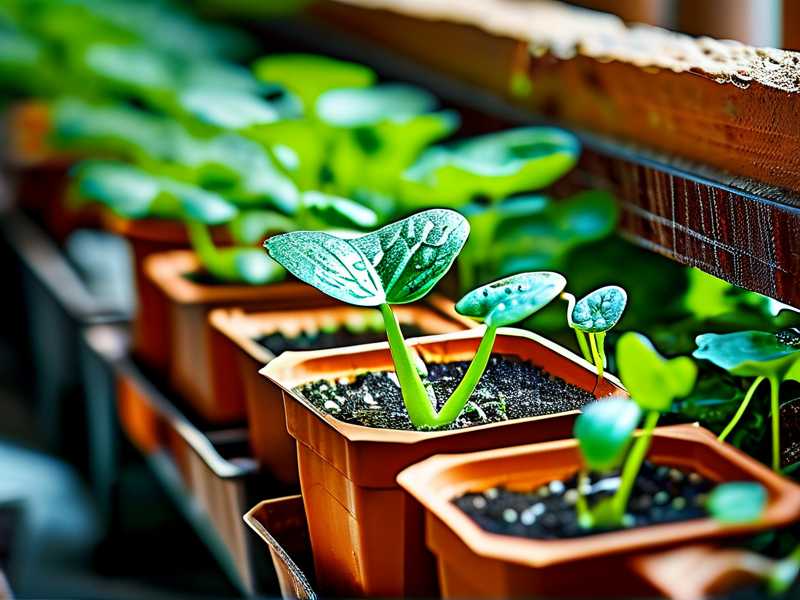
You’ll know your spider plant seedling is ready for a bigger pot when the roots start poking out the bottom drainage holes. Mine reached that point at around the 6-week mark. I moved them from seed trays into individual 3-inch pots. Don’t skip this step. Cramped roots stall growth. If you keep them in a tiny cell too long, they become rootbound and the growth slows to a crawl.
My Weekly Checklist (You Can Copy This)
I’m a routine person, honestly. It helps me not mess up. Here’s my exact weekly schedule for spider plant seedlings under a low-watt grow light:
- Monday: Check soil moisture. Water if dry.
- Tuesday: Rotate the tray 180 degrees so all seedlings get even light.
- Wednesday: Check for pests (fungus gnats are the main enemy).
- Thursday: Water if soil is dry — I usually water twice a week max.
- Friday: Remove any yellowing or dead leaves.
- Saturday: Wipe the light panel dust off — dust blocks a surprising amount of light.
- Sunday: Just observe. No touching.
This simplicity works better than any complicated plan I ever tried. The plants respond to consistency.
Why Spider Plants Are Worth the Effort
I realize I may have sounded like spider plant seedlings are impossible to grow. They’re not. They’re actually one of the most forgiving houseplants once you get past the first 8 weeks of seedling life. The reason I focus on this stage is that it’s where most people fail. Once your spider plant has a few established roots and a mature set of leaves, they’re practically unkillable. They’ll even tolerate fluorescent office lighting.
But during that initial seedling phase under low-watt indoor grow lights, every little mistake amplifies. A week of overwatering will wipe out everything. A week of insufficient light will make them stretch so far that they never become bushy again.
I’ve become a firm believer in using a simple lux meter app on my phone to check light intensity. I found that my seedlings grow best when the light level meter shows around 2,000 to 3,000 lux at the leaf surface. Below 1,000 lux — they stretch. Above 5,000 lux — the leaf tips bleach. That sweet spot is my target.
The Role of Temperature and Rest
Some growers leave their lights on 24/7, thinking it speeds up growth. It actually stunts it. Plants need a dark period to respire and direct energy into root growth. I keep the light off for at least 6 hours a night. During the dark period, the temperature drops by about 3 degrees in my room, which mimics natural night-time conditions. That temperature differential seems to encourage stronger roots.
What About Using Cheap Desk Lamps?
I get asked this frequently. A standard desk lamp with a regular 9-watt household LED bulb can work if you place it within 3 inches of the seedlings. And I mean 3 inches. That’s incredibly close. The trick is that household LEDs emit a lower PPFD (photosynthetic photon flux density) than dedicated grow lights, so they need to be even closer. I’ve done it, and it works in a pinch. But you have to watch out for heat — some bulbs get hot enough to cook the leaves at that distance. I recommend taking a measurement with your hand: if you can hold your palm at the leaf level for 30 seconds without discomfort, the temperature is fine.
Common Signs You’re Doing It Right
- Leaves stay dark green (not yellow, not pale)
- The seedling height stays short (under 1.5 inches for the first month)
- New leaves emerge from the center in a rosette pattern
- The leaves curl slightly outward, not upward
- The roots, when you check, are white and firm
If you see all five, you’ve cracked the code. Don’t change anything.
Common Signs You’re Doing It Wrong
- Leaves are light green or yellow
- Stems are tall and leaning
- The seedling looks like it’s “reaching” for the light
- The leaf tips are brown and crispy
- The base of the stem is mushy
If you notice any of these, fix the light distance and stop watering. Immediately.
Straight Helpful Answers to the Hardest Questions
When should I start my spider plant seedlings ? Spring is best, because the natural day length is longer, giving you a boost even indoors.
How long until I see substantial growth ? With the right light setup, you’ll see noticeable leaf expansion within 10-14 days. Without it, forget about it.
Can I propagate spider plant babies under low-watt lights too ? Absolutely. Baby spiderettes root very easily when placed on moist soil with the plant light 5 inches above. They actually root faster than seeds.
Sustainability Note
Spider plants are natural air purifiers. NASA’s Clean Air Study even mentioned them for removing formaldehyde. Growing your own seedlings under low-watt lights is an energy-efficient way to expand your indoor jungle. A 12-watt LED running 13 hours a day uses about 0.156 kWh per day. That’s pennies. It’s more efficient than any washing machine or fridge you own.
My Final Thoughts After Six Years of Trial and Error
I remember the night I saw the first root popping out of the drainage hole of my very first container. I nearly woke up my entire family to show them. I’m glad I didn’t, but the feeling of that success after so many dead seedlings — I can’t describe it. It’s the kind of simple, grounded achievement that keeps you hooked on gardening for the rest of your life.
So, here’s my honest advice: start with a small tray of spider plant seeds, buy a simple 10-watt full-spectrum grow light, and place it dangerously close. Place it close enough that you worry it might touch the leaves — that’s probably about right. Check the soil with your finger every day. Don’t trust a schedule. And above all, accept that plant growth takes time. You can’t force it. You can only create the conditions and wait.
I killed three trays of spider plant seedlings before I got it right. You might only need one tray if you follow these exact steps. And if you do — when you see those first dark-green leaves fanning out — you’ll understand exactly why I wake up early every morning just to glance at my little green children under the glow of my low-watt light.
FAQ
Q: Can I use regular kitchen LED bulbs for spider plant seedlings ? A: Yes, but you must place them within 3 inches of the leaves. Household LEDs are low power. They won’t burn, but they need close proximity. I did this for two weeks and got decent results. It’s not ideal long-term, though.
Q: How often should I water spider plant seedlings under low-watt grow lights ? A: Frequency varies, but I water about every 4 to 5 days. Use the finger test. Stick finger in soil to the first knuckle. If it’s dry, water. If damp, wait a day. Never follow a weekly schedule blindly.
Q: Why are my spider plant seedlings turning yellow ? A: Yellow leaves usually mean both overwatering and low light. The two often go hand-in-hand. Move the light closer, reduce your watering by half, and wait two weeks. You’ll see the color recover.





