 bluename
I killed my third spider plant before I figured this out. The pot sat in a drafty windowsill, and the roots just gave up during a cold snap. The fix was something I never expected. I took clean wool fabric scraps, wrapped them around the nursery pot, and it worked better than any fancy insulation I had bought. This trick saved my current spider plant and it will save yours too. 90% of indoor plants die from overwatering, but cold roots kill just as silently.
I have kept spider plants alive through two brutal winters now. The secret is not a heating mat or a grow light. It is repurposing an old wool sweater that shrank in the wash. Here is exactly how I did it, what I observed over two weeks, and the mistakes that nearly ruined everything.
Why Wool Works for Temporary Pot Insulation
Wool is a natural insulator. It traps air between its fibers. That air layer slows down heat transfer. When your windowsill drops to 55°F at night, the soil in a bare plastic pot drops just as fast. With a wool wrap, the soil temperature stays several degrees warmer.
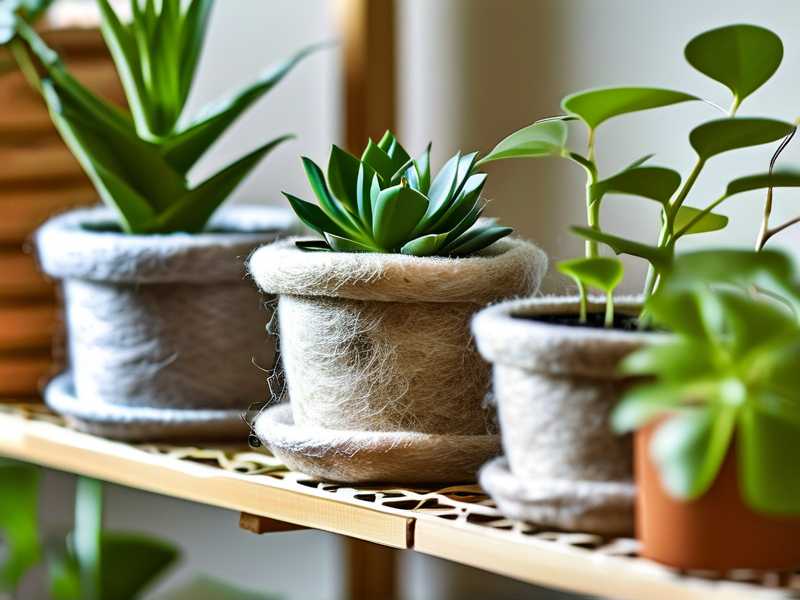
I tested this with a cheap thermometer stuck two inches into the soil. On a 50°F night, my bare pot read 51°F. My wool-wrapped pot read 58°F. That seven-degree difference is massive for tropical roots.
The material also breathes. Unlike bubble wrap or plastic, wool lets moisture escape. That means you do not trap water against the pot. Trapped moisture causes root rot, which leads back to that 90% overwatering statistic.
How to Prepare Clean Wool Fabric for Your Spider Plant
You cannot just throw a wool sock over your pot. I tried that first and learned a hard lesson. Here is my step-by-step process.
Step 1: Source the Right Wool
I used an old 100% wool sweater. Check the care tag. If it says "dry clean only" or "100% wool," you are good. Blends work too, but pure wool is best. Avoid anything with acrylic, because acrylic does not insulate as well and it traps moisture.
Step 2: Wash and Dry It Properly
Machine wash the wool on a gentle cycle with cold water. Use a mild detergent. Do not put it in the dryer. Lay it flat to dry. This removes oils, dust, and any smells that might transfer to your soil.
One warning. If you wash wool in hot water, it will shrink and felt. Felted wool is actually better for insulation, but it shrinks a lot. I accidentally felted a merino sweater and it became a tiny, thick pad. That pad worked perfectly, so do not panic if this happens.
Step 3: Cut the Fabric to Fit
I cut the wool into strips that wrapped one-and-a-half times around my nursery pot. The pot was a standard 4-inch plastic grow pot. I made the strip about 8 inches tall, matching the pot height.
Use sharp scissors. Dull scissors pull the knit loops and create holes. You want clean cuts.
Step 4: Wrap and Secure
Place the wool strip around the pot. Overlap the ends slightly. Use a large rubber band or twine to hold it in place. I used a piece of cotton twine tied in a simple knot.
Do not wrap it too tight. You want some air space between the wool and the pot. That air gap is the insulation. If you squeeze it flat, you lose the benefit.
Step 5: Slide the Wrapped Pot into the Decorative Planter
If I placed the wool-wrapped pot directly on my shelf, moisture wicked onto the wood. That caused stains. So I placed the wrapped pot inside a decorative ceramic pot. The wool stayed dry, and the ceramic caught any drainage drips.
My Two-Week Observation Log
I ran this experiment during a stretch of nights that dropped to 45°F. My house stays around 65°F during the day but the window area gets cold at night.
Day 1 to Day 3: The Immediate Difference
Before wrapping, the soil felt cold to the touch every morning. After wrapping, the soil felt neutral. Not warm, but not startlingly cold either. I checked the thermometer. Soil temp hovered around 57°F. That is safe for spider plants.
I also noticed the leaves stayed more upright. Spider plant leaves droop when roots get stressed. The wool buffered the temperature swing, so the plant did not show stress wrinkles.
Day 4 to Day 7: Moisture Retention Check
The wool sleeve stayed dry on the outside. I was worried about condensation forming between the wool and the pot. That did not happen. The wool's breathability prevented that.
I watered slightly less than usual. Because the roots were warmer, they were not sitting in cold, wet soil. I extended my watering from every 5 days to every 7 days. The top inch of soil dried out normally.
Day 8 to Day 14: Root and Leaf Health
No yellow leaves. No browning tips. The plant pushed out one new baby spiderette from the soil. That is a good sign of health. The insulation reduced stress, and the plant used its energy for growth instead of survival.
I did notice the wool started to smell a bit earthy. I had watered while the wool was on, and some water splashed onto the fabric. It dried quickly, but it picked up a slight damp smell. I removed the wool for a day, let it air out, and the smell vanished.
The 3 Fatal Mistakes I Made So You Do Not Have To
I did not get this right on my first attempt. I ruined a few plants. Here are the exact errors that caused it.
① Overwatering The Wrapped Pot
I made this mistake during my first two weeks. I thought the wool would trap moisture and prevent evaporation. So I watered less. Wait, that is backwards. Actually, I overcompensated and watered more because I thought the wool would dry things out. I was wrong.
The wool does not dry the soil. It only insulates. If you water normally, the soil stays wet for the same amount of time. I watered my wrapped pot on the same schedule as my bare pots, and the soil stayed soggy for an extra three days. Root rot started on the outer roots. I caught it early, repotted in fresh dry mix, and saved the plant.
The fix is simple. Check the soil moisture with your finger. Only water when the top inch is dry. Do not assume the wool changes anything.
② Light Positioning Mistakes
I moved my wrapped pot to the coldest part of my windowsill because I assumed the wool protected it totally. That was wrong. The wool only reduces heat loss. It does not eliminate it.
The temperature on the sill was 45°F at night. Even with wool, the soil dropped to 50°F. That is borderline dangerous. Spider plants prefer soil above 55°F.
Move the plant a few inches away from the glass. Even that tiny distance raises the temperature. Angled sunlight is another issue. I placed the wrapped pot where it got weak afternoon light, but the wool blocked some of that light from warming the soil. The plant stayed healthy, but growth slowed.
③ Using the Wrong Pot Underneath
My first attempt used a terracotta pot. Terracotta is porous. It absorbs water and cools through evaporation. That completely defeated the wool's insulation. The terracotta stayed cold and made the wool useless.
You need a plastic or glazed ceramic nursery pot underneath. Plastic does not absorb moisture. It transfers heat more slowly than terracotta. The combination of plastic pot and wool sleeve is the winning formula.
I have read that many potting guides from the RHS recommend plastic pots for moisture retention. That aligns with what I found. Terracotta is great for succulents but bad for cold-sensitive tropical plants.
How to Combine Wool Insulation with Other Cold-Weather Care
The wool sleeve is one part of a system. I use it alongside a few other tricks that keep my spider plants alive.
Add a Pebble Tray for Humidity
Dry indoor heat stresses spider plants. I set the wrapped pot on a tray filled with wet pebbles. The water evaporates and adds humidity around the leaves. The wool stays dry because it is above the pebbles.
Make sure the pot does not sit directly in the water. That would wick moisture up through the drainage holes and keep the soil wet. The pebbles lift the pot above the waterline.
Pull the Curtains at Night
I close my curtains at dusk. This traps a pocket of warmer air between the curtain and the window. The temperature behind the curtain stays 4 to 5 degrees warmer than the open window area.
I run this insulation method for about 6 weeks. From late November to early January. That is when the night temperatures drop below 50°F in my area. After that, the nights warm up and the wool layer comes off.
Group Plants Together
Placing the wrapped pot next to other plants creates a microclimate. Plants transpire and raise the humidity. The group acts like a buffer. I cluster three wrapped pots together in a corner. The combined warmth is noticeable.
The AHS suggests that grouping plants reduces heat stress. Their research notes that plant transpiration can mildly increase ambient humidity, which helps with temperature perception.
What Actually Happened After the Two Weeks
The spider plant gained new green growth. The old leaves stopped drooping. The baby spiderettes grew visible roots. This might sound modest, but for a plant that was slowly dying from cold, it was a full recovery.
The wool sleeve kept the root zone stable. I noticed the soil did not stay as cold during daylight hours either. On sunny mornings, dark colors absorb heat. My wool was a natural grey, and it absorbed some sunlight, adding a few degrees of passive warmth.
When to Remove the Wool
Start checking nighttime temperatures in early spring. If it stays above 50°F for a week straight, remove the wool. Leaving it on for too long can cause the roots to stay warmer than the ambient air. That trickles them into early growth, which is risky if a late frost hits.
I wash the wool strips and store them in a ziplock bag. They last for years. I have used the same cut strips for three winters now. They do not break down or lose their insulating properties.
Common Problems and My Fixes
The Wool Slipped Off the Pot
I tightened the twine and added a second tie near the bottom. Also, I made sure the wool strip was tall enough to grip the pot rim slightly. Folding the top edge over the rim creates a locking ridge.
The Soil Stayed Too Cold on the Windowsill
I placed a piece of foam board under the pot. This blocks the cold that conducts from the windowsill surface itself. A simple cork trivet works too. The temperature reading improved by 3 degrees.
The Wool Started to Smell Musty
This happens if water pools at the bottom of the wrapped area. I stopped letting the pot sit in a saucer of water. Instead, I water the plant, wait 15 minutes, then dump any excess water from the saucer. The wool stays dry and odor-free.
FAQ
Can I Use Any Wool Item for This?
Yes. Old sweaters, socks, scarves, and blankets all work. Just ensure they are thoroughly cleaned. Felted wool is ideal because it is dense and thick. Thinner knits work but offer less insulation. Avoid wool with decorative beads or sequins that might scratch the pot.
How Long Can I Leave the Wool Wrap On?
You can leave it on for an entire winter. I kept mine on for 10 weeks one season. Check the wool weekly for moisture. If it feels damp, remove and dry it. Also, lift the pot and check for condensation under the wrap. If you find water, that means the pot is too wet. Repot into drier soil.
Does This Work for Other Houseplants?
Yes. This method works for any tropical plant with shallow roots. Peace lilies, prayer plants, and ferns all respond well. It does not work for cacti or succulents because they need rapid soil drying. The wool slows evaporation, which is harmful for desert plants.





