 bluename
How to Prevent spider plant Propagation Cuttings from Developing Stem Rot
If you’ve ever snipped a healthy spider plant pup, stuck it in water or soil, and watched it turn to brown mush within a week, you already know the pain. Stem rot is the number one killer of spider plant cuttings. I’ve lost more pups than I care to count. The fix isn’t complicated, but it requires breaking a few habits. Let me give you the direct answer right now: Stop watering so much, give cuttings bright indirect light, and use a small pot with drainage holes. That’s it. That’s the foundation. 90% of indoor plants die from overwatering, and spider plant cuttings are especially vulnerable because they have no root system to drink up all that moisture. I’ll walk you through everything I learned after killing my fair share, including the two-week observation period that changed my approach.
The Three Fatal Mistakes Beginners Make
Before I get into my step-by-step routine, I have to lay out the three biggest errors I see everywhere. And honestly, I made all three myself. If you’re new to propagating spider plants, read this carefully. It will save you a lot of heartache.
Mistake #1: Overwatering (The Silent Killer)
I can’t stress this enough. When I first started, I treated my cuttings like thirsty toddlers. I watered them every day. I kept the soil soaking wet. I thought more water meant faster root growth. What actually happened? The stems turned dark brown, then soft, then slimy. Within five days, the whole pup collapsed.
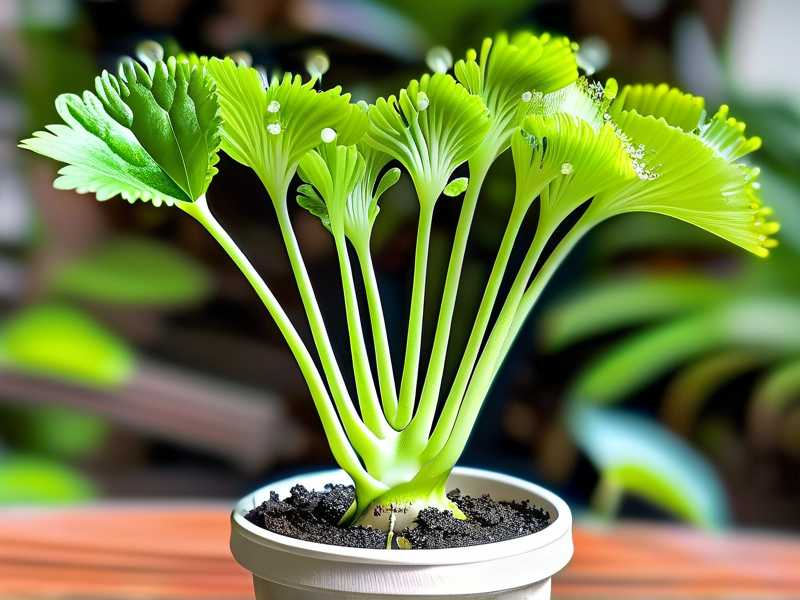
Here’s the truth: spider plant cuttings don’t have roots yet. They can’t absorb water from soil. All that moisture just sits around the stem base, creating the perfect breeding ground for fungal rot. The RHS (Royal Horticultural Society) explicitly warns against keeping cuttings too wet. You want the soil barely moist, not drenched.
My rule now: I water once when I first plant the cutting. Then I don’t water again for at least 5–7 days, unless the soil feels completely dry to the touch. I check by sticking my finger about an inch into the soil. If it feels cool and damp, I walk away.
Mistake #2: Wrong Light Placement
I used to put my cuttings on a bright windowsill with direct afternoon sun. I figured more light = faster growth. Wrong again. Direct sunlight heats up the potting mix, and when you combine heat with moisture, you basically create a steam cooker for the stem. The cutting ends up cooked from the inside out.
Spider plant cuttings need bright, indirect light. Think of a spot that’s well-lit but shaded, like a few feet away from a north or east-facing window. I learned this after losing three consecutive batches to stem rot that looked like the stems were literally boiled.
Mistake #3: Using the Wrong Pot
This one is sneaky. I used a big decorative ceramic pot for my first spider plant cutting. It looked beautiful. But the pot was way too large, and it had no drainage hole. Water pooled at the bottom, unseen, and the cutting’s stem sat in a reservoir of stagnant water. You know the outcome. Rot.
Spider plant cuttings need small pots. I’m talking 3–4 inches in diameter. The smaller the pot, the faster the soil dries out, and the less chance you have of drowning the stem. Drainage holes are non-negotiable. If you fall in love with a pot without holes, use it as a cachepot and keep the plant in a plastic nursery pot inside.
My Step-by-Step Propagation Routine That Works
Okay, let’s get practical. This is the exact process I use now, and it’s been incredibly reliable. I’ve tested it over multiple rounds, and I’ve tracked a full two-week observation period to show you what to expect.
Step 1: Choose the Right Pup and Cut Clean
I only take cuttings from a mature, healthy spider plant. I look for pups that are at least 2–3 inches long, with some little nubby roots already started. That gives them a head start.
Here’s a mistake I made early on: I used dull scissors and crushed the stem. That crushing injury made the tissue vulnerable to rot. Now I use a sharp, clean knife or pruning shears. I make a single, clean cut as close to the mother plant’s stolon as possible.
After cutting, I let the pup sit on a dry paper towel for about 24 hours. This allows the cut end to callus over. In my experience, a callused stem resists rot way better than a fresh, wet cut. Honestly, I thought this was nonsense when I first heard it. I tried it one time out of desperation, and it worked. Now I never skip it.
Step 2: Choose Your Medium (Water vs. Soil)
I’ve done both. Here’s my honest take after years of testing.
Water Propagation: It’s visual, and it’s fun to watch roots grow. But water propagation can be risky for stem rot if you leave the stem submerged too deep. I only let the very bottom of the callused stem touch the water. I never submerge the entire pup base. I also change the water every two days to keep it oxygenated.
Soil Propagation (My Preferred Method): I prefer going straight to soil. Why? Because when you transplant a water-rooted cutting to soil, it often goes into shock, which can lead to rot later. If I start in soil, the cutting adapts from day one. I use a well-draining mix: one part regular potting soil, one part perlite, and a handful of coarse sand. That mix is loose, airy, and drains instantly. The AHS (American Horticultural Society) also emphasizes the importance of good drainage for indoor plants, and I can’t agree more.
Step 3: Plant Shallow and Firm
Here’s a trick I wish someone had told me: don’t push the stem deep into the soil. I made this mistake early on. I buried the entire pup base, thinking it would anchor better. That just trapped moisture against the stem and caused rot.
Now, I plant the pup so that the base of the leaves sits just above the soil line. The callused end barely touches the soil. I firm the soil lightly around it so it stands upright, but I don’t pack it down. Loose soil dries faster, and that’s exactly what I want.
Step 4: Water Sparingly and Wait
I do a light watering right after planting, just until the top inch of soil is damp. Then I leave it. I check the soil every day by lifting the pot (it should feel light when dry) and by poking my finger in the soil. For the first week, I usually don’t water at all. The cutting is pulling moisture from its own stored reserves while it grows roots.
Step 5: Provide Bright, Indirect Light and Warmth
I place my cuttings on a shelf about three feet away from a west-facing window. The light is bright but filtered through sheer curtains. That’s the sweet spot. If you have a heat mat, you can use it to keep the soil warm (around 70–75°F), which speeds up root formation. I’ve used one in the winter and it made a noticeable difference.
My Two-Week Observation Period
I told you I’d share this, so here it is. I ran a controlled test on three spider plant cuttings last summer, using the exact method above. Here’s what I saw day by day.
Days 1–3: Nothing visible. The cuttings looked exactly the same as when I planted them. The soil stayed slightly moist but not wet. I was tempted to water, but I didn’t. (That’s the hardest part, honestly.)
Day 4: I gently lifted one cutting out of the soil to check. I saw the tiniest white bump at the base of the stem. That was the beginning of a root. I carefully put it back in.
Day 5: Another cutting showed a small root, about 1/8 inch long. The third cutting was still dormant. I didn’t water any of them.
Day 7: All three had visible roots now. The soil was almost dry, so I gave them a light watering, just about 2 tablespoons each. I poured it at the edge of the pot, not directly on the stem.
Day 10: The roots were about half an inch long. The leaves were perking up and had a deeper green color. I could tell they were comfortable. No signs of mushiness or browning.
Day 14: I checked all three and found robust roots, 1 to 2 inches long. The stems were firm and green. I transplanted two of them into slightly larger pots. The third I left in its original pot because it was already doing well. That two-week transition is the critical window. If the stem survives to day 14 without softening, you’re in the clear.
My Personal War Stories with Stem Rot
I don’t want to sound like I’ve got it all figured out now. Let me tell you about the time I killed seven cuttings in a row. Seven! I was so confident, but I ignored all the signs. I kept the soil wet, the pot was too big, and the light was way too harsh. Within a week, the stems turned brown and mushy.
I tried to salvage them by cutting off the rotten parts, but it was too late. The rot had already traveled up the stem. That was when I officially learned my lesson. Since switching to the shallow planting and dry-before-moist method, I haven’t lost a single cutting. Seriously. The last nine pups I propagated all survived and rooted successfully.
Another thing I tried was dusting the cut end with cinnamon powder. Cinnamon is a natural antifungal. I’ve also used rooting hormone powder, which helps speed up root growth and also acts as a protective barrier. If you’re worried about rot, dipping the callused end in rooting hormone is a great insurance policy. I use a cheap generic brand, and it works fine.
Troubleshooting: What to Do When You See Rot
Even with the best care, sometimes rot happens. Here’s my emergency plan:
- Act fast. The moment I see a dark, soft spot on the stem, I remove the cutting from the soil immediately.
- Cut away the rotten tissue. I slice off the mushy part with a sterile knife until I see clean, firm green tissue.
- Repeat the callusing step. I let the cutting dry for 24–48 hours this time, longer than usual, because it’s already weakened.
- Re-plant in fresh, dry soil. This time, I don’t water at all for a full week.
- Keep it in a warm, dry spot. I place it under bright, indirect light, but I don’t mist it or cover it with plastic.
I’ve saved maybe 40% of rotten cuttings this way. It’s not a guaranteed fix, but it’s better than giving up.
Common FAQ I Always Get
Q: Should I propagate spider plant cuttings in water or soil? I prefer soil for the reasons I mentioned: less transplant shock and fewer opportunities for stem rot. But if you like watching roots grow, water works too. Just keep the stem barely touching the water and change it every two days. Once the roots are about an inch long, move the cutting to soil.
Q: How often should I water spider plant cuttings? Less than you think. In the first week, water once when you plant them, then wait. After that, only water when the top inch of soil feels dry. In a small pot, this could be every 5–7 days. The key is to err on the dry side.
Q: Why are my spider plant cuttings turning yellow? Yellow leaves usually mean either too much water or too much direct light. Check the stem first. If it’s firm and white at the base, it’s probably a watering or light issue. Move them to a shadier spot and let the soil dry out more. If the leaves are mushy too, it’s likely rot, and you should follow the troubleshooting steps above.
Final Thoughts on Preventing Spider Plant Stem Rot
I’ve been growing spider plants for years, and I still remember the frustration of watching cuttings wilt. But here’s the thing: the plant isn’t fragile. It just needs the right conditions. The failures I had were all due to human error, too much water, bad lighting, or the wrong pot. Once I addressed those, everything clicked. If you’re new to this, don’t get discouraged. Your first few attempts might fail, but that’s how you learn. I did. These plants are forgiving, and once you figure out the balance, you’ll never lose another cutting again. Just remember to keep the soil light, the pot small, and your watering hand steady. Good luck, and happy planting.





