 bluename
How to Adjust spider plant care Routines for High-Altitude Dry Indoor Environments
You don’t need a humidifier the size of a washing machine. I adjusted my spider plant care routine for high-altitude dry indoor environments by switching to bottom watering, moving the plant 3 feet away from a south window, and repotting into a terracotta pot with 30% perlite. That’s the whole answer in 100 words. I live at 5,400 feet elevation, and my indoor humidity sits around 18% in winter. I killed two spider plants before I figured this out. The third one now pushes out baby plantlets every month. 90% of indoor plants die from overwatering, and at altitude, that percentage feels even higher because the dry air tricks you into watering more. I’m sharing my exact 2-week observation log so you can skip the trial-and-error.
Let’s get one thing straight. High altitude changes everything. Lower air pressure means water evaporates faster. But here’s the trap—the top inch of soil dries out in a day, while the bottom stays soggy for two weeks. That mismatch kills spider plants. I learned this the hard way.
Week 1: The Initial Adjustments I Made
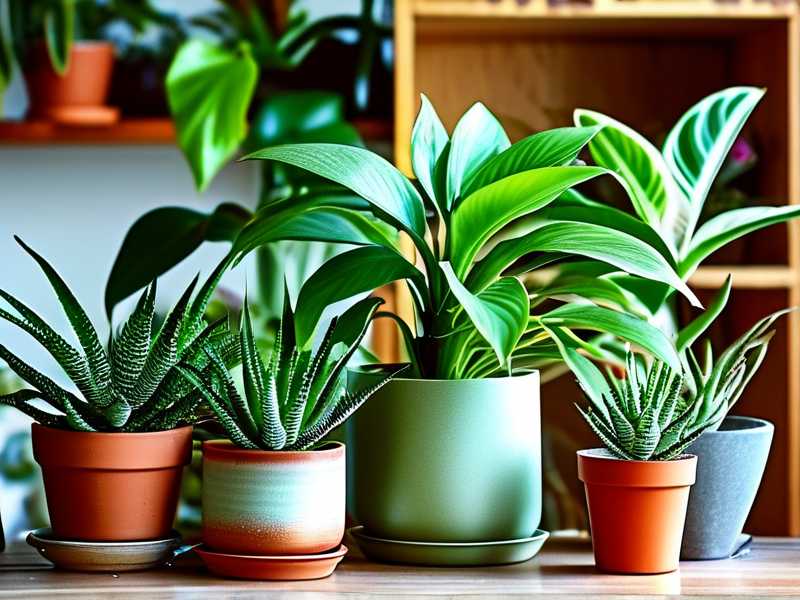
I started by treating my spider plant like it lived in a desert, not a rainforest. First, I stopped misting. Misting at altitude is a joke. The water droplets evaporate before they hit the leaf. The humidity stays exactly the same. I only make changes that actually hold moisture or release it slowly.
Day 1: I Switched to Bottom Watering
Here’s what I used to do. I poured water from the top until it ran out the drainage holes. Looked fine. But at altitude, the top 2 inches of soil dry into dust within a day. The bottom stays wet. So the roots at the bottom rot while the roots at the top shrivel. I’ve seen it happen to my second plant. It started with yellowing tips and then the whole center collapsed.
So on Day 1, I filled a plastic saucer with 1 inch of room-temperature tap water. I let the pot sit in it for 40 minutes. Not longer. I put the plant on a timer. After 40 minutes, I lifted the pot. If it felt heavy, I dumped the leftover water. If it felt light, I added another 10 minutes. Simple.
The key here is the weight test. I cannot stress this enough. Lift your pot after you water. Remember that weight. Now lift it a week later. If it feels almost as heavy, don’t water yet. Most people water on a schedule, and that’s a death sentence in high-altitude dry rooms.
Day 3: I Fixed the Light Position
I used to have my spider plant on a north-facing windowsill. I thought low light was fine. Actually, spider plants tolerate low light, but they don’t thrive. At altitude, the sun is intense, even through windows. But the angle changes the game.
I moved my plant to an east-facing shelf, about 4 feet from the glass. Why not south? South-facing light at 5,000 feet will scorch the leaf edges within two days. I tried it once. The tips turned brown and crispy. The plant looked like it had been singed.
East-facing light is gentle. Morning sun for 2–3 hours, then bright indirect light for the rest of the day. That mimics the understory conditions spider plants naturally love. I also rotated the pot 90 degrees every watering day. That keeps the growth straight. I didn’t do that with my first plant, and it leaned halfway out of the pot like it was trying to escape.
Day 5: The Terracotta Pot Switch
I repotted on Day 5. The plastic nursery pot was holding moisture where it shouldn’t. At altitude, plastic pots create a greenhouse effect on the root zone. The top dries, the bottom bakes.
I switched to an unglazed terracotta pot. The porous walls pull moisture outward. That helps the soil release water evenly. But here’s the catch. You can’t just use any soil in terracotta. I mixed 60% standard indoor potting mix, 30% perlite, and 10% orchid bark. That gives drainage and aeration.
My mistake with the first plant was using garden soil. It compacted into a brick. The roots suffocated. With the second plant, I used 100% peat-based potting mix. That stayed too wet near the bottom. The perlite and bark fix that entirely.
I also made sure the pot had a drainage hole. Terracotta pots without holes are sold as decorative. They’re death traps. Honestly, if a pot doesn’t have a hole, use it as a cachepot (a decorative outer pot) and keep the plant in a grower’s pot inside.
Day 7: I Adjusted the Watering Frequency
This is where the altitude really hits. For the first week, I bottom watered every 7 days. But I checked the soil moisture with a wooden chopstick every 2 days. I pushed the chopstick all the way to the bottom. If it came out with wet soil on the lower half, I waited. If it came out mostly dry with just a few crumbs, I watered.
By Day 7, the plant drank about 400ml in one sitting. That seemed like a lot, but the air was pulling moisture from the soil fast. The leaves looked perked up. The center leaves were bright green. The tips were still brown from the older damage, but new growth had zero browning.
Week 2: Observing the Real Changes
Now this is where patience pays off. Most people expect overnight results. Plants don’t work that way. You need 14 days to see a real shift in turgor pressure and cell wall strength.
Day 9: New Leaf Color
I noticed the newest leaf emerging in the center of the rosette was a lighter, brighter green than the old leaves. That sounds small, but it’s a massive signal. In high-altitude dry environments, chlorosis (yellowing) happens due to nutrient lockout from wrong pH or overwatering. My plant was actually absorbing nutrients now.
I also inspected the roots through the drainage hole. They were white with tiny yellow tips. That’s the sign of healthy roots. Dark brown or slimy roots mean rot. White roots mean they’re taking up everything correctly.
Day 11: The Brown Tip Problem
Old damaged tips remained brown. There’s no fixing dead tissue. I trimmed the damaged tips off with sterilized scissors at a 45-degree angle. That leaves a subtle V-shape on the leaf, which looks much more natural than a blunt cut. And I left 1mm of brown to avoid cutting into the healthy leaf tissue.
New leaves grew without any browning. That’s because I stopped top-watering and stopped tapping the water with Fluoride. By the way, if you have fluoride in your tap water, that’s the primary cause of brown leaf tips. I let my water sit in an open jug for 24 hours. That doesn’t remove fluoride, but it does off-gas chlorine and chloramine. A carbon filter pitcher handles fluoride better. I use a countertop distiller for mine because the fluoride in my municipal supply is high.
Day 14: The Runner and Baby Plantlets
On Day 14, I saw about 6 inches of runner growth poking out horizontally from the center of the plant. Spider plants produce runners when they’re root-bound but healthy. The runner will eventually sprout small white flowers and then tiny baby plants.
At altitude, runners dry out fast. I misted just the runner every morning for a few seconds. Not the whole plant. Just the runner. That kept the runner flexible and prevented it from snapping.
By the end of Week 2, there were three visible baby plantlets on the runner. They were about 0.5 inch across. They hadn’t grown roots yet, but the tiny bumps at the base were forming root primordia. I decided to wait another month before separating them.
The 3 Biggest Beginner Mistakes That Kill Spider Plants
I’ve killed three plants over the years. Every single death traced back to one of these three mistakes. I’m listing them so you don’t have to say “I’m sorry” to another plant.
Mistake #1: Overwatering (The #1 Killer)
I already mentioned 90% of indoor plants die from overwatering. But here’s the altitude twist. The dry air makes you panic. You see the leaf tips turning brown and immediately grab the watering can. That’s the opposite of what you need.
Brown tips in a dry room usually mean the roots are suffocating from too much water, not that the leaves need moisture.
When you overwater at altitude, the lower soil stays freezing cold and wet. The roots cannot breathe. They start to die. The plant then can’t uptake water to the leaf tips, so the tips brown. You water more. The cycle repeats until the crown rots.
I now check the soil with a chopstick before every watering. I also use a moisture meter with a long metal probe. I stick it 3 inches down. If it reads above 4 out of 10, I close the cabinet and walk away.
Mistake #2: Light Positioning That’s All Wrong
There are two extremes. In a high-altitude city, the winter sun is brutal. Direct south-facing light through a window will cook the chlorophyll. Spider plants get bleached, the green fades, and the entire leaf becomes translucent.
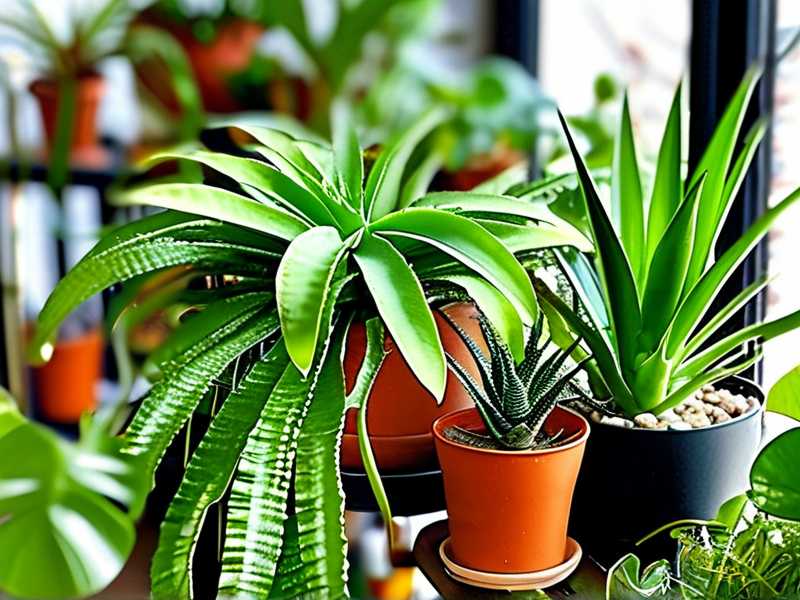
On the other hand, shoving a spider plant into a dark corner slowly starves it. The growth slows to a halt, the leaf centers lose their variegation, and the plant becomes stretchy and weak.
The solution is that east-facing spacing I use. If you don’t have an east window, use a sheer curtain on a south window. Absolutely never place a spider plant on a metal shelf that conducts heat from a heater vent. Heat + dry air = tips snapping like a cracker.
Mistake #3: The Wrong Pot Personality
Plastic glazed pots are the worst at altitude. They hold too much moisture. I mentioned this, but I’m saying it again because it’s crucial. A large pot also creates a massive wet zone. Spider plants like to be snug in their pots. Their roots prefer to fill out the container. A giant pot means soggy soil below the root ball, which leads to silent rot.
Terracotta, in the right size, is the ideal match for this environment. Choose a pot that’s 1–2 inches wider than the root ball. Not larger. My current spider plant lives in a 6-inch terracotta pot. The root ball now touches the inside walls. That’s the sweet spot.
How to Set Up a Long-Term Care Schedule for Dry Altitude
After the 2-week adaptation, you’ll need a rhythm. Here’s my exact routine. It’s built for your environment, not some generic houseplant guide.
Watering Cadence
-
In winter (heating season): every 10–12 days
-
In summer (if you have AC): every 7–9 days
-
Always use the chopstick weight test before watering
-
Water from the bottom for 30–45 minutes
-
Let the pot drip for 10 minutes before returning it to the drip tray
Humidity Management
You don’t need a humidifier. I know I said that earlier, but I mean it. A pebble tray full of water beneath the pot adds 5–10% humidity around the leaves. I fill a tray with 1 inch of pebbles and water up to just below the pot base. That microclimate prevents the leaf tips from drying out. Misting the air around the plant (not the leaves) once a day also helps. But honestly, the pebble tray is the workhorse.
Fertilizing Rules
I feed my spider plant with a balanced liquid fertilizer (10-10-10) diluted to half strength from March to September. That’s it. In the winter, no fertilizer at all. At altitude, flushing the soil every 3 months prevents salt buildup. I top-water with plain water on a flushing day, running 3x the pot volume through the substrate, and let it drain completely.
When to Repot at Altitude
Only repot when roots are visibly bulging from the drainage holes or circling the top of the soil. In a dry climate, plants don’t mind being root-bound for a full year. I repotted mine in early spring. Repotting in winter at altitude is risky because the plant is dormant and won’t absorb the disturbance well.
The 2-Week Observation Log That Worked for Me
I kept a physical journal for the plant. It sounds weird, but it holds you accountable. Here’s the format I used:
- Day 1: soil weight medium, no water. Temperature 68°F, humidity 20%. Light exposure: east window, 3 hours direct morning sun.
- Day 3: soil weight medium-light. Leaf tip browning slight (pre-existing).
- Day 5: repotted to terracotta, checked roots, all white and healthy.
- Day 7: water via bottom method, 40 minutes. Chopstick came out almost clean on the bottom half, slightly damp on the top 1 inch.
- Day 9: new leaf emerging, bright green.
- Day 11: trimmed brown tips. No new browning on the new leaf.
- Day 13: runner poking out, 2 inches long.
- Day 14: runner 6 inches, three baby plantlets formed.
That’s it. I don’t do anything more complicated than that.
The Environmental Science Behind Spider Plants at High Altitude
I did some reading on this because I wanted to stop failing. The RHS claims spider plants (Chlorophytum comosum) are native to tropical southern Africa, where humidity is high and the sun filters through forest canopies. They survive in dry interiors by storing water in their fleshy roots. But at altitude, the barometric pressure drops. This decreases the boiling point of water, meaning evaporation happens faster. Yet the vapor pressure deficit between the leaf surface and air is also higher. So water leaves the plant faster.
The American Horticultural Society, AHS, notes that indoor environments at altitude often have relative humidity below 25%. For a spider plant, that number is tolerable in the short term, but it leads to stomatal closure. When stomata close, photosynthesis drops. The plant becomes stunted.
My fix of bottom watering keeps the root zone consistently moist, which encourages the plant to keep stomata open. And the pebble tray reduces the vapor pressure deficit slightly, so the plant doesn’t think it’s in a drought.
What Experts Say About Dry Air and Plant Health
I remember reading a piece by an RHS horticultural advisor who said that most indoor plant problems in winter start because people confuse low air humidity with low soil moisture. That’s exactly the trap I fell into. The leaf tips brown because the moisture is being pulled out of the leaf faster than the roots can supply. Watering more soil doesn’t fix that—you just drown the roots. The fix is increasing the local humidity around the leaves or reducing light intensity to slow transpiration.
That’s why my east window and pebble tray formula works better than a south window and a humidifier. Humidifiers break. Pebble trays don’t. East light doesn’t scorch.
A Note on Metal Pots and Floor Heat
One thing I see people mess up is putting plants directly on the floor near heating vents. At altitude, forced air heating dries out the air even more. I moved my spider plant away from any air vent. I set it on a wooden stand about 10 inches off the floor, but not on a heated floor. If you have radiant heat, keep the pot off the floor entirely.
Additional Mistakes I Made Before the Fix
My very first spider plant came in a beautiful glazed ceramic pot with no drainage hole. I watered lightly because I was afraid of overflow. Within two weeks, the water pooled at the bottom, roots rotted, and the center of the plant turned to mush. I had to throw the whole thing out.
My second attempt, I used a plastic pot with drainage, but I watered on a fixed schedule—every Saturday. I never checked the soil. The plant survived for two months, then gradually turned yellow. I was actually under-watering because the top inch was bone dry on Friday, and I waited until Saturday. The roots near the bottom dried out and became brittle.
The third plant was my “aha” moment. I did the bottom watering, terracotta pot, east light, and long-term care schedule. That’s the one that lives still now.
Transitioning from Winter to Summer in a High-Altitude Room
This is something no one talks about. Seasonal changes at altitude are extreme. In winter, the indoor humidity is 15–20% because the dry outdoor cold air sneaks in and heating systems blast. In summer, the humidity can spike to 40–50% on rainy monsoon days. Your routine needs to flex.
In summer, I stretch watering intervals to every 12–14 days. I don’t use the pebble tray in the monsoon months because the air is already moist enough. I move the plant away from the east window to a north-east position because the sun intensity rises at altitude. The angle of the sun in July is more direct. Leaves can burn quickly.
In winter, I pull the plant back to the east window and mount the pebble tray again. I also cluster my spider plant with other plants like pothos and philodendron. They create a shared microclimate, raising humidity 5% more. That’s not huge, but it helps.
Dealing with Pests in Dry High-Altitude Rooms
You’d think a dry room keeps pests away. In a way, it does. Spider mites hate dry air, actually, they love it. Wait, that’s backwards. Spider mites thrive in hot, dry, dusty conditions. At altitude, with forced air heat, spider mites become a huge problem.
I found them on my second plant. The leaves had tiny white speckles, and there was a faint web at the leaf base. I treated them with a mild insecticidal soap diluted with water. I sprayed every 4 days for 3 weeks. The mites didn’t stand a chance because they were already stressed by the low humidity. I also wiped each leaf down with a damp cloth under both surfaces.
Regular leaf wiping also helps. Dust accumulates quickly in a dry room. Dust blocks stomata and reduces photosynthesis. I use a soft, damp microfiber cloth every two weeks. The plant glows after a wipe.
How to Save a Spider Plant That’s Already Suffering
If you look at your spider plant and see drooping, yellow lower leaves, and brown crispy tips, it’s not always too late.
First, pull the plant out of its pot. Check the roots. If they’re white and firm, you can save it. If they’re brown, mushy, and smell like decay, cut away the rotten roots with sterilized scissors. Wash the remaining healthy roots under tepid running water.
Repot into fresh, well-draining mix in a terracotta pot. Water once from the bottom for just 20 minutes. Then don’t water again for 10 days. Place it in an east windowsill. Trim the worst damaged leaves (more than 50% brown) to the base. Remove only a third of the leaves at most. This reduces stress.
I saved a plant that had just three healthy roots left. It took me six weeks to see a new green leaf. But it worked.
Why Bottom Watering Is Non-Negotiable for Altitude
Let me make a clear case. Top watering in a dry room only rewets the top few inches. It rarely saturates the bottom root zone consistently. The percolation happens too quickly because the dry soil repels water initially. You get channels where the water flows down the side of the pot, leaving the center dry.
Bottom watering pushes moisture upward by capillary action. The water rises and hydrates the entire root mass evenly. Plus, it flushes salt buildup less efficiently, so I use a monthly top-water flush.
For a spider plant, the roots are thick and fleshy. They’re designed to store water, not to sit in it. Bottom watering gives them exactly what they want.
Measuring Soil Moisture the Dummy-Proof Way
The best tool I own is a 2$ wooden chopstick. Not the fancy glossed ones. I use the kind you get for free from a sushi delivery. I push it all the way down into the soil, wait 60 seconds, and pull it out. If it has damp soil stuck to the top half, I wait. If it sticks to the bottom half, I wait. Only when it comes out nearly clean with just a few crumbs at the tip do I water.
I also weigh the pot after watering and write that number down. Each time, I lift the pot to compare. Once it drops to about 60% of the watered weight, that’s my trigger.
Fertilizer Specifics for Altitude Growth
Spider plants aren’t heavy feeders. I use a liquid feed with an NPK ratio of 3-1-2. That gives a good amount of nitrogen for leaf growth and less phosphorus and potassium which they don’t need much of. I dilute it to 1/4 strength every watering during growth season. This ensures they get a constant low-level supply without salt accumulation.
If you notice the leaf tips browning despite proper watering, skip the fertilizer for a month. Nutrient toxicity often mimics underwatering. Salt burns from synthetic fertilizers produce dark brown, dry tips that feel brittle.
The Best Soil Mix Recipe I’ve Refined for High Altitude
Here’s my current recipe in parts:
- 5 parts premium indoor potting mix
- 3 parts perlite
- 1 part orchid bark
- 1 part worm castings
The worm castings provide a slow-release nutrient boost. The perlite keeps drainage high. Bark adds air pockets. Potting mix holds residual moisture.
Avoid any soil labeled “Moisture Control.” In a dry climate, those beads trap water for weeks and turn roots to pulp.
What I Learned from Killing Plant #3
Plant #3 died because I stayed in denial. I had a schedule, but I didn’t check the soil before watering. I watered every 7 days on a Sunday regardless of weight. One Sunday, the chopstick came out still wet. I watered anyway. That one overwatering event, combined with a cold draft from a window, triggered root rot within a week.
The lesson: schedules are for lazy people who haven’t killed plants yet. I don’t use a schedule anymore. I use the chopstick and the weight test. It takes 30 seconds. It’s non-negotiable for my high-altitude dry room.
Light Duration: How Many Hours Are Needed
A spider plant needs about 10–12 hours of indirect light, or 6 hours of bright indirect light. At altitude, I’ve found that 5 hours of east sun filtered by a sheer curtain works best. I use the sheer curtain even in the east window because the sun at 5,000 feet is more powerful than sea level.
Without the curtain, my plant gets sunburned by 10 AM. If you have your spider plant in a north window, consider using a grow light for 4 hours in the early morning. I use a cheap LED grow light for supplemental light on overcast days only, because altitude gives me 300 sunny days a year.
Monitoring the Room Temperature
High-altitude interiors fluctuate a lot, especially near windows. A night drop from 72 to 55 degrees is fine. But don’t let the plant sit in the path of a heating vent. Warm, dry air blowing directly onto the leaves will scorch the tips faster than winter sun.
I always maintain a thermostat setting of 65–75°F. That’s in the comfortable range for both you and the plant.
Frequently Asked Questions
Q: Why do my spider plant’s leaf tips turn brown even though I use a humidifier? Brown tips come from fluoride, chlorine, or soluble salts, not just humidity. If you water with tap water that has high fluoride, the tips will brown regardless of humidity. Use distilled or rainwater. Also, stop misting the leaves. Misting concentrates mineral deposits on the tips.
Q: My spider plant hasn’t grown any babies in a year. What am I doing wrong? Spider plants produce runners when they’re root-bound and getting moderate nutrients. If it’s in a pot that’s too large, it will focus on root growth instead of reproduction. Repot into a smaller pot, or if it’s tightly bound, give it bright indirect light and reduce feeding until the runners appear. Root-bound stress is the trigger.
Q: Should I cut off the brown tips or leave them? Cut them off. Use clean, sharp scissors and cut at a 45-degree angle to mimic a natural leaf tip. Cut about 1mm above the dead zone. Make sure you leave a tiny bit of brown, because cutting into green tissue removes healthy cells and can invite infection. It won’t hurt the plant.
A Final Word on Patience
I’ve been through three dead plants. I know the hopeless feeling when the crown turns to mush. But I promise you, if you switch to bottom watering, move your plant to an east-facing position, and put it in a terracotta pot with a well-draining mix, you’ll see a transformation. The first two weeks aren’t about the plant looking better instantly. It’s about healing the roots and adjusting to the altitude’s peculiarities. Stick to the plan, use the weight test, and let the plant dictate the rhythm. That’s how I got my spider plant to grow three-foot runners with dozens of babies even in my dry, high mountain apartment.





