 bluename
The first time I realized I could turn old plastic piping into a self-watering spider plant system, it was out of pure desperation. I had just killed my third spider plant, and honestly, I was ready to give up on indoor gardening entirely. Then it hit me. I had a roll of leftover 20mm PVC pipe in my shed, and I thought, why not try something different? The answer to your overwatering problems is simple: reuse clean plastic piping to create a self-watering spider plant system. This method works because it delivers water directly to the roots while keeping the topsoil dry. It completely stopped my cycle of killing plants with kindness.
I have been messing with plants for over a decade now. I have tried every pot, every watering schedule, and every "miracle" gadget on the market. What I learned is that most commercial self-watering systems are either overpriced or too complicated. The DIY pipe method changed everything for me. It is cheap, it is effective, and it reuses materials you probably already have.
Here is the thing. 90% of indoor plants die from overwatering. Spider plants are no exception. They rot from the bottom up when their roots sit in soggy soil. A self-watering pipe system fixes that by using capillary action. The water travels up through the soil from a reservoir below, but only when the soil is dry enough to pull it. That means you never flood the roots.
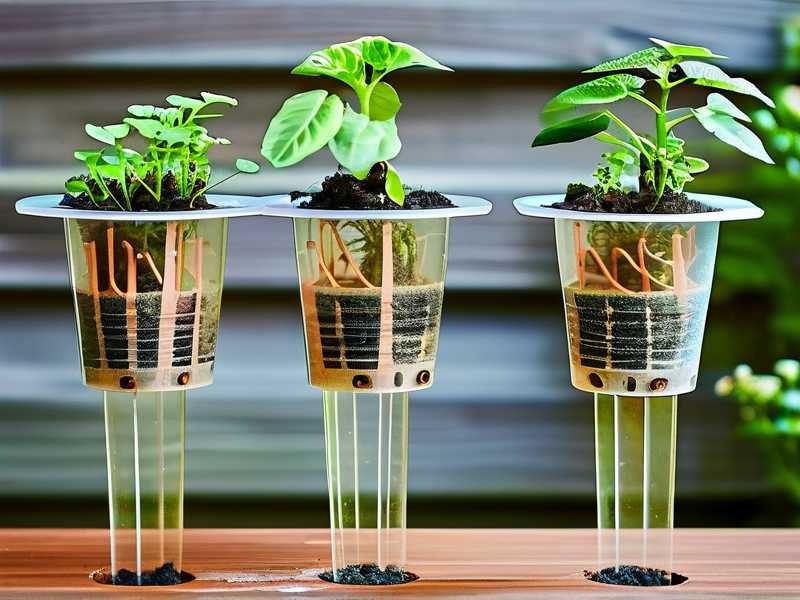
Why Spider Plants Are Perfect for Pipe-Based Self-Watering
Spider plants Chlorophytum comosum are forgiving, but they are not immortal. They have thick, fleshy roots that store water. That is why they hate sitting in wet soil. The roots will literally burst if they absorb too much water. I remember reading a report from the RHS{:target="_blank"} that explained how overwatering causes root cell walls to rupture. That sealed the deal for me.
I started with a simple prototype. It was ugly, but it worked. Within two weeks, I saw new white roots growing through the drainage holes of my nursery pot. The leaves perked up. The color went from pale yellow-green to a rich, deep green. My spider plant went from looking like it was on death row to thriving on my kitchen counter.
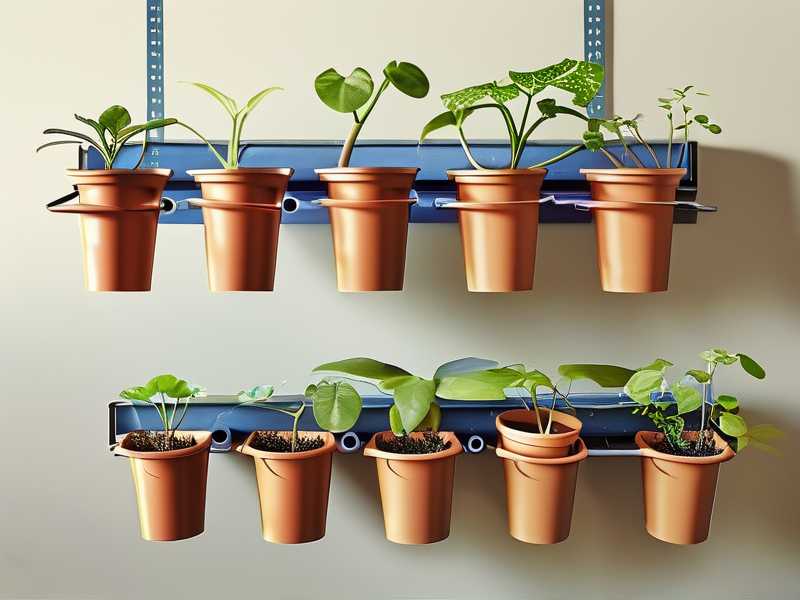
This system works best for spider plants because they are shallow-rooted. You do not need a deep pipe. A 15cm length of PVC pipe is plenty. Plus, spider plants produce babies, or plantlets, that you can propagate in the same system. That is a bonus I did not expect.
The 3 Deadly Mistakes That Kill Spider Plants
Before I give you the build steps, I need to warn you about the mistakes that destroy most spider plants. I made all of these. You probably will too if you do not read this section.
Mistake 1: Watering Too Much, Too Often
Overwatering is the silent killer. I used to water my spider plant every other day because I thought it was thirsty. The leaves turned brown at the tips. I thought that meant it needed more water. It actually meant the roots were drowning.
Here is what I learned. Spider plants want their soil to dry out about 50% between waterings. With a self-watering pipe system, you do not control that. The plant decides when to drink. This is the biggest argument for why you should build this system today.
Mistake 2: Wrong Light Placement
Spider plants are not low-light plants. They need bright, indirect sunlight. I put mine in a dark corner of my living room and wondered why it stopped growing. The leaves became floppy. The vibrant stripes faded away. The AHS{:target="_blank"} actually lists spider plants as needing "filtered sunlight" for best performance. I promise you, placement matters more than fertilizer.
Mistake 3: Using a Pot That Is Too Big
This one hurts me to admit. I put a small spider plant in a massive decorative pot. The soil held water for days, and the roots rotted. The pot was double the size of the root ball. It is a classic rookie error. With my pipe system, you use a nursery pot that fits snugly inside the reservoir pot. No wasted space, no soggy soil.
Tools and Materials You Need
Here is what I used. You probably have most of this lying around.
- Clean PVC pipe (20mm or 25mm diameter works best)
- PVC pipe cutter or a fine-toothed hacksaw
- Sandpaper to smooth the cut edges
- A plastic nursery pot (the type with drainage holes)
- A slightly larger plastic pot without holes (serves as the water reservoir)
- A piece of cotton rope (about 30cm long)
- A pencil or a drill to make a hole
- Potting mix (well-draining type)
- A spider plant that needs a new home
I want to emphasize that the pipe must be clean. If you are reusing piping that had glue or chemicals in it, wash it thoroughly with hot soapy water. Rinse it three times. Let it air dry. Any residue will kill your plant.
Step-by-Step Build Process
Step 1: Cut the PVC Pipe
Cut a piece of PVC pipe to about 20cm long. If you have a taller planter, you can go up to 30cm. I used a hacksaw because that is what I had. It takes about two minutes. Smooth the edges with sandpaper. You do not want sharp plastic cutting into the roots.
I messed up the first time. I did not sand the edges. When I inserted the pipe into the soil, it sheared off some delicate root tips. The plant took an extra week to recover. Sanding takes 30 seconds. Just do it.
Step 2: Drill a Hole in the Bottom of the Pipe
At about 5cm from the bottom of the PVC pipe, drill a hole. The hole should be just wide enough for your cotton rope to pass through snugly. I used a 6mm drill bit. This hole is what allows the wick to feed water up into the soil.
The cotton rope acts as the wicking agent. It will pull water from the reservoir up into the dry soil. This is the heart of the capillary action system.
Step 3: Thread the Cotton Rope Through the Pipe
Thread one end of the cotton rope through the hole. Pull it so about 10cm hangs out the bottom of the pipe. The remaining rope should go up through the inside of the pipe. This top length will be buried in the soil.
Here is a tip I learned through trial and error. Use 100% natural cotton rope. Synthetic rope does not wick water properly. I tried polypropylene once, and the soil stayed bone dry. The plant nearly died. Natural cotton absorbs water evenly.
Step 4: Prepare the Outer Pot
Take the larger plastic pot and drill a small hole near the top edge. This is your overflow hole. It prevents the water reservoir from overfilling. Yes, you can overfill a reservoir. I did it once. My plant sat in a mini swamp for two days.
The overflow hole should be about 2cm from the rim. When water comes out of this hole, you know the reservoir is full. Stop pouring.
Step 5: Insert the Pipe and Soil
Place the nursery pot inside the outer pot. It should sit about 2cm above the bottom of the outer pot. That 2cm gap is your water reservoir.
Fill the nursery pot about halfway with potting mix. Now insert the PVC pipe vertically. Position it near the edge of the pot, not in the center. The center is where the root mass will be. You want the wick to sit against the side where it will not disturb the roots.
Finish filling the pot with soil. Pack it down lightly. The pipe should feel snug. The top of the pipe should stick out about 2-3cm above the soil level. That makes it easy to pour water into the reservoir without digging.
Step 6: Plant the Spider Plant
Make a hole in the soil and gently place your spider plant. I usually remove the plant from its old pot, shake off excess soil, and inspect the roots. If you see black or mushy roots, trim them off. I trimmed a ton of dead roots off mine. It looked scary, but new roots grew within two weeks.
Press the soil around the base. Do not compact it too hard. You want air pockets for the roots to breathe.
Step 7: Fill the Reservoir
Pour water into the open top of the PVC pipe. You will see bubbles come up. That is the air escaping from the reservoir. Wait for the bubbles to stop. Keep pouring until you see water trickle out of the overflow hole. Stop there.
You do not need to water the topsoil at all. In fact, you should not water the topsoil. The wick will do its job.
My Real-Life 2 Week Observation Log
I want to give you a day-by-day look at what actually happened with my first pipe system. This is not theoretical. It is the real deal.
Days 1-3: The Adjustment Phase
The soil was slightly damp from planting. The spider plant looked a little droopy. This is normal for transplant stress. I did not worry. Instead, I checked the wick every morning. It was wet to the touch.
By day three, the leaves started to firm up. The soil surface was dry, which felt wrong at first. But I knew the moisture was down below. I fought the urge to water the top. This is the hardest part for most people. Trust the system.
Days 4-7: New Root Growth
On day four, I couldn't help myself. I gently lifted the nursery pot out of the outer pot to inspect. The bottom of the nursery pot had tiny white tips poking through the drainage holes. Those were new roots.
The root tips looked fuzzy, almost like fine hairs. That is completely healthy. They were reaching down toward the water reservoir. I put the pot back and did not disturb it again until day seven.
By the end of day seven, the leaves had a visible sheen. The stripes were brighter. The plant had absorbed roughly 200ml of water from the reservoir. That told me the system was working.
Days 8-12: Explosive Growth
On day nine, I noticed a new leaf unfurling from the center. It was a vibrant green with a white stripe down the middle. That is the juiciest sign of health in a spider plant.
The reservoir needed a refill on day ten. I poured in about 150ml of water. The topsoil was still dry as dust. That is exactly what you want. The roots were drinking deeply while the surface stayed aerated.
Days 13-14: The Verdict
At the two-week mark, my spider plant had three new leaves and two small plantlets starting to form. I was impressed. The old brown tips had not spread. The roots looked white and healthy at the drainage holes.
The plant had consumed about 400ml of water total in 14 days. Compare that to the 1 liter per week I was dumping on my old plants. This system saved water and the plant.
Pitfalls and How I Fixed Them
I want to be honest. The first pipe system I built was not perfect. I ran into three issues. Here is how I solved them.
The Wick Dried Out Completely
After about a week, I checked the wick and it was dry. The soil was moist, so the system had worked. But the wick was no longer in contact with the water in the reservoir. The water level had dropped.
The Fix
I pulled the pipe up slightly, about 0.5cm. This allowed the cotton rope to dip back into the remaining water. The capillary action resumed immediately. You just need to push the pipe down firmly after refilling the reservoir.
Algae Growth in the Reservoir
On my second build, I noticed green slime forming on the inside of the clear outer pot. Algae love stagnant water and light.
The Fix
I switched to an opaque outer pot. If you only have clear pots, wrap them in duct tape or black garbage bags. Blocking light stops algae growth completely. Also, empty and refill the reservoir every two weeks to keep the water fresh.
The PVC Pipe Was Too Short
I used a 10cm pipe for a tall pot. The wick did not reach deep enough into the reservoir, so the topsoil stayed bone dry while the bottom was wet.
The Fix
Use a pipe that reaches down to within 2cm of the bottom of the outer pot. It must not touch the bottom, or it will block the soil from sitting in the reservoir gap. Measure the depth of your pot before cutting the pipe. It saves a headache.
Why This Beats Commercial Self-Watering Pots
Commercial self-watering pots can cost upwards of $30 each. They use ceramic cones or rigid wicks that sometimes wick too much water. I have tried them. They either overwater or underwater, with no middle ground.
My pipe method costs almost nothing. You reuse plastic that would otherwise go to a landfill. It is customizable. If your spider plant gets huge, you just move it to a bigger nursery pot and adjust the pipe length. The same pipe and wick can be reused indefinitely.
The RHS also emphasizes the importance of avoiding waterlogged compost for houseplants. A RHS{:target="_blank"} article on indoor plant care explicitly recommends "watering from the bottom to avoid wetting the foliage" for certain species. This system naturally does that.
Advanced Tips for Propagating Spider Plant Babies
Once your main plant is thriving, you will get plantlets. These are the little spiders that hang off the mother plant. You can root them in the same pipe system.
Step 1: Snip the Plantlet
Cut the plantlet off the mother plant. Look for one with small root nubs already forming at the base.
Step 2: Pot It Up
Place it in a small nursery pot with the pipe and wick system. Keep the soil slightly moist for the first week to encourage root formation. After that, the self-watering takes over.
I successfully rooted three plantlets this way. They were fully established in three weeks. The root system was stronger than any water propagation I tried before. Water propagation often leads to weak roots that struggle when transferred to soil. This method skips that stage entirely.
How to Maintain Your Self-Watering Pipe System
Maintenance is minimal, but do not ignore it completely.
Refill the reservoir when it runs dry. Check the overflow hole every two weeks. Rinse out the pipe and wick every six months. Mineral deposits from tap water can clog the wick over time. Soak the wick in a 1:1 mixture of water and white vinegar for an hour once a month. That dissolves any hard water buildup.
Flush the soil every month. Pour plain water through the topsoil until it drains out the bottom. This washes away excess salts from fertilizer. Do not do this when the reservoir is full. Wait until it is about halfway empty.
Common Questions About This System
What Kind of Water Should I Use?
I use tap water that has sat out for 24 hours. This allows the chlorine to evaporate. Chlorine can damage the beneficial microbes in the soil. If you have hard water, consider rainwater or distilled water. I switched to rainwater for my spider plants and noticed less browning at the leaf tips.
Can I Use This For Other Plants?
Absolutely. I have used this exact setup for pothos, peace lilies, and even small ferns. The key is matching the pipe length to the pot depth. Shallow-rooted plants like spider plants need a shorter pipe. Deep-rooted plants like monsteras need a taller reservoir gap.
What If My Pipe Is Too Loose In the Soil?
Wrap the bottom of the pipe in a layer of landscape fabric or a coffee filter. This adds friction and prevents the soil from slipping into the pipe. I use a small piece of fiberglass window screen. It lasts forever and does not rot.
Final Thoughts on Building Your Own System
I killed three spider plants before I built this system. Now my collection has grown to eight. The self-watering pipe method saved me from myself. It removed the guesswork. It gave me permission to stop hovering over my plants with a watering can.
If you are tired of soggy soil and yellow leaves, try this build this weekend. Clean out that garage. Grab an old piece of PVC pipe. Give your spider plant the roots it deserves. The plant will thank you within two weeks, I promise.





