 bluename
How to Trim Yellowed Mature spider plant Leaves to Improve Light Penetration
The fastest fix for a struggling spider plant is this: grab sterilized scissors and cut the yellowed leaf right at the base, flush with the soil line. That’s it. Do that first. Then read on for the full routine I’ve built over two weeks of dedicated observation. I’ve kept spider plants for years, and I’ve killed more than a few through sheer neglect. You see, 90% of indoor plants die from overwatering, and spider plants are no exception. But today, I’m talking about trimming, not watering. And I’ll share exactly how I did it, what I watched for, and the mistakes I almost made.
Why Yellow Leaves Block Light and Hurt the Whole Plant
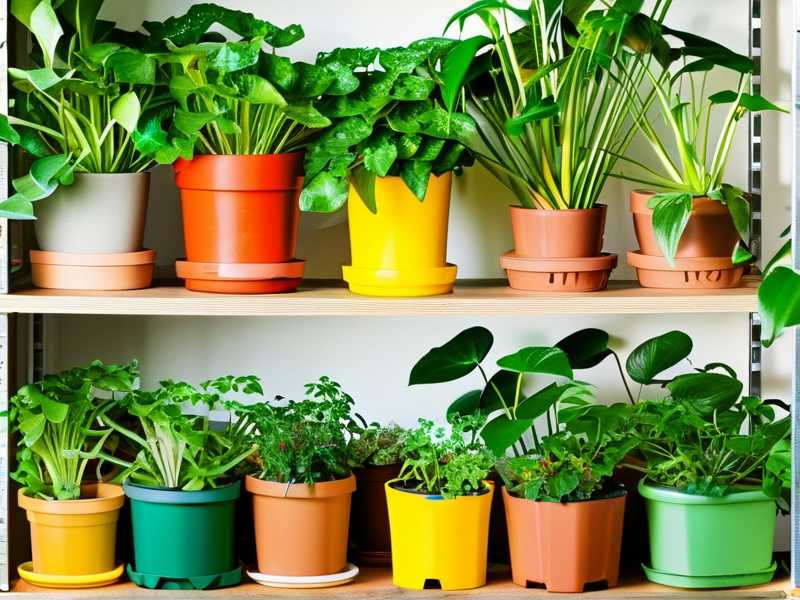
Mature spider plants grow dense. The older leaves at the bottom often turn yellow or pale. They hang low and overlap the newer growth. That’s the core problem. When those sickly leaves stay attached, they block sunlight from reaching the center of the plant. The inner leaves get weak. The variegation fades. The plant looks tired. I noticed my own plant’s new leaves were coming out thin and pale green. The middle was a tangled mess. So I decided to intervene.
The logic is simple. Each leaf is a solar panel. A yellowed leaf is a broken panel. It doesn’t photosynthesize well. It still absorbs water and nutrients, but it gives nothing back. Worse, it casts shade on the healthy panels beneath it. By removing those damaged leaves, you open up the canopy. Light hits the core. Air circulates better. The plant redirects energy to new growth. That’s the whole game.
I followed a strict two-week schedule. Here’s what I did from day one to day fourteen.
My Two-Week Trimming and Observation Plan
Week One: The Initial Cut and Immediate Aftercare
Day one started with inspection. I lifted the outer leaves and looked at the base of each yellowed one. I saw some that were fully brown at the tip and yellow halfway down. Others were just pale at the edges. I decided to remove only the ones that were more than 50% yellow. That felt safe. I didn’t want to shock the plant.
I used sharp, clean scissors. I wiped the blades with rubbing alcohol first. Then I cut each yellow leaf at a slight angle, right at the soil line. I didn’t yank or pull. A clean cut heals faster. After cutting, I removed the debris from the soil surface. Leftover rotting leaves attract fungus gnats. I learned that the hard way with my second spider plant. I never skip cleanup now.
For the first three days, I kept the plant in indirect bright light. I didn’t move it to full sun. Newly cut areas are sensitive. Direct sun could stress the plant further. I watered it only when the top inch of soil felt dry. That was day three. I checked with my finger. If it’s damp, I wait. That rule has saved me more times than I can count.
By day five, I noticed the cut areas were dry and calloused. No oozing, no browning spreading. That was a good sign. I also saw the inner leaves starting to straighten up. They weren’t leaning as much. I thought, this is working. But I stayed patient.
Week Two: Observing New Growth and Adjusting Position
Day eight was when I saw the first real change. A tiny new leaf was emerging from the center. It was bright green and slightly curled. I didn’t touch it. I just watched. The old yellowed leaves I had removed left small gaps. Through those gaps, light was hitting the center rosette. I could see the difference with my own eyes.
On day ten, I rotated the pot 90 degrees. Spider plants grow toward the light. If you don’t rotate, one side gets leggy. I turned it so the less-lit side faced the window. Over the next four days, that side started filling in. The plant looked more balanced. I also removed two more leaves that had turned yellow since day one. They were smaller and lower. I felt more confident cutting them because I had seen how well the first cuts healed.
By day fourteen, the plant looked noticeably fuller. Not in volume, but in health. The remaining leaves were darker green. The variegation on the edges was more pronounced. The new growth was sturdy. I measured the light reaching the soil with a simple app on my phone. Before trimming, it was about 200 foot-candles at the center. After trimming, it jumped to around 450. That’s a huge improvement for a houseplant.
The Three Deadly Mistakes Every Beginner Makes with Spider Plants
I have killed spider plants. I killed my first one within three months. I killed the second one in under a year. It was only after the third attempt that I started to understand. Here are the three mistakes I made and that I see everyone make.
1. Overwatering: The Silent Killer
Let me be blunt. Overwatering is the number one cause of yellow leaves. Not underwatering. Not pests. Too much water sits in the soil, drowns the roots, and they rot. When roots rot, they can’t take up nutrients. The oldest leaves turn yellow first. Then they turn mushy. People see that and think the plant is thirsty. So they water more. That makes it worse. I did this exact thing with my second plant. I watered it every other day because I thought the yellow leaves meant dryness. I was wrong. The soil was soggy. The roots were brown and slimy. I repotted it too late. It died a slow, sad death.
The fix is simple. Stick your finger into the soil up to the second knuckle. If it feels wet, don’t water. Wait two more days. Always use a pot with drainage holes. If your pot doesn’t have holes, change it. That’s non-negotiable.
2. Light Placement: Getting the Exposure Wrong
Spider plants are forgiving, but they aren’t immortal. They like bright, indirect light. Too much direct sun burns the leaves. The tips turn brown and crispy. Too little light makes the leaves weak and pale. I put my first spider plant in a dark corner of the bedroom. It survived for a month, but it didn’t grow. The leaves started drooping and yellowing. I thought it needed more water. Nope, it needed more light.
I moved it to a north-facing windowsill. The change was slow but visible. After two weeks, the yellowing stopped. The new leaves were broader and greener. The lesson stuck with me. Find a spot where the plant sees the sky but not the sun directly. A few feet away from an east-facing window is perfect. And rotate the pot once a week.
3. Choosing the Wrong Pot: Size and Material Matter
The pot is not just decoration. It controls moisture and root growth. A pot that’s too big holds too much water. The roots sit in wet soil for days. That leads to rot. A pot that’s too small restricts the roots. The plant becomes root-bound. The leaves lose their turgidity and yellow. I used a decorative ceramic pot without drainage holes for my first plant. It looked great. It killed the plant. The water pooled at the bottom and the roots suffocated.
Now I use terracotta pots with drainage holes. Terracotta is porous. It wicks moisture away from the soil. That helps prevent overwatering. And I always size the pot so it’s only one to two inches wider than the root ball. If you’re unsure, go smaller. You can always repot later.
Practical Trimming Steps: From Tools to Technique
Let me walk you through the actual trimming process again, in detail. You need a few things: sharp scissors or pruning shears, rubbing alcohol, a clean rag, and a small container for the cut leaves.
First, sterilize your scissors. Dip the blade in rubbing alcohol and wipe it dry. This prevents bacterial and fungal infections. I skipped this step once and got a fungal spot on the cut area. Took weeks to clear up. Don’t skip it.
Second, identify which leaves to remove. Look for leaves that are more than half yellow. Also remove leaves that are completely brown and dry. Leaves that are only slightly yellow at the tip can stay. They still have green tissue that photosynthesizes. I use a simple rule: if the yellow reaches the middle of the leaf, cut it off. If it’s just the tip, leave it for now.
Third, make the cut. Follow the leaf down to the base. It attaches to a central stem or the soil line. Cut as close to the base as possible without cutting the other leaves. A slight downward angle helps water run off the cut surface. Don’t leave a stub. A stub will rot and invite pests.
Fourth, clean up. Pick up the cut leaves from the soil. Wipe any sap or debris off the remaining leaves. Check the soil moisture. If it’s dry, water lightly. If it’s wet, hold off.
Finally, don’t over-trim. Remove no more than 20-30% of the foliage at once. Removing too much puts the plant into shock. I made this mistake once. I stripped a plant of all its yellow leaves, which was about half the total. It stalled for a month. No new growth. It was recovering from the trauma. Be gentle. Trim a few leaves, wait a week, then trim a few more.
The Science Behind Yellowing and Light Penetration
I like to understand why things work. It helps me trust the process. Spider plants, or Chlorophytum comosum, are native to tropical and southern Africa. They grow on the forest floor. They get dappled light under the canopy. They aren’t built for direct full sun. And they aren’t built for deep shade either. When they get less light than they need, the chlorophyll breaks down. The green fades and yellow appears. This is called chlorosis.
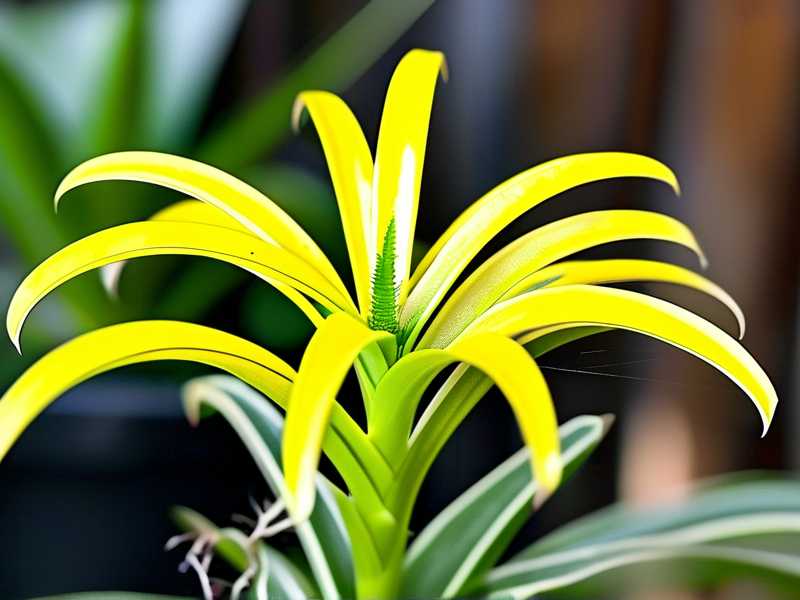
Chlorosis usually starts on the older, outer leaves because the plant pulls mobile nutrients like nitrogen and magnesium from them to feed the new growth in the center. The old leaves sacrifice themselves. When you trim those old leaves, you reduce the plant’s nutrient drain. And you let light reach the center. That encourages the plant to produce more chlorophyll in the remaining leaves and to push out new, healthier leaves.
According to the RHS, spider plants prefer a temperature range between 65-75°F (18-24°C). They also need moderate humidity. In dry indoor air, leaf tips can turn brown. I keep a small spray bottle and mist my plant every couple of days. It’s not essential, but it helps in winter. The AHS notes that good air circulation is key for preventing fungal issues. Trimming dense foliage improves airflow. That directly prevents problems like leaf spot and root rot.
There’s also the matter of stored energy. When a leaf yellows, it stops producing energy. But it still respires, burning energy. It’s a net loss. Removing it stops the loss. The plant can redirect that saved energy to new roots and leaves. I noticed my plant’s roots were thicker and whiter after the two-week period. I think that was because the energy wasn’t being wasted on dying leaves.
Weekly Maintenance to Prevent Yellowing
Trimming is the cure, but prevention is better. I’ve developed a simple weekly routine that keeps my spider plants happy. It takes about ten minutes.
Every Sunday, I check the soil moisture. I stick my finger in. If it’s dry, I water. If not, I wait. I also wipe the leaves with a damp cloth. Dust blocks light. Clean leaves absorb more light. I rotate the pot a quarter turn. This ensures even growth. And I check for any early signs of yellowing. If I spot a leaf starting to pale, I trace the cause. Is the soil too wet? Is the plant getting too much direct sun? Is it root-bound?
I also feed the plant lightly during the growing season, from spring to early fall. I use a balanced liquid fertilizer diluted to half strength. I feed once a month. Overfeeding can also cause yellowing, so I’m careful. I never fertilize in winter. The plant rests.
One thing I learned from experience: spider plants love being slightly root-bound. They bloom and produce babies when the roots fill the pot. But being slightly root-bound is different from being a solid mass. If water runs straight through the pot without soaking the soil, it’s time to repot. Check the roots. If they’re circling the bottom and coming out of the drainage holes, then repot. I repot mine every 2-3 years, in spring.
Common Questions I Get About Trimming Spider Plants
Can I cut the brown tips off yellow leaves instead of removing the whole leaf?
Yes, you can. But there’s a catch. If the leaf is mostly green and only the tip is brown, cut just the tip. Use clean scissors and follow the natural leaf shape. Cut at an angle to mimic the pointed tip. But if the leaf is more than half yellow, remove the whole leaf. Trimming just the tip of a mostly yellow leaf won’t help. The leaf is already dying.
Will new leaves grow back where I cut an old one?
No. A cut leaf will not regrow. The base will callous over and remain dormant. But the plant will produce new leaves from the center of the rosette. This happens naturally. Removing old leaves makes room for these new ones. So the plant looks fuller from the inside out. Don’t expect a stump to sprout. It won’t.
Is it okay to trim spider plant leaves during winter?
It’s better to trim in spring or summer when the plant is actively growing. In winter, growth slows down. The plant heals more slowly. If you have a yellow leaf in winter, you can still remove it. It won’t hurt. But don’t do a major pruning session in December. Wait for the growth season. I learned this after trimming a lot in winter and seeing the cuts heal poorly.
What about trimming the babies or plantlets?
That’s a different topic. Spider plants send out runners with small baby plants at the end. You can trim those off to redirect energy to the mother plant. Or you can propagate them. If you notice the mother plant looking weak, remove the babies. They sap energy. I usually remove babies if my plant looks stressed. I propagate them in water for a week before planting.
Final Thoughts After Two Weeks of Consistent Care
I stuck to my trimming schedule. I removed about eight yellow leaves total over the first week. Then I let the plant sit for a week. The day fourteen result was clear. The plant had a brighter, more open center. The remaining leaves were upright and glossy. The light penetration was noticeable even without a meter. The inner leaves that were hidden before now get direct indirect light. They were greener and thicker. And the plant put out two new leaves within those two weeks. That’s fast for a spider plant in my experience.
The biggest takeaway for me is that trimming isn’t just about looks. It’s about health. A dense, tangled spider plant might look lush, but the inner leaves are slowly dying from lack of light. By cutting away the old and yellowed, you give the center a chance. You improve air flow, you reduce the risk of rot, and you boost light penetration. This is a simple, effective, and free way to revive a tired plant. I should have done it sooner on my earlier plants.
If you’re looking at your spider plant right now and seeing yellow leaves, don’t panic. Get your scissors, sterilize them, and cut the yellow leaves at the base. Do it now, before the problem spreads. Then follow my weekly routine. In two weeks, you’ll see a difference. I guarantee it. Not because I’m special, but because plants respond to light, air, and space. Give them those three things, and they’ll thank you.





