 bluename
spider plant Fertilizing Schedule: High-Nitrogen in Spring & Autumn, Low-Fertilizer in Winter
You love your spider plant. It’s resilient, it grows those charming little “spiderettes,” and it purifies your air. But then, you notice something off. The leaves are losing their vibrant stripes, turning a bit pale, or maybe growth has just… stopped. You water it faithfully, give it light, but something’s missing. If this sounds familiar, you’ve likely stumbled upon the most common, yet easily overlooked, aspect of spider plant care: the fertilizing schedule. I’ve been there, staring at a languishing plant, wondering what secret I wasn’t in on.
After years of trial, error, and a few tragic over-fertilizing incidents, I’ve landed on a rhythm that works wonders: a spider plant fertilizing schedule that emphasizes high-nitrogen fertilizer in spring and autumn, and a strict low-fertilizer approach in winter. This isn’t just a guess; it’s a practice backed by the growth cycles of the plant itself and supported by authorities like the Royal Horticultural Society (RHS), which notes that foliage plants like spider plants benefit most from nitrogen-rich feeds during active growth periods.
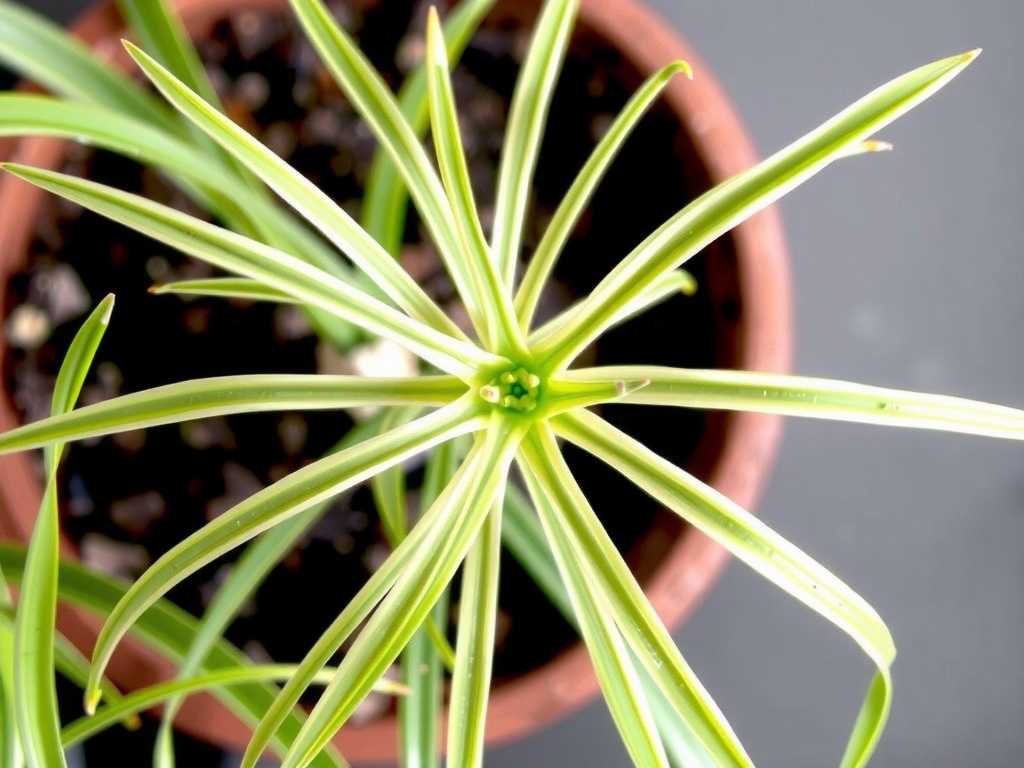
Let me walk you through my exact process, the dramatic two-week transformations I’ve witnessed, the mistakes I’ve made (so you don’t have to), and how this simple seasonal schedule can unlock your spider plant’s full potential.
Understanding the Spider Plant's Natural Rhythm
Before we talk about fertilizer, we need to listen to the plant. Spider plants (Chlorophytum comosum) have distinct growth phases. Spring and early autumn are their power hours. Longer daylight and warmer temperatures signal it’s time to push out new leaves and, famously, those offshoots or “pups.” This is when the plant is hungry for resources.
Summer can be a continuation of growth, but often at a slightly slower pace due to heat stress. Winter, however, is a time of dormancy or significantly reduced activity. The plant’s metabolism slows down. Feeding it heavily during this time is like offering a full banquet to someone who’s hibernating—it can’t process the nutrients, leading to a harmful buildup in the soil.
My Go-To High-Nitrogen Fertilizer Strategy for Spring & Autumn
This is where the magic happens. I follow a simple, consistent routine during these active seasons.
The Product I Use: I opt for a balanced, water-soluble fertilizer with a slightly higher nitrogen (N) ratio. Something like a 10-5-5 or 7-3-3 NPK formula is ideal. The American Horticultural Society (AHA) emphasizes that nitrogen is crucial for promoting healthy, green leaf development, which is exactly what we want for those striped or solid green leaves. I always choose a formula that includes micronutrients like iron and magnesium, which are vital for preventing chlorosis (yellowing leaves).
My Step-by-Step Application Process:
- Timing is Everything: I begin my spring fertilizing regimen in early March, as daylight increases. I resume the high-nitrogen fertilizer routine in early September for the autumn push.
- The Dilution Rule: I never, ever use fertilizer at full strength. Root burn is a real and present danger. I dilute the fertilizer to half the strength recommended on the package label. My spider plants thrive on a gentle, consistent diet.
- Application Method: I fertilize only when the soil is already moist. I water the plant lightly with plain water first, then follow up with the diluted fertilizer solution. This prevents the concentrated salts from hitting dry roots directly. I apply it until the solution just begins to drain from the pot’s bottom.
- Frequency: I stick to a schedule of fertilizing spider plants every two weeks. This consistent, light feeding mimics a steady supply of nutrients in their natural environment.
The Two-Week Transformation: A Case Study from My Windowsill
Last spring, I had a mature ‘Vittatum’ spider plant that had produced many pups but whose main rosette looked tired. The leaves were a dull green, and it hadn’t put out a new leaf in weeks. I committed to my high-nitrogen schedule.
- Week 1: After the first feeding, I didn’t expect much. The key here is patience.
- Week 2: This is when the change began. I noticed a definite brightening in the color of the central leaves. The white stripes seemed more pronounced. Most excitingly, at the base of the plant, two new, tightly furled leaves had emerged—a sure sign of activated growth.
By the end of the second week, the plant had a visibly refreshed appearance. It wasn’t a dramatic overnight change, but a clear, healthy revitalization. The new leaves continued to unfurl over the following weeks, and a month in, it sent up a new flower stalk, precursor to more spiderettes. This two-week mark is typically when you’ll see the first tangible signs that your schedule is working.
The Critical Low-Fertilizer Winter Protocol
As daylight wanes in late October, I make a decisive shift. This is perhaps the most important part of the spider plant care calendar.
I completely stop all fertilizing from November through February. The plant is resting. Its water needs also diminish, so I water only when the soil is completely dry halfway down the pot. The goal in winter is simple: sustain, don’t stimulate.
I learned this lesson the hard way. One winter, thinking I was giving a “boost,” I gave a half-strength feed. Within days, the leaf tips began to brown excessively—a classic sign of fertilizer salt accumulation. The plant was unable to use the nutrients, and they built up, damaging the roots and causing “tip burn.” The solution was immediate: I placed the plant in the sink and ran lukewarm water through the soil for several minutes to flush out the excess salts—a process known as leaching. I then left it to dry thoroughly and didn’t water again for a long while. It recovered, but it was a stressful setback I could have easily avoided.
Common Pitfalls and How I Solved Them
The Burned Leaf Tip Dilemma: This is the #1 issue. Many assume it’s a watering or humidity problem (and it can be), but often it’s fertilizer salt buildup. My fix is two-fold: First, I always use the half-strength dilution. Second, every third watering during the growing season, I skip fertilizer and just use plain water to help flush any residual salts.
The “No-Pup” Problem: If your plant is healthy but won’t produce babies, it might be ironically too comfortable. Spider plants often produce offsets as a stress response or when they are slightly root-bound and actively fed. Ensuring a proper spider plant feeding schedule with high-nitrogen during growth seasons, combined with not potting it into an excessively large container, can encourage pupping.
Overwatering vs. Over-Fertilizing: Symptoms can look similar: yellowing leaves. The key difference is in the pattern and soil feel. Overwatering leads to widespread yellowing, often starting with lower leaves, and constantly wet soil. Over-fertilizing burn often starts with crispy brown tips and margins, and can cause sudden leaf drop. When in doubt, I err on the side of underfeeding and check the soil moisture first.
Your Spider Plant Fertilizer Questions, Answered
Can I use homemade fertilizer, like coffee grounds, for my spider plant? I’ve experimented with this. While coffee grounds can add organic matter to soil over time, they are not a reliable, immediately available source of balanced nitrogen for potted plants. They can also compact the soil and encourage mold. For a controlled, effective spider plant nutrient regimen, I find a dedicated liquid fertilizer formulated for houseplants to be far more predictable and successful.
My spider plant leaves are mostly green, losing their variegation. What’s wrong? This is often a light issue, but fertilizer can play a role. Too much nitrogen in low light conditions can push rapid but weak, overly green growth. Ensure your plant gets bright, indirect light. If light is sufficient, double-check that your fertilizer isn’t too strong, and consider a product that also includes micronutrients to support overall leaf health and coloration.
Is it okay to fertilize a spider plant that has just been repotted? I avoid it. Fresh potting mix almost always contains some slow-release nutrients. Fertilizing on top of that is overkill. I wait at least 6-8 weeks after repotting before resuming my fertilizing schedule to allow the plant to settle into its new home and use up the existing nutrients in the fresh soil.
Finding the right rhythm for feeding your spider plant transforms it from a survivor into a thriving showpiece. By syncing your care with its natural cycle—providing generous high-nitrogen support in the vibrant growth periods of spring and autumn, and stepping back to a minimalist, low-fertilizer approach in the quiet winter—you work with nature, not against it. Observe your plant, start with a diluted solution, and give it those two weeks to show you its gratitude. The result will be a lush, vibrant plant that fills your space with life, season after season.





