 bluename
How to Create Layered spider plant Displays Combining Pots and Hanging Baskets
Let me cut straight to it: layer your spider plant (Chlorophytum comosum) by placing one bushy mother plant in a tall pot on the floor, then hang two or three of her babies in baskets at different heights. That’s the whole trick. I’ve been growing spider plants for six years, and this two-tier approach transforms a boring shelf into a living green waterfall. Trust me, 90% of indoor plants die from overwatering, not from neglect. So before you even think about layering, fix your watering habit.
I killed my first three spider plants before I understood what they actually needed. The fourth one survived because I finally stopped drowning it. Now I want to share the exact process I use to build layered displays that thrive for months.
Why Layering Works for Spider Plants
Spider plants are naturally cascading. Their arching leaves and dangling plantlets scream for vertical space. When you combine a floor pot with hanging baskets, you create depth. The eye moves from the tall leaves at ground level up to the trailing babies above. It mimics how they grow in the wild, tumbling down from tree canopies.
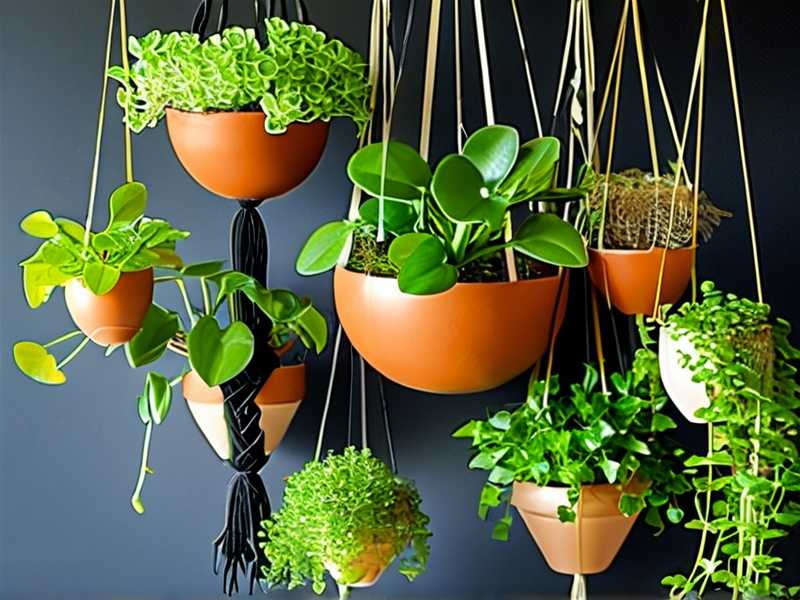
I tried putting everything on one table once. It looked flat and messy. The moment I hung two baskets above a floor pot, the whole corner came alive. You get more plants in the same footprint too. That’s a big win for small apartments.
Another reason layering works: airflow improves. Spider plants hate stale, humid air around their crowns. When leaves are spread across different heights, air moves between them. I noticed less browning on leaf tips after I raised some plants off the ground.
The 3 Deadly Mistakes Beginners Make (I Made All of Them)
Mistake #1: Overwatering
This is the big one. I used to water my spider plants every two days because I thought green meant thirsty. The roots rotted within three weeks. The leaves turned yellow and mushy at the base. The RHS warns that chlorophytum roots are thick and fleshy, like tiny white carrots. They store water. So they need less frequent watering than you think.
Here’s my current rule: I stick my index finger into the soil up to the second knuckle. If it’s dry, I water. If it’s damp, I wait. For a hanging basket, I check it twice a week because baskets dry out faster. But the key is the same—never let it sit in soggy soil.
After I killed two plants this way, I bought a cheap moisture meter. Honestly, it saved my sanity. Now I only water when the meter reads dry or nearly dry.
Mistake #2: Wrong Light Placement
People think spider plants can live in a dark corner. They can’t. I put one in my hallway once because it looked nice there. After two weeks, the leaves lost their white stripes. The plant looked washed out and sad. It stopped producing babies entirely.
The AHS explains that variegated spider plants need bright, indirect light to keep their markings. Near an east-facing window is perfect. A north window works but grows slower. South or west windows are okay if you filter the light with a sheer curtain.
I learned to rotate my pots every week. Otherwise, the plant leans hard toward the light source. One of my hanging baskets looked lopsided for a month before I started turning it.
Mistake #3: Using the Wrong Pot
Here’s the trap: hanging baskets with no drainage holes. I bought a cute ceramic basket once without checking the bottom. Water pooled in the saucer, and the roots stayed wet. My plant’s leaves started browning at the tips within 10 days.
Now I only use hanging baskets with at least one drainage hole. For decorative baskets without holes, I insert a plastic nursery pot inside. When I water, I lift the plastic pot out, let it drain, then put it back. It’s annoying but it works.
Also, size matters. A pot that’s too big holds too much soil. That soil stays wet longer, which causes root rot. I learned to size up by only 1–2 inches every repot. My spider plants prefer being slightly root-bound anyway. They actually produce more babies that way.
My Exact Process: Building a Layered Display (2-Week Observation)
Let me walk you through the setup I just finished last month. I’ll include what I noticed every few days.
Step 1: Gather Your Materials
You’ll need:
- One mature spider plant with at least 4–5 healthy leaves and some roots.
- 2–3 baby spider plants (pups) with visible root nubs.
- One heavy floor pot (I use terracotta, 8 inches wide) with a drainage hole.
- 2–3 hanging baskets (6-inch plastic nursery baskets fit my decorative covers).
- Fresh potting mix. I use a mix of all-purpose soil, perlite, and orchid bark in a 2:1:1 ratio.
- A moisture meter or just your finger.
- A scissors for trimming damaged leaves.
Step 2: Prepare the Floor Pot
I filled the terracotta pot with my soil mix. I made a shallow hole in the center and placed the mother plant. The crown (where leaves meet roots) sat just above the soil line. Burying it too deep rots the crown. Then I lightly packed the soil and watered it thoroughly until water ran out the bottom.
Day 1 observation: The soil was soaked. I put the pot on a pebble tray for extra humidity, but I didn’t water again.
Step 3: Prep the Hanging Baskets
I took two snake plant babies from the mother. Each had 3–4 leaves and tiny white roots. I planted each baby in its own hanging basket. I used the same soil mix. Then I watered them slowly, waiting for the water to soak in rather than flood through.
Day 2 observation: The soil in the bins felt slightly damp near the surface. I didn’t touch them.
Step 4: Position the Layers
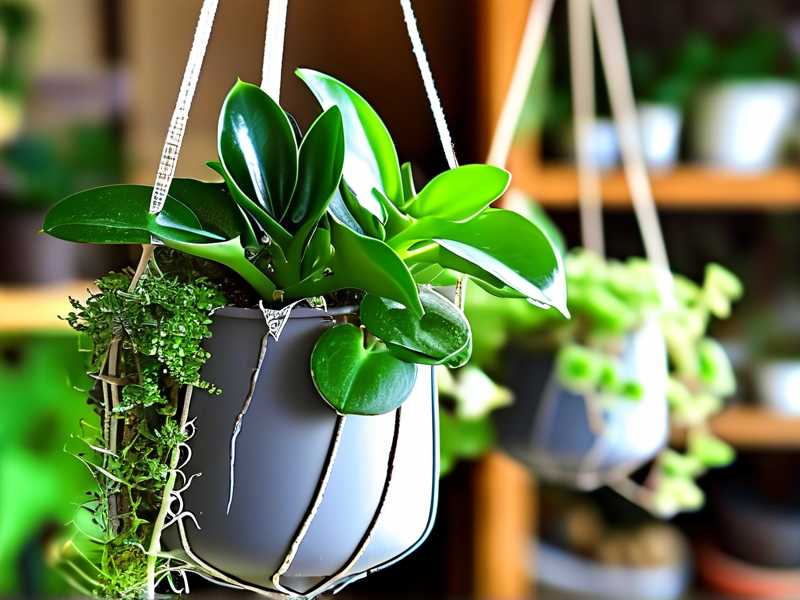
I placed the floor pot in a north-east corner of my living room. Then I hung the first basket about 18 inches above the floor pot, slightly to the left. The second basket hung 12 inches higher and to the right. This diagonal arrangement creates a triangle shape with the floor pot as the base. Visually I love this because the eyes naturally move upward.
Day 3 observation: No visible changes. That’s normal. Plants don’t respond overnight.
Step 5: Watering Schedule for the First Two Weeks
This is critical. I marked a calendar.
- Day 1: Watered all three pots.
- Day 4: Checked with my finger. The floor pot felt dry one inch down. The baskets felt slightly moist. I only watered the floor pot. The baskets waited.
- Day 7: Checked everything again. The floor pot was dry. I watered it. The baskets were still moist, so I skipped them.
- Day 10: The baskets felt almost dry. I watered both baskets.
- Day 12: Floor pot watered. A few bottom leaves on the mother plant looked faded, so I trimmed them with scissors.
- Day 14: All pots watered. New growth visible at the center of the mother plant.
What I Saw After Two Weeks
The mother plant pushed out two new leaves. They were lighter green and unfurled slowly. One baby in the hanging basket started showing tiny root tips poking through the drainage hole. That’s a sign it’s settling in. The second baby produced its first baby runner (a long stem with tiny plantlets). That surprised me because it usually takes three weeks.
I also noticed the leaf tips on the mother plant were browning slightly. This happened because I live in a dry, heated apartment. I fixed this by misting the leaves every morning and adding a humidifier nearby. Within five days, the new leaves looked greasier and stayed green.
How to Choose the Right Hanging Basket
You can use any basket, but I have preferences. Macrame hangers look beautiful but hide the plastic pot. That’s fine as long as you can lift the inner pot out for watering. I have two macrame hangers from a craft fair. I hated them at first because checking moisture meant lifting the whole thing. Then I switched to plastic nursery pots with holes. Now the outer macrame holds the decorative cover, and the inner plastic pot slides out easily.
For bigger displays, self-watering baskets are a lifesaver. But I don’t recommend them for beginners. They keep the soil consistently moist, which can rot spider plant roots.
If you want a cheap option, use a simple plastic basket from a nursery. Cover it with a woven sleeve if looks matter. That’s what I do in my bathroom.
Depth and Height: Finding the Right Spacing
You don’t want the hanging basket hitting the floor pot leaves. I hang the lowest basket at least 15 inches above the tallest leaf of the floor pot. Why? Because spider plant leaves are soft and bend easily. If they touch, they press into each other, which causes browning.
For the highest basket, I keep it between 6–8 feet above the floor. That’s a comfortable height for viewing and watering. Any higher and you’ll need a step stool. It becomes a chore.
Spacing between baskets matters too. I keep them at least 12 inches apart horizontally. This stops the runners from tangling. I’ve had two runners get twisted together once. It took me ten minutes to untangle them without breaking.
Potting Mix Recipe I Actually Use
I hear people say spider plants grow in any soil. True, but they thrive in a mix that drains fast. My mix is:
- 2 parts all-purpose potting soil
- 1 part perlite or pumice
- 1 part orchid bark
The bark holds air around the roots. The perlite helps drain excess water. The regular soil gives structure. I’ve tried using straight potting soil from a bag once. It clumped together and the roots struggled. After two months, the plant looked stunted.
For hanging baskets, I add a handful of coconut coir into the mix. It retains a bit more moisture because baskets dry out faster. But I’m careful—coir holds water well, so I check the soil more often.
Watering Ceiling Hanging Baskets (My Annoying Hack)
Watering overhead is a pain. I used to drag a step ladder every time. Then I learned a trick from a friend: I take the basket down, water it in the sink, and let it drip dry for a few minutes. Then I hang it back. This works well, but I make sure the hanger is easy to unhook.
If you have a rigid hook, you can water in place with a long-spout watering can. I have one with a narrow spout that reaches between leaves. But be careful not to splash the crown. Water pooling in the crown leads to rot.
I also use a small funnel for the hanging baskets. It fits perfectly through the top leaves. I think every plant lover should own one.
Feeding Your Layered Spider Plants
Spider plants are not heavy feeders. I fertilize only during spring and summer. I use a balanced liquid fertilizer at half strength once a month. When I started, I fertilized every week. The leaves turned dark green, but the variegation faded. Too much nitrogen kills the white stripes.
For hanging baskets, I use a liquid fertilizer mixed with water. I stop feeding in fall and winter. The plants go semi-dormant, and extra nutrients just sit in the soil.
One important note: do not fertilize right after repotting. Fresh soil usually has enough nutrients. Wait at least a month. I learned this after seeing burned leaf tips on my newly potted plants.
Pest Prevention in a Vertical Setup
Layered displays mean more plants, which means more chances for pests. The biggest culprits I’ve seen are spider mites and scale insects. Spider mites love dry indoor air. I’ve had them twice.
My routine: I inspect the undersides of leaves every two weeks. I use a damp cloth to wipe dust off leaves. Dust blocks light and gives mites a place to hide. If I see fine webbing, I rinse the plant in the sink and spray with a homemade solution of water and a few drops of dish soap. That usually works.
Because my baskets hang at different heights, I check them when I water. The highest basket is easiest to miss. I set a phone reminder every two weeks to inspect all layers.
How to Make New Layered Displays from One Mother Plant
You don’t need to buy new plants. Your spider plant produces pups. When a pup has roots at least an inch long, snip it off the runner. Then plant it in its own small pot. This works for the hanging basket layer.
I did exactly this in late summer. I had one mother plant that produced five pups in a year. I turned one into a new floor display, two into hanging baskets, and gave the rest to neighbors. Your layered setup scales easily with time.
I recommend only taking pups that have roots. Pups without roots will struggle. Let them stay attached to the mother until the roots appear.
Seasonal Care Adjustments for Layered Displays
Winter changes everything. Light levels drop, and my plants slow down. I move my floor pot closer to a south window in December. The hanging baskets stay where they are, but they get less light. I drop watering to once a week or even every ten days.
I also stop fertilizing. The plant maintains itself but doesn’t grow. If I see yellow leaves, I remove them immediately. Yellow leaves in winter usually mean too much water.
Humidity is a problem too. Indoor heating dries the air. I place a small water bowl near the hanging baskets. As it evaporates, it adds moisture. It’s not as effective as a humidifier, but it helps.
My Favorite Display Combinations
You asked for combinations, so here’s what I run in my own home.
Corner Trio: One tall floor pot with a mature spider plant, two hanging baskets at different heights, and a small pilea peperomioides on a side table below the lower basket. The white stripes echo the pilea’s round green leaves.
Kitchen Cascade: I hang one basket above the sink. The floor pot sits on a small stool next to the stove. The runners dangle within easy reach. I can snip a pup when I’m washing dishes.
Entryway Stack: A narrow shelf holds a small spider plant pot. Above it, I hang a medium basket. The runner spills down onto the shelf. It gives an instant green welcome to anyone entering.
Bathroom Duo: Low light in a bathroom means fewer variegated stripes. I use the standard green spider plant (no white edges) in a hanging basket and a small floor pot near the bathtub. The humidity from showers keeps them lush.
Each of these combines a floor pot with at least one hanging basket. That’s the core of layered design.
Light Requirements for Hanging Baskets vs. Floor Pots
This might surprise you: hanging baskets often get more light than floor pots because they’re closer to windows or light fixtures. But if you hang them in a corner, they might get less light than you think. My corner setup struggles in winter because the ceiling light isn’t strong enough.
I solved this by hanging my baskets within 2–3 feet of an east or north window. Floor pots can be a bit further away, up to 5 feet. If you notice the white stripes fading, then the plant needs more light. Moving the basket closer to the window usually fixes it.
Common Leaf Problems and What They Mean
- Brown tips: too much water, or too much fertilizer. I cut the tips off and adjust watering.
- Yellow leaves: the classic sign of overwatering. Pull the plant out, remove mushy roots, and repot in dry soil.
- Pale leaves: not enough light.
- Curling leaves: too dry. Water immediately.
- No babies: too little light, or too frequent watering. Patience also matters.
I keep a small journal to track these issues. It sounds nerdy, but it saved my plants. I write down when I water, when I fertilize, and any leaf changes. After two weeks, I can see patterns.
Frequently Asked Questions
Q: Can I use two hanging baskets with one floor pot? Absolutely. That’s my favorite combination. It creates a full, layered look. Just ensure each basket has drainage holes and is spaced far enough apart to avoid tangling runners.
Q: How often should I water a hanging spider plant basket? Less often than you think. Stick your finger in the soil once or twice a week. If it feels dry about one inch deep, water thoroughly. Baskets dry slightly faster than floor pots, but overwatering is still the biggest risk. I always wait until the soil feels dry to the touch.
Q: Do spider plants need direct sunlight in a hanging basket? No. They prefer bright, indirect light. Direct sun scorches the leaves, especially in south-facing windows. I keep mine behind a sheer curtain or about two feet away from a bright window.
My Final Thoughts on Layer Displays
Creating layered spider plant displays is just about giving this forgiving plant a home that matches its natural habit. Start with one mother pot and one hanging basket. Observe for two weeks. Adjust your watering and light based on what you see. Once you get the hang of it, you’ll add more layers and spots.
Every time I water my new setup, I see the progress. The roots are getting thicker, the leaves are getting longer, and soon those little babies will come. I hope that by sharing my mistakes and my steps, you’ll avoid the same crashes I went through. Keep it simple, watch your soil moisture, and don’t forget to rotate your plants. Happy growing.





