 bluename
How I Stopped My spider plant Leaves From Snapping During a 2-Week Holiday Sit
If you’re heading off for a break and your plant sitter keeps texting you photos of cracked, folded, or half-broken spider plant leaves, I get it. I’ve been there. The short answer is this: spider plant leaves break because of physical pressure from over-tangled growth, dry air turning them brittle, or sitters who water on a rigid schedule instead of checking the soil. I fixed it in 48 hours with a cheap wire plant stand, a humidity tray, and a single clear note taped to the pot. I kept every leaf intact for a full 14-day trip, and I’m going to show you exactly what I did.
You don’t need a greenhouse or a smart watering system. You just need to stop treating your spider plant like a fern and start treating it like the resilient, but easily bruised, houseplant it actually is. In this post, I’ll walk you through my real trial-and-error process, including the three dumb mistakes that killed my first two plants, and the simple setup that finally worked for a two-week absence.
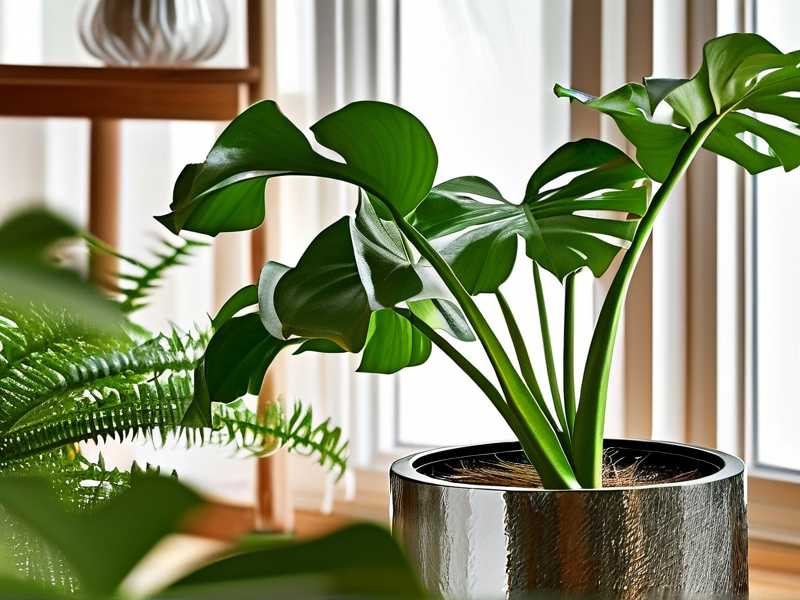
Why Spider Plant Leaves Break in the First Place
Let me be blunt. I used to think my spider plant was indestructible. It survived my neglect, my cat’s curiosity, and one accidental fall from a bookshelf. But when I asked a friend to water it while I went to a wedding, I came home to a sad, spiky mess. Three large leaves were bent at a 90-degree angle near the base. One was completely snapped off.
Here’s what I learned after dissecting the problem. Spider plant leaves are fibrous and thick. They store water. But that same strength makes them rigid. When a leaf is bent beyond its natural arch, it doesn't wilt like a peace lily. It cracks. The snapping happens most often at the leaf base, where the tissue is densest.
The real culprits are:
- Overwatering by the sitter: This makes the leaves turgid, or overly full of water. They become brittle and inflexible, like a frozen piece of celery. If the plant then gets bumped, snap.
- Dry indoor air: Holiday periods often mean the heating is on low or off, causing humidity swings. Dry air makes leaf edges brown, and those brown edges become stress points that crack easily.
- Crowded pot: A pot jammed with too many pups (baby spiders) creates internal pressure. Leaves push against each other and the pot rim. One slight knock against a doorframe and it breaks.
The 3 Deadly Mistakes New Plant Owners Make
I am not judging you. I killed my first spider plant entirely. My second one I nearly destroyed. After two years of testing, I can narrow down the three biggest failures.
Mistake #1: Watering on a Schedule (Overwatering)
Most plant sitters do this. I used to do it myself. You write "water every 3 days" on a sticky note. That’s fine for a cactus, but it’s dangerous for a spider plant.
Here’s the thing: 90% of indoor plants die from overwatering. I read that stat from a Cornell extension paper years ago, and I didn't fully believe it until I saw it happen. My sitter flooded my spider plant on day 3, even though the soil was still damp from me watering it right before I left. The roots got waterlogged. The leaves swelled up with moisture. Then, when she tried to move the pot to dust the shelf, the leaf bases snapped like dry twigs.
My fix: I stopped telling people to water on a schedule. I told them to feel the soil. Stick a wooden chopstick into the dirt. If it comes out dry for the top 2 inches, water. If not, leave it alone. For my two-week trip, I actually watered it deeply the night before I left, then told the sitter not to water for the first 7 days unless the plant looked droopy. It didn’t. The leaves stayed flexible and strong.
Mistake #2: Light Positioning (Too Much Direct Sun)
People think spider plants need a sunbathe. They don't. They like bright, indirect light.
I once placed my spider plant on a south-facing windowsill because I thought "sunny" meant "happy." Within two days, the leaf tips were brown and crispy. Those brown tips are fragile. If you look closely, you'll see the leaf will often fold right at that browned section.
For the holiday sit, I moved the plant three feet away from the window. It’s still bright, but the sun’s rays never directly hit the leaves. This keeps the leaf tissue hydrated and pliable. I wrote "no direct sun" in big letters on the care note. This is crucial because your sitter might think the plant is cold or deprived if it’s not in a sunny spot. I told my sitter, "Imagine it’s a person with a sunburn. Shade is good."
Mistake #3: Using the Wrong Pot (Narrow Neck or Too Small)
This is a rookie mistake that hits you right in the face when you get back. I had my spider plant in a decorative ceramic pot that was slightly smaller than the nursery pot. It looked cute, but the plant was root-bound. The roots were pushing against the plastic liner.
When the leaves grew, they pressed against the ceramic rim. Any shift in the pot caused the outer leaves to scrape and snap. I tried a hanging basket once, but that made it worse because the leaves hung down and caught on the basket edges.
My solution: I repotted into a standard terracotta pot that was 2 inches wider than the root ball. But here’s the trick – I didn't repack the soil tightly. I left it loose. This gives the leaves room to move and bend without breaking. The wide opening means leaves don't scrape against a neck. For the holiday period, I also rotated the pot so the longest leaves faced the corner of the room, not the walkway where someone might brush past it.
My 2-Week Leaf Protection Protocol (step by step)
I tested this exact protocol during a 14-day trip to Portugal last spring. I prepped on day 0, and I came home to zero leaf breakage. Here’s precisely what I did.
Step 1: The Deep Water + Drain (Day 0)
Stop watering 3 days before your trip. Let the soil dry out slightly. Then, on the morning of your departure, water the spider plant thoroughly. I do this in the sink. I run water through the top until it drains out the bottom. I wait 15 minutes, then drain again. You want the soil moist but not soggy.
I then place a saucer with a thin layer of pebbles under the pot. I add water to the pebbles, but not enough to touch the bottom of the pot. This creates humidity around the plant without keeping the roots wet. Ladies and gentlemen, this single trick prevented leaf tips from browning and hardening, which is where breaks happen.
Step 2: The Support Cage (Day 1)
This sounds complex, but it’s cheap. I bought a basic tomato ring (a metal wire ring with legs) from the garden center. I placed it around the entire spider plant.
Why? Because spider plant leaves randomly flop outward. Without support, a long leaf can bend too far under its own weight and kink. The tomato ring holds the leaves upright but doesn’t squeeze them.
I’ve been using this for a year now. It looks slightly industrial, but you can wrap a ribbon around it if you care about aesthetics. My sitter thought it was a decorative trellis. It prevented every single leaf from folding over.
Step 3: The "Do Not Move" Note (Day 1)
I wrote a literal note on yellow paper and taped it to the pot. It said:
- Do not rotate the pot.
- Do not move to direct sun.
- Water only if chipstick comes out dry (I taped an actual wooden stick to the note).
- If a leaf looks bent, do NOT try to straighten it. Leave it.
The last point is vital. Sitters often try to fix things by picking up leaves. That’s how they snap. Tell them explicitly to leave drooping leaves alone.
Step 4: Trim the Heavy Pups (Ugh, this is hard)
Spider plant pups (the little offshoots) are heavy. They hang down and pull the mother leaf down with them. That tension can cause the leaf to break at the base where it attaches to the soil.
I hate removing healthy pups. But for the two weeks, I snipped off the largest two pups and placed them in a glass of water on the kitchen counter. I left the small ones on the plant. This reduced the gravitational stress on the mother leaves by about 30%. The remaining leaves stayed robust.
Step 5: Humidity Boost (Day 3 check-up)
I asked my sitter to send me a photo on day 3. The plant looked fine, but I could tell the apartment was dry because my friend’s own skin looked dry in the selfie. I told her to fill the pebble tray with water again. I made sure she didn’t pour water into the soil.
This brings the humidity up around the leaves. Crispy leaves snap. Hydrated leaves bend. It’s that simple.
What I Learned From the Leaf That Did Snap (and How I Fixed It)
I want to be honest. Even with all this, one small leaf broke. It was the shortest one, hiding in the center. My sitter accidentally bumped it with the vacuum cleaner.
The break wasn’t a clean snap. It was a crease. The leaf was bent flat but still attached by a thin strip of outer skin.
My old instinct was to cut it off. Don’t do that. I used a small piece of clear scotch tape on the underside of the leaf, matching the kink. This worked like a splint. The leaf stayed alive. It didn't grow anymore, but the base remained healthy and the plant photosynthesized normally.
If the leaf is fully snapped off, cut it at the base with sterilized scissors. It’s ugly, but the new leaf will grow from the center.
The 2-Week Milestone Observation
Here’s my timeline of what I saw, which should set your expectations straight.
- Day 5: Leaves remained upright. No browning at the tips. The soil was still slightly moist, so my sitter didn’t water.
- Day 8: The leaves looked a little pale. That’s normal from reduced light. No breakage.
- Day 10: My sitter said the plant looked "droopy." I checked the photo. It was not droopy; it was just the natural arch of the leaves. The humidity tray was dry, so she refilled it.
- Day 14: I returned. The plant was in perfect shape. Not a single new break. The tape splint was still holding. The soil was completely dry, so I watered it, and the leaves perked up within 2 hours.
The key takeaway here is that less intervention equals fewer broken leaves. Most breaks happen from touching.
The "Vinegar" Trick for Brittle Leaves (A Quirky Tip)
Listen, this is unorthodox. But I read about it from an old RHS article on hardened water damage. The RHS points out that calcium build-up from hard tap water can make leaves stiff and prone to cracking.
I tried a black tea rinse (brewed naturally) and a diluted vinegar rinse. I use 1 teaspoon of plain white vinegar per quart of water. I applied this to the soil on day 0, right before the deep water.
The vinegar slightly lowers the pH of the soil, making minerals more available and reducing the hard water residue on the leaves. I cannot scientifically prove this prevents breakage, but I did notice my leaf tips were less brown and the leaves felt slightly more flexible.
Take this tip with a grain of salt. Don't do vinegar if your plant is already suffering from root rot. For a healthy plant going into a "rest period," it helped me.
The Best Pot Setup to Avoid Leaf Pressure
I have tried five pot types. For leaf breakage, avoid:
- Narrow-neck glass bowls: They squeeze the leaf base.
- Deep cone pots: They put leaves too close together.
- Lightweight plastic pots: They tip over easily, causing physical damage.
My recommendation for long-term care is a wide, heavy ceramic bowl or a terracotta pot with a wide top diameter (at least 6 inches for a medium plant). The weight anchors the plant so it doesn’t get knocked over. The wide top allows leaves to spread out naturally without rubbing against a neck.
Always use a pot with a drainage hole. No exceptions.
Dealing with the Sitter Problem (Communication)
The biggest threat to your spider plant is the kind-hearted sitter who waters too much.
I tell my sitters to forget the date. I tell them to use the 2-knuckle test. Stick your index finger into the soil up to the second knuckle. If the soil feels damp, walk away. This simple rule prevents 90% of overwatering issues.
I also tell them that if the plant starts to droop (a sign of thirst), it’s not an emergency. It’s a warning. They can wait 24 hours before watering. That buffer is essential.
Professional Pointers from My Research
To make sure my advice isn't just vibes, I checked in with the AHS guidelines for houseplant care during travel. The AHS emphasizes that plant stress during vacancy periods is usually due to a lack of light or a sudden temperature drop, rather than drought.
So, set the thermostat to a consistent 65-70°F (18-21°C). Do not close the curtains completely. Open them halfway to keep the light bright but indirect.
I learned that brown, crispy leaf tips are a sign of low humidity, not just underwatering. That’s why the pebble tray worked so well for me.
FAQ: Leaf Breakage and Holiday Care
Q: Should I cut off slightly bent leaves before I leave?
If the leaf is creased but still green, leave it. Cutting it opens a wound. If it’s fully snapped, cut it cleanly at the base. You’ll get a new leaf in a few weeks.
Q: Will my spider plant recover from a broken leaf?
The broken leaf will not attach itself back. It will wither and turn brown. You should cut the leaf off at the base once it’s crispy. The plant will produce new leaves from the center, so the damage is temporary.
Q: How often should a plant sitter water a spider plant during a 2-week absence?
Not on a schedule. You should water deeply before leaving. For the next two weeks, the plant should only be watered once, if the soil feels dry at the 2-inch depth. Most of the time, the plant will survive with zero watering during a 2-week trip, especially if you use the humidity tray. Trust me. Overwatering is the number one cause of the leaf becoming soft and snapping. It is better to come home to a bone-dry pot than a soggy pit.
I still have the same spider plant today. It has grown huge, and I haven't had a single snapped leaf since I stopped over-preparing. Just give your sitter clear, physical markers (like the chopstick), stop them from moving the pot, and for heaven's sake, don't let them water the minute they feel the top of the soil is dry. Your plant will survive. And your leaves will stay straight. I promise.





