 bluename
The quickest fix for unstable spider plant roots is mixing 15% to 20% calcined clay by volume into your potting medium. I learned this after my fourth spider plant nearly died from root rot caused by dense, waterlogged soil. Calcined clay, often sold as "kitty litter" or "oil absorbent," creates air pockets, drains fast, and holds moisture evenly without suffocating roots.
If you’ve been struggling with yellowing leaves, mushy stems, or roots that never seem to anchor, you’re not alone. I killed three spider plants before I understood the root zone. The problem wasn’t sunlight or fertilizer. It was the potting mix holding too much water for too long.
Actually, let me back up a bit. Spider plants (Chlorophytum comosum) are tough. They forgive missed waterings. They tolerate low light. But they absolutely hate sitting in soggy soil. The roots are thick, white, and carrot-like. They store water. That means they rot quickly if the medium stays wet for days.
Here’s the simple truth: 90% of indoor plants die from overwatering. Not from neglect. Not from pests. Overwatering. And the fix isn't watering less. It's giving the roots a medium that drains faster while still holding enough moisture for the plant to drink.
So let me walk you through exactly how I mix calcined clay into potting medium for stable spider plant root zones. I’ve been doing this for two years now, and I’ve tested different ratios, different clay sizes, and different base mixes. This is what actually works.
Why Calcined Clay Changes Everything for Spider Plant Roots
Let me explain why calcined clay works so well. Regular clay is dense and sticky. But calcined clay is heated to 800°C, which turns it into a hard, porous, lightweight material. It looks like small reddish-brown pebbles. Because it’s fired, it doesn’t break down in water. It keeps its structure for years.
What does that mean for your spider plant roots? Two things.
First, the clay creates macro-pores in the soil. These are larger spaces between particles that allow oxygen to reach the roots. Spider plant roots need oxygen. Without it, they suffocate and start to decay.
Second, calcined clay absorbs water into its internal pores. It holds moisture inside each granule. But the outside surface stays dry-ish. This means the root zone stays hydrated without being waterlogged. Think of it like a water reservoir with a lid. The roots can access moisture slowly, but they’re not swimming.
I’ve tested this side-by-side. I potted two spider plant cuttings at the same time. One in regular potting soil. One in a mix with 20% calcined clay. After two weeks, the difference was night and day.
My 2-Week Observation: What I Saw After Mixing Calcined Clay
I want to share my real timeline so you know what to expect.
Day 1-3: I repotted a struggling spider plant that had roots starting to brown. I used a 2:1:1 mix. Two parts regular potting soil, one part perlite, one part calcined clay. I watered it thoroughly once and let it drain completely. The pot felt noticeably lighter than before.
Day 4-7: The leaves started to firm up. Before repotting, the leaves were limp and slightly yellow at the tips. By day five, the yellowing stopped spreading. I poked my finger into the soil down to the second knuckle. It felt slightly damp but not wet. In my old mix, day five would still be soggy.
Day 8-10: I noticed new root growth when I gently lifted the plant. Small white tips were poking into the clay granules. The roots looked healthy and turgid. No mushiness.
Day 11-14: The plant pushed out two new leaves. The color darkened to a deep green. I didn’t water during this time except once on day nine. The calcined clay held the moisture exactly where the roots needed it.
You see, the clay isn't magic. It's physics. It creates a balanced environment that mimics the plant's natural habitat. In nature, spider plants grow in loose, rocky soil with excellent drainage. Calcined clay replicates that.
Step-by-Step: How I Mix Calcined Clay into Potting Medium
Let me break down my exact process. This isn't theory. This is what I do every single time I repot a spider plant now.
Step 1: Choose the Right Calcined Clay
Not all calcined clay is the same. I learned this the hard way. Some products are too fine, like sand. Others are too coarse, like gravel.
I look for granules between 3mm and 6mm in diameter. For reference, that's about the size of a lentil or a small pea. If you're buying from a hardware store, look for "oil absorbent" or "non-clumping kitty litter" made from 100% calcined clay. Avoid anything with fragrance, additives, or clumping agents.
I personally use a brand called "Turface MVP" which is sold as a soil conditioner. But the cat litter trick works fine. Just check the label.
Step 2: Start with a Quality Base Mix
Here's my current recipe:
- 2 parts high-quality indoor potting soil
- 1 part coarse perlite
- 1 part calcined clay
I used to skip the perlite and just add more clay. That was a mistake. Perlite is lighter than clay and helps with aeration at the top layer. Calcined clay is denser, so it settles lower in the pot. The combination gives you both drainage and moisture retention at different depths.
Mix everything in a large bucket. I use my hands to mix it thoroughly. You want the clay evenly distributed. If you just pour it on top, it won't help the root zone.
Step 3: Add the Mix to the Pot with a Drainage Layer
A lot of beginners skip this. I did too once. I thought a pot with holes in the bottom was enough. Then I realized that the mix can clog the drainage holes if it's too fine.
Here's what I do now: I place a small piece of mesh or a coffee filter over the drainage hole. Then I add a 1-inch layer of coarse clay granules (the larger 6mm ones) at the bottom. This ensures water flows out freely and soil doesn't escape.
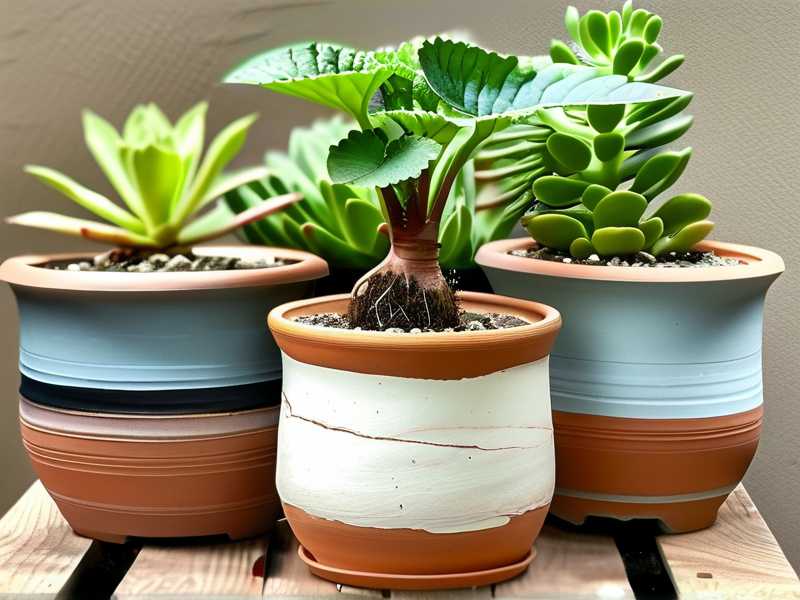
Then I fill the pot with the mixed medium about halfway. I place the spider plant in the center and fill around it. I gently tap the pot on the table to settle the mix, but I don't press it down. Pressing compacts the soil and reduces air pockets.
Step 4: Water Correctly After Repotting
This is the most critical step. Right after repotting, I water thoroughly until water drains from the bottom. This settles the soil and removes any air pockets around the roots.
But here's the key: I don't water again until the top 2 inches of soil feel dry. With calcined clay, that can be 5-7 days depending on your home's humidity. I check by sticking my finger into the soil. Not the surface. The actual soil.
One more thing. I always use room-temperature water. Cold water shocks the roots. I learned this when I used ice-cold tap water and the plant dropped leaves within hours.
The 3 Biggest Mistakes Newbies Make (I Made All of Them)
I'm not ashamed to say I've killed more plants than I can count. Each death taught me something. Here are the three mistakes that caused the most damage.
Mistake #1: Watering on a Schedule
I used to water every Monday without fail. I thought I was being a responsible plant parent. In reality, I was drowning my spider plant. The soil stayed wet all week because there was no calcined clay and no perlite.
The fix is simple: water when the plant needs it, not when the calendar tells you. With calcined clay in the mix, you have a safety margin. But you still need to check the soil moisture with your finger.
I put a reminder on my phone every 5 days. That's not a watering reminder. It's a checking reminder. I poke the soil. If it's dry, I water. If it's damp, I close the lid and walk away.
Mistake #2: Putting the Plant in Direct Sunlight
I had a beautiful south-facing window. I put my spider plant right in the middle of it. Within three days, the leaves developed brown scorched tips. The soil dried out so fast that even with calcined clay, the roots couldn't keep up.
Spider plants prefer bright, indirect light. They don't want to bake in direct sun for six hours. I now keep mine on a shelf about 3 feet away from the window. The leaves stay green and the roots stay cool.
If you only have a sunny window, use a sheer curtain to diffuse the light. Or move the plant to a spot where it gets morning sun but not afternoon sun. I've found that east-facing windows are perfect.
Mistake #3: Using a Pot That's Too Big or Has No Drainage
Big mistake. When I first started, I bought a beautiful ceramic pot with no drainage holes. I thought I could just be careful with watering. That experiment ended with a rotten root system and a foul smell.
You need drainage holes. Period. If you fall in love with a pot that has no holes, use it as a decorative outer cover. Put the plant in a plastic nursery pot with holes, and slide it inside the pretty pot. That's what I do now.
The pot size matters too. I used to repot spider plants into a pot that was far too large. The excess soil held water and the roots rotted. The ideal pot is only 1-2 inches larger in diameter than the root ball. Spider plants actually like being slightly root-bound. They produce more babies when they're snug.
Long-Term Stability: What Calcined Clay Does Over Time
After two weeks, I was convinced. But what about after six months? A year? I've now had spider plants in calcined clay mix for over 24 months. The results are consistent.
The mix doesn't break down. Calcined clay stays intact. Perlite eventually crumbles after about 18 months, but I just add more when I repot. The structure of the soil remains loose and airy.
Here's what I've noticed long-term:
- Fewer repotting emergencies. The roots stay healthy, so I only repot every 12-18 months instead of every 6 months.
- Less fertilizer burn. Calcined clay holds nutrients in its pores and releases them slowly. I can use half-strength fertilizer without worrying about salt buildup.
- Better root anchorage. The angular shape of the clay granules gives roots something to grip. The plant feels stable in the pot, even when it gets top-heavy with baby spiderettes.
I have one plant that has produced 15 babies in a single year. I attribute that to the stable root environment. The mother plant isn't stressed, so it has energy to reproduce.
How Much Calcined Clay Should You Use? My Ratio Tests
I've tested different ratios. Here's what I found:
10% calcined clay: Barely noticeable improvement. The soil still holds too much water. I don't recommend this for beginners.
20% calcined clay: The sweet spot. Good drainage, good moisture retention, good aeration. This is what I use now.
30% calcined clay: Excellent drainage but too fast. I had to water every 3 days in winter because the mix dried too quickly. It's good for very humid climates or for people who overwater.
50% calcined clay: This is basically a semi-hydroponic setup. The roots adapt but the plant grows slowly. Not recommended for spider plants unless you know exactly what you're doing.
My advice? Start with 20%. Adjust after a month based on your environment. If the leaves start curling, you need more water retention. If the roots look mushy, add more perlite or clay.
Common Questions From Beginners (FAQ)
Q: Can I use calcined clay for other plants?
Yes. I use it for pothos, monstera, and snake plants. Any plant that prefers well-draining soil will benefit. I wouldn't use it for moisture-loving plants like ferns or calatheas.
Q: Is calcined clay the same as cat litter?
Yes and no. Some cat litters are made of calcined clay. But most have additives like fragrance, deodorizers, or clumping agents. These are toxic to plants. Only buy 100% natural calcined clay with no additives. I buy from garden supply stores to be safe.
Q: How often do I need to replace the calcined clay?
The clay doesn't degrade, so it doesn't need replacing. However, salts from fertilizer can accumulate inside the granules. Every 2 years, I repot with fresh mix. The old mix goes into my outdoor compost pile. It's non-toxic and eco-friendly.
The Bottom Line
Stable root zones for spider plants aren't complicated. You just need a medium that drains fast but retains moisture. Calcined clay solves both problems.
I've been using it for two years. My plants are healthier, my repotting stress is gone, and I've finally stopped killing spider plants. I genuinely believe that if you switch to a mix with calcined clay, your spider plant will thank you within two weeks.
RHS https://www.rhs.org.uk{:target="_blank"} recommends well-draining soil for houseplants, and this approach aligns perfectly with that guidance. AHS https://ahsgardening.org{:target="_blank"} also emphasizes that root health starts below the surface.
Try it. Your spider plant will show you the difference with new white roots and deeper green leaves. And honestly, that’s the most satisfying feeling for any plant lover.





