 bluename
The moment I decided to write this, I knew exactly which mistake you are probably making. You are topping up the soil in your spider plant pot, and you are terrified of wrecking the roots. I get it. I have been there. The short, direct answer is this: do not dig into the soil, do not pull the plant out, and never pack the new soil down tightly. You only need to work with the top two inches, and you need to do it while the soil is slightly moist, not soaking wet. That is the secret. Let me explain exactly how I do it, what I killed, and what finally worked.
I remember my first spider plant. I was so proud of it. The leaves were vibrant, and it was throwing out babies like crazy. Then autumn came, and I thought it needed a fresh layer of dirt. I grabbed a trowel and dug right in. I sliced through the thick, white, fleshy roots like I was cutting a cake. Within a week, the leaves started drooping. Within two weeks, it was mush. I lost the whole plant because I was too aggressive. That was my third killed plant. I only learned my lesson after that one.
Why Your Spider Plant Roots Are So Fragile
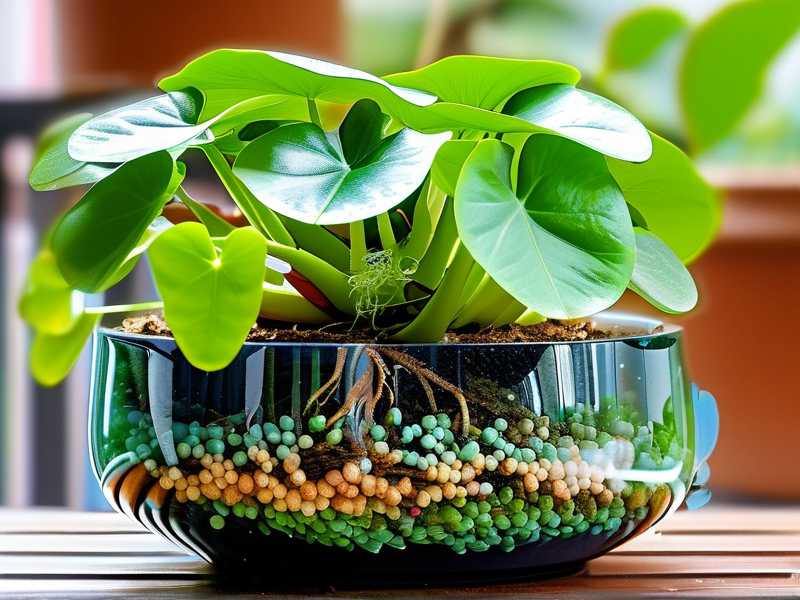
Spider plants, or Chlorophytum comosum, store water in their roots. These are thick, tuberous structures. They are surprisingly brittle. If you snap them, the plant cannot absorb water properly. The foliage will wilt even if the soil is wet. This is the most confusing symptom for beginners. The leaves look thirsty, so they water more, which then rots the damaged roots. It is a death spiral. I have seen it happen in my own home. The roots are the plant's lifeline, and they hate being moved.
My First Mistake: Treating Top Dressing Like Repotting
I used to think that adding soil meant I had to mix the new soil with the old. I would use a fork and try to fluff everything up. That is a disaster. The top layer of soil holds fine feeder roots. These are tiny hair-like roots that absorb most of the water and nutrients. When you mix aggressively, you tear these hairs off. The plant goes into shock. I noticed the leaves turning pale yellow at the base. That is a sign of root stress, not a nutrient deficiency. You have to let the old soil stay as a solid block and simply place new soil on top.
The Correct Way To Add Soil (My 2-Week Observation)
Here is the exact routine that saved my current plant. I usually do this, but I want you to do it once and watch for two weeks. First, I stop watering the plant for three days. This lets the soil dry out just a little. It should feel like a slightly damp sponge. Not dry dust, not dripping mud. Then, I take a small spoon or a narrow spatula. I gently scrape the top half-inch of loose, old soil away. I do not go deeper. I am just removing the crusty bits that have salt buildup or algae.
After that, I sprinkle fresh, dry potting mix over the surface. I use a soil mix that has perlite in it for drainage. I only add enough to bring the level up to where it was. Maybe a little higher. I never, ever push down on the soil. Compaction is the enemy. I just tap the side of the pot to let the soil settle naturally. The critical part is the watering. After adding the soil, I do not water immediately. I wait two days. This gives the roots a chance to adjust to the new material above them without being shocked by sudden moisture.
Over the next two weeks, I watch the leaves. For the first three days, nothing happens. Do not panic if it looks the same. On day four, you should see the new soil start to lighten in color as it dries. On day seven, I water the plant from the bottom. I sit the pot in a saucer of water for 15 minutes. This pulls moisture up slowly. The roots stay still, and the new topsoil gets a gentle drink. By day ten, the new soil will be integrated. By day fourteen, you should see new growth. If you see leaves browning, you went too deep. If you see the plant wilting, you packed the soil down too tight.
Three Fatal Mistakes Every Beginner Makes
I have to be honest with you. I made all three of these errors before I fixed my routine. First, 90% of indoor plants die from overwatering, and this is usually because we water right after adding soil out of habit. You do not need to water to "settle" the new dirt. It will settle on its own.
Mistake #1: Watering Excessively
I cannot stress this enough. When you add fresh soil, it holds more water than old, depleted soil. If you soak it immediately, you create a swamp. The roots below are already stressed from the disturbance. They cannot handle the oxygen loss. I lost a plant to root rot because I watered immediately after a top-up. The top of the soil looked dry in two days, but the bottom was a pool of sludge. Wait the two days. It is the hardest part, but it is vital.
Mistake #2: Light Placement Errors
I used to think that since the plant was getting new soil, it needed a boost of sunlight to grow. Wrong. I moved my spider plant to a south-facing window after a top-up. The combination of new root stress and intense direct light caused the leaves to bleach and curl. Spider plants need bright, indirect light. After any root disturbance, they need even less light. Keep them in the same spot they were in. Do not move them to a "better" location. The shock of moving is just as bad as the shock of digging. I keep mine in a north-east window, and it thrives.
Mistake #3: Using the Wrong Pot
This is a sneaky one. I used to have my spider plant in a decorative ceramic pot with no drainage hole. I thought topping up the soil was fine because I wasn't repotting. But the excess water had nowhere to go. The new soil held water against the old roots, and they suffocated. You must have a pot with holes. If you have a decorative outer pot, that is fine. But the growing pot inside must have drainage. If your spider plant is in a pot without holes, do not top up the soil. Repot it entirely into a proper pot first. Otherwise, you are just adding more material to a sealed container, which will inevitably rot the lower roots.
My Specific 2-Week Routine (Step-by-Step)
Let me walk you through the exact process I use. I have done this three times in the last year, and I have not lost a plant since. I start on a Saturday. I skip watering that weekend. The next Wednesday, I check the soil with my finger. If it is dry down to the first knuckle, I proceed. If not, I wait another day. I use a chopstick to gently loosen the top crust. I do not disturb the soil below the surface. I use my fingers to break up any large clumps in the new potting mix before I put it in. Clumps create air pockets that dry out the fine roots.
I sprinkle the new soil. I aim for a thin layer, about half an inch to one inch thick. I always use a mix specifically for indoor plants. I avoid garden soil at all costs. Garden soil compacts and can bring in pests like fungus gnats. I had a gnat infestation that lasted three months because I used yard dirt once. Never again.
On the following Saturday, I water the plant from the bottom. I place the pot in a shallow dish with two inches of water. I leave it for exactly 30 minutes. Then I take it out and let it drain. I do not water it again for another week. During the second week, I just watch. I do not fertilize. Fresh soil has enough nutrients. Fertilizing now will burn the recovering roots.
What I Saw By Day 14
The results were clear. By the end of the second week, the new soil had settled to about half the depth I originally added. That is normal. The old roots had pushed themselves up slightly into the new layer, which is a great sign. I could see tiny white tips of new roots at the surface. The new leaves were a darker green and stood up straighter. The plant looked fuller. I also noticed that the soil stayed moist longer, which meant I could reduce my watering frequency.
Tools I Use to Avoid Root Damage
I have a specific set of tools. I use a plastic fork to scrape the top layer. A metal trowel is too sharp. I also use a small spray bottle, not a watering can. After I add the soil, I mist the surface lightly. Just enough to dampen the top millimeter. This prevents dust from flying but does not soak down to the roots. I also rotate the pot a quarter turn every day for the first two weeks. This ensures all sides of the plant get the same light, preventing the roots from growing in only one direction.
Observations from the Experts
I checked the guidance from the RHS on caring for houseplants. They emphasize that most potting mixes contain enough nutrients for the first few months. They recommend against over-handling the root ball. They also suggest that top-dressing is a valid method to refresh the soil without the stress of a full repot. Specifically, the AHS notes that plants prefer stable soil environments. They point out that root disturbance triggers a stress response. This is why my method of waiting before watering works. It gives the plant time to alter its internal chemistry.
What To Do If You Already Damaged the Roots
If you have already dug in and broken some roots, there is a fix. Do not pull the plant out. Stop watering immediately. Let the soil dry out completely for a week. The damaged roots will shrivel, but the healthy ones will take over. The plant might lose a few leaves. That is okay. Remove the damaged leaves by cutting them at the base. After a week of dry conditions, mist the leaves daily to keep the plant hydrated without adding moisture to the roots. This forces the plant to rely on its aerial moisture intake. I saved a plant this way. The leaves looked terrible for a month, but then new shoots appeared.
A Note on Seasonal Timing
I do this top-up in early spring or early autumn. This is when the plant is either waking up or slowing down. The roots are less active, so they are less likely to be injured by the slight change in soil level. I never do this in winter when the plant is dormant. The roots are too sensitive. I also avoid doing this in the middle of summer when the plant is in peak growth. The water demand is too high, and any root damage will cause immediate collapse.
Final Thoughts on Keeping It Simple
You need to trust the process. Adding soil is a cosmetic and nutritional refresh. It is not a major surgery. If you treat it like surgery, you will hurt the plant. I know the urge to "mix it in" is strong. Resist it. Just place the new soil on top. Let the roots find their own way up. That is what they do naturally in the wild. They grow into leaf litter. They do not get dug up. My final tip is to always use a pot with a drainage hole. If you do that, wait two days to water, and keep the light the same, your spider plant will live for years. I have three now, and I haven't lost one in over two years.
FAQ
Do I need to remove the old soil before adding new? No. You only need to remove the top crust, if any. I use a fork to scrape off the white salt deposits, but I do not go deep. The old soil is fine. You are just adding a fresh layer on top.
How long should I wait to water after adding soil? Wait a minimum of two days. I sometimes wait three or four days if the weather is humid. The new soil will absorb moisture from the air and from the old soil underneath. Watering too soon leads to root rot.
Can I use compost or garden dirt for the top up? Absolutely not. Use a sterile, peat-free indoor potting mix. Garden dirt can contain pests and diseases that will infect the roots. I lost two plants to fungus gnats and a bacterial infection because I used yard compost. Stick with bagged houseplant soil.





