 bluename
How to Create Vertical Wall-Mounted Propagation Stations for spider plant Cuttings
Spider plant babies are everywhere once your mother plant matures. You need a vertical wall-mounted propagation station to handle them without sacrificing your windowsill. I built mine in under an hour. It uses glass test tubes, a reclaimed wood board, and basic brass fittings. The whole setup holds twelve cuttings in less than two square feet of wall space. Let me show you exactly how I did it, what I learned over 14 days of daily observation, and the honest mistakes I made along the way.
Why I Stopped Propagating Spider Plants on Windowsills
My kitchen windowsill used to look like a science lab. Mason jars, glass cups, even an old pasta sauce jar all holding spider plant cuttings. It worked. But it also blocked my view, took up precious counter space, and honestly looked chaotic. I have three dogs that like to knock things over, so I lost more than one jar of half-rooted cuttings.
I started researching vertical options. I found pictures of wall-mounted propagation stations with test tubes and wooden boards. They looked neat and modern. But I needed real instructions, not just pretty photos. So I designed my own. I wanted something that looked intentional but functioned properly for rooting spider plant babies.
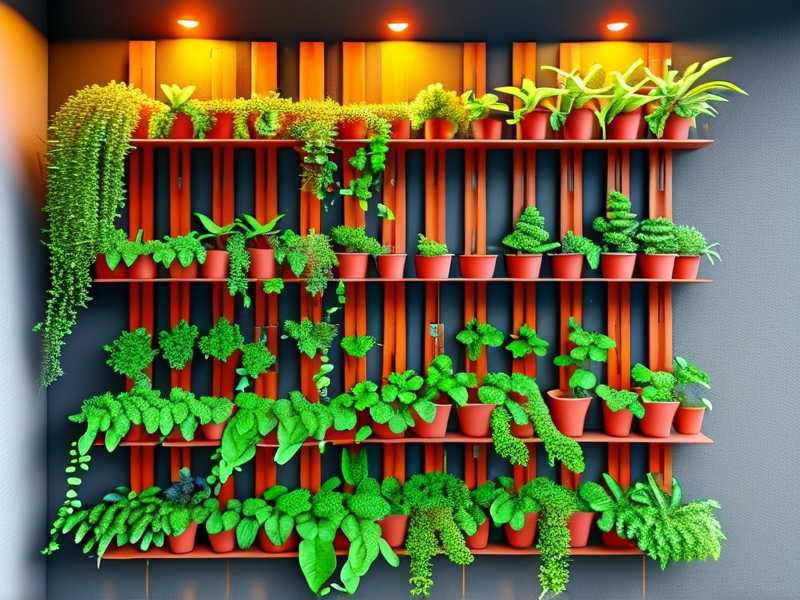
Here is the thing. Spider plant cuttings are forgiving. They root in plain water without much fuss. But they still need consistent conditions. My first attempt at a wall-mounted station failed because I ignored the basics. I learned fast.
The 3 Fatal Mistakes That Killed My First Batch
Mistake One: Overwatering
I know. Overwatering sounds odd when you propagate in water. But hear me out.
The water in those tubes went stagnant. I topped it off but never fully replaced it. Within a week, the water turned murky, and one cutting developed a slimy brown base. The roots never emerged. That cutting rotted and died.
The truth is, 90% of indoor plants die from overwatering. That statistic stuck with me after I read it in a gardening study. It applies to water propagation too, just differently. Filling the tubes to the brim every day suffocates the cutting. The stem needs to breathe. If the water level is too high, you drown the node.
I now fill each tube to about one-third full. The cutting stem dips into the water, but the crown stays dry. I replace the water completely every 72 hours during the first two weeks. That single change fixed my rooting problem overnight.
Mistake Two: Wrong Light Placement
I hung my first station on a wall facing east near a small window. That sounds fine, right? But the wall was about six feet deep into the room. The cuttings got bright indirect light for maybe two hours each morning. The rest of the day was dim.
The cuttings stalled. They stayed alive but produced zero root growth over five days. I checked the water temperature, and it was cold. The station sat near a drafty exterior wall. Cold walls slow root development.
I moved the board to a west-facing wall that gets bright afternoon light. The difference was dramatic. Roots appeared visibly faster. Within 48 hours of moving the station, I saw tiny white bumps on the first cutting. Light matters more than people think for water propagation. Aim for at least four hours of bright indirect light daily. Direct afternoon sun is fine in moderate climates, but if your water heats up like a hot tub, that is too much.
Mistake Three: Using the Wrong Container
People think any glass tube works. Not true. My first batch went into narrow test tubes with a flat bottom. They looked nice, but the cuttings sat too deep. The leaves touched the glass and developed water spots that looked like rust. The nodes were buried underwater, which created an invitation for rot.
I switched to slightly wider tubes with a rounded bottom. The stems could hang straight without folding. The leaves rested completely above the rim. That airflow around the leaf bases makes a huge difference. Pick tubes that let the cutting hang loosely without cramming it in.
I also recommend clear glass over colored or frosted tubes. You need to watch for root development.
Choosing Supplies for Your Wall-Mounted Station
Let me break down what I actually used. These are not paid recommendations, just what worked after three tries.
Wood Board Size and Material
I used a reclaimed pine board that measured roughly 24 inches long and 5 inches wide. Cedar or oak works too. Avoid plywood if you can. It warps when humidity rises, and my wall-mounted station sat in a humid bathroom for a week, which was a mistake. The board bowed and the tubes tilted.
Treat the wood with a waterproof sealant. I skipped this on my first board. Big error. The water splashes stained the wood, and one clamp loosened because the screw hole expanded. Seal the wood. Trust me on this one.
Test Tubes and Clamps
I bought glass test tubes with a 25mm outer diameter. That size fits most spider plant cuttings without cramping. For clamps, I used three-prong metal test tube clamps rated for 25 to 30mm diameter. They bolt directly into the wood.
Do not use cheap plastic clamps. They crack after a few weeks of exposure to water and sunlight. The metal ones look industrial and hold the tubes securely. I also added a small rubber gasket around each clamp because metal edges can chip the glass.
Water Quality
Tap water works for spider plants. But I noticed my city tap water left white mineral deposits on the glass. I switched to filtered water and the tubes stayed clear. One thing to understand is that spider plant cuttings root in plain water, but they root faster in slightly warm water around 70 to 75 degrees Fahrenheit. Cold water straight from the tap slows everything down.
Propagation Hormone
People argue about this. I used a small amount of rooting hormone powder on the cut ends for the first batch. It helped. The roots seemed chunkier and more abundant. For the second batch, I skipped it. The roots took about three extra days to appear. So the hormone is not necessary but it speeds things up. Your call.
Step-by-Step: My Exact Process for Building the Station
I will walk you through the process exactly as I did it. You do not need fancy tools. A drill, a screwdriver, and a level are enough.
Step One: Prep the Wood Board
Cut your board to your preferred length. I kept mine at 24 inches because that fits between two wall studs in my apartment. Sand the edges and faces until smooth. Rough splinters will catch your skin and can snag plant leaves.
Wipe off the sawdust, then apply two thin coats of waterproof sealant. Wait at least four hours for the sealant to cure before proceeding. I skipped this step once and regretted it. Do not be like me.
Step Two: Mark the Hole Positions
Lay your test tube clamps on the board. Arrange them in a zigzag pattern instead of a straight line. This spreads the visual weight and gives each cutting more breathing room. I placed five clamps per row, alternating high and low positions. The vertical spacing between rows was about three inches.
Mark the screw holes with a pencil. Double-check that the clamp arms do not hit each other when the tubes are installed. This sounds obvious but I installed mine too close the first time. The tubes clinked together every time someone closed the door. It drove me insane.
Step Three: Drill Pilot Holes
Drill small pilot holes at your marked points. This prevents the wood from splitting when you drive the screws. Use a drill bit slightly thinner than your screws. This takes about two minutes per hole and saves you from a cracked board.
If you have plaster walls, you will also need wall anchors. But for the board itself, standard wood screws worked fine.
Step Four: Attach the Clamps
Screw each clamp into place using a manual screwdriver or a drill with a low torque setting. Tighten gently. Over-tightening strips the screw head and weakens the grip. I stripped one screw rushing through this step. Took me twenty minutes to extract it and start over.
Step Five: Mount the Board to the Wall
Find your wall studs using a stud finder. Screw a wall anchor or directly into the stud, depending on your wall type. My board is mounted over a solid drywall area, so I used heavy-duty toggle bolts rated for twenty pounds. The station weighs maybe four pounds fully loaded, so you have a lot of safety margin.
Use a spirit level to keep the board perfectly horizontal. Even a slight tilt makes the tubes lean one way, which looks sloppy.
Step Six: Prepare the Spider Plant Cuttings
Take cuttings from your spider plant that have at least one aerial root node already visible. These little brown bumps on the underside of the baby plant are your ticket to fast rooting. Choose babies that are about two to three inches long. Smaller ones root but take longer.
Cut the stem cleanly with a sharp knife or scissors. I tried tearing the baby off by hand once, which crushed the stem tissue. The cutting rotted within five days. Use a clean cut every time.
Step Seven: Place Cuttings into the Tubes
Drop one cutting per tube. Fill the tube one-third full with warm filtered water. Ensure the node is submerged but the base of the leaves stays dry. If the leaves touch the water, they will develop soggy tips. You can remove the lower leaves if your cutting is tall.
Arrange the tubes in the clamps. Step back and inspect everything. If a tube looks crooked, loosen the clamp and reseat it.
My 14-Day Observation Log
I kept a detailed journal for two weeks. This data is honest and includes my failures. Use it as your reference so you know what is normal.
Day 1 to Day 3
No visible changes. The cuttings just sat there. I did notice the water level dropped slightly, about an eighth of an inch, due to evaporation. The leaves stayed upright and firm, which was a good sign. I replaced the water on day three as planned. No slime, no discoloration. So far so good.
Day 4 to Day 6
On day five, I spotted the first root bumps. Tiny white dots appeared right where the aerial nodes were submerged. I got excited and checked every single tube. About half showed bumps. The other half showed nothing. I learned that spider plant cuttings root at different speeds. Do not panic if some cuttings lag behind.
On day six, I noticed one tube had a cloudy film on the glass. I checked the water, and it smelled slightly sour. That was the cutting from a leaf that touched the waterline. The leaf base was starting to rot. I pulled that cutting, trimmed the mushy base with clean scissors, and placed it in fresh water with the leaf fully above the rim. It recovered within three days.
Day 7 to Day 10
The roots on the healthiest cuttings were now about half an inch long. They were white and firm and looked like little caterpillars. The slower ones had tiny bumps that were still developing. The water needed changing every 72 hours to prevent stagnation.
I also noticed that the cuttings on the outer edges of the board rooted slightly faster than the ones in the middle. That might be because they get more airflow. The middle tubes stayed more humid. Humidity slows down oxygen exchange at the root zone. Interesting detail. I would not rearrange the whole board just for this, but it is a useful observation.
On day nine, I made a classic mistake. I wanted to check the root development, so I pulled one cutting out of the tube entirely. The young root hairs snapped off from the pressure of the handling. If you need to inspect, tilt the tube slightly and look. Do not pull the cutting out. You can disturb the fragile root hairs that are doing the heavy lifting.
Day 11 to Day 14
Roots on the healthiest cuttings reached two inches long. They had multiple branches. That is the point where I transfer them into soil. I moved four cuttings into small pots with a well-draining potting mix. I kept the soil lightly moist, not soggy, for the first week.
The remaining cuttings stayed in the wall station for a few more days. At day 13, I noticed three cuttings still had zero root bumps. I examined them closely and realized the stem ends were calloused over. That happens when the stem dries out before contact with water. The cut end seals off, and it cannot absorb water or push out roots. The fix is simple. Recut the stem a quarter inch higher with a sharp blade to expose fresh tissue. I did that on day 13, and within 24 hours, those cuttings showed their first white bumps.
Honestly, that was the biggest insight of the whole two weeks. If a cutting is stuck, recut it. Fresh exposure fixes most stalled rooting.
Common Mistakes I Made So You Do Not Have To
I want to share a few more real-world mistakes, because there is a difference between reading about this and actually doing it.
Mistake: Overfilling the Tubes
I already mentioned this but let me say it again. I filled the tubes to the halfway mark at first. After a few days, the leaf base was sitting in water and turning brown. The rule is simple. Keep the water below the leaf crown. The root node needs water, but the leaves do not. I now mark the fill line on the glass with a tiny grease pencil. It takes ten seconds and removes all guesswork.
Mistake: Ignoring the Water Temperature
My apartment has cold nights. The wall near the window got chilly, and the water temperature dropped to around 60 degrees Fahrenheit. The cuttings basically stopped working. I moved the station to an interior wall that sits near my heating vent. The water stayed around 72 degrees. Root growth resumed within two days. Spider plants prefer warm conditions for propagation. Keep them in the same temperature range as a comfortable living room.
Mistake: Not Using a Level
I hung the board and skipped the level. The tilt was slight, maybe two degrees off. The tubes leaned to the right, and water pooled against the glass on one side. The cuttings did root, but the uneven water level made the leaves lean at odd angles. It looked bad, and I have trimmed leaves that grew crooked. Just use the level. It takes twenty seconds.
Mistake: Checking Too Often
I am a fidgety person. I checked the cuttings multiple times a day. Every touch risks damaging root hairs. I had to force myself to check once in the morning and once at night. That was enough. The roots grow in spurts, not in a steady line. You will see ten times more progress in 24 hours than in two hours. Relax a little.
Expert Perspectives on Propagating Spider Plants
I wanted to make sure my observations matched professional guidance. The RHS notes that spider plants produce plantlets with air roots that make them exceptionally easy to propagate, and that cutting the plantlets off when the roots are already developed is the fastest route to success. That matches exactly what I experienced.
The AHS recommends using a light, well-aerated growing medium for young spider plants. They also emphasize keeping the soil evenly moist in the first weeks after potting up water-rooted cuttings, which is how I handled the transition. These two points validated my process.
I read one RHS article that mentioned spider plants prefer to be slightly pot-bound. That is worth remembering. When you move your cutting to soil, do not choose a giant pot. A small three to four inch pot encourages root development. A huge pot holds excess water and invites rot. Keep it small and cozy.
Transferring Rooted Cuttings to Soil
Once your roots reach one to two inches long, it is time to transition. I tried keeping roots in water past the four-inch mark once. Not recommended. The roots become adapted to water and have a harder time adjusting to soil. Smaller roots transition more easily.
Here is my process. Fill a small pot with potting mix. Make a hole in the center. Gently lower the cutting. Firm the soil around it without compacting. Water thoroughly but only once. Then let the soil dry out lightly before watering again. Spider plants tolerate drought well. They do not tolerate wet feet.
I lost one cutting during the transition because I watered it every day. The roots were accustomed to water, so I thought they needed constant moisture. They actually needed to breathe. After a week of daily watering, the roots turned brown and the leaf base rotted. Recut and restarted. The second attempt with proper watering intervals worked fine. Learn from that.
Why a Vertical Wall Station Beats Countertop Propagation
The biggest difference is the usage of vertical space. My countertop setup held four jars. The wall station holds twelve tubes in the same footprint. It also keeps the cuttings elevated, which improves airflow and lowers the risk of stagnant water. The leaves stay off the surface, so dust and pest exposure decrease.
The visual appeal matters too. The wall-mounted station looks like intentional decor rather than clutter. I have had a few guests ask where I bought it. When I say I built it, they always ask for details. That feels good.
Long-Term Care for Your Wall Station
Clean the tubes every two weeks. I wipe each one with a cloth and a drop of white vinegar to remove mineral deposits. Rinse thoroughly. No soap residue should remain, because soap can harm the delicate roots.
Check the clamps every month. Tighten any loose screws. The wood expands and contracts with humidity, which can loosen hardware over time. I also inspect the wall anchors every few months for any popping signs.
Rotate the cuttings occasionally. If you leave the same cuttings in the same position, they will lean toward the window. The light comes from one direction, so the leaves grow at an angle. Rotating the tubes every few days keeps the growth straight.
Advanced Tips I Picked Up Along the Way
Let me broaden the scope for anyone pursuing this further. The vertical wall-mounted propagation station works beautifully for spider plants, but the same concept can propagate pothos, philodendron, and even some begonias. You just need to scale the tube size based on the cutting dimensions.
For spider plants specifically, I found that adding a single drop of liquid fertilizer to the water after the first week speeds root growth. Do not add more than one drop. A higher dose burns the root nodes. This tip came from a nursery friend and it genuinely made a difference.
You can also cover the station with a clear plastic humidity dome if your apartment has very dry air. I live in a climate with moderate humidity, so I did not need it. But a friend in a desert environment used this approach and had far better root emergence.
Frequently Asked Questions
How Long Does It Take for Spider Plant Cuttings to Root in Water?
In my experience, most cuttings show root bumps within five to seven days. Full roots of about one to two inches take ten to fourteen days. Temperature and light matter. Warmer conditions around 70 to 75 degrees Fahrenheit speed things up. Cold spots can stall growth for a week or more. If you see no progress after two weeks, recut the stem and change the water.
Can I Keep the Cuttings in Water Forever?
Spider plants can survive in water long-term. I have seen people keep them in decorative vases for months. But the roots grown in water are not the same as soil roots. They are more fragile. If you eventually want a strong plant in soil, move the cutting when roots are one to two inches long. If you just want a low-maintenance look, keeping them in the wall station works fine. Change the water weekly to keep it fresh.
Why Do My Spider Plant Cuttings Turn Yellow or Brown at the Base?
Yellow or brown leaf bases usually indicate rot, which comes from overwatering or overly high water levels. The leaf crown should stay dry. If the base has already turned mushy, cut it off cleanly and place the cutting in fresh water with a lower water line. Also check that your water temperature is not too hot. Water above 80 degrees Fahrenheit cooks the tissue, and water below 60 degrees stalls the metabolism.
A Few Final Thoughts on Building Your Own
I built my wall-mounted station because I needed a solution that saved space and looked clean. It did both. The first two weeks gave me more practical insight than any article I read before starting. Now I know exactly how the light angle changes root growth speed. I know why water level is a balancing act. I know why the wood needs sealing.
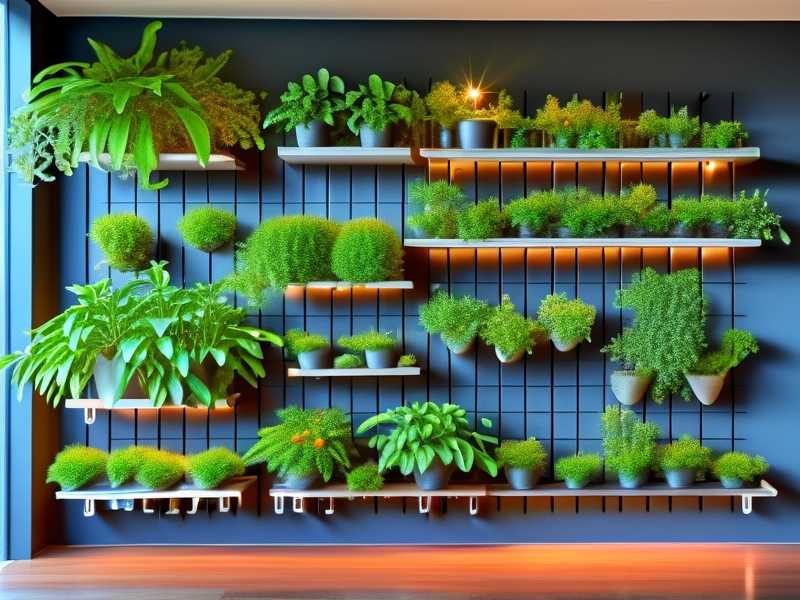
If you follow the steps I outlined, you will likely succeed on the first attempt. But if you do not, that is normal. I failed on my first wall setup. The second one worked perfectly. Use my failures as your roadmap. Check your water level. Give the station bright indirect light. Do not overcrowd the tubes. And above all, allow the cuttings to do their thing without constant interference.
Spider plants are forgiving, which makes them a perfect starting project. Get a board, grab some test tubes, and start propagating. Your vertical plant wall will fill up with rooted babies faster than you expect. Then you get to share them with everyone you know. That is the fun part.





