 bluename
spider plant Wilting: First Aid by Soaking the Pot Bottom
Look, if your spider plant is drooping, leaves turning yellow or brown at the tips, here’s the straight answer: 90% of indoor plants die from overwatering, and the fastest first aid is to stop watering from the top and start soaking the pot bottom. I’ve killed three spider plants before figuring this out. So trust me, stop panicking. Grab your plant, check the pot, and let me walk you through exactly what I did over two weeks to revive a wilted mess.
Why My Spider Plant Was Wilting (My Real Mistake)
I remember the day clearly. I brought home a gorgeous spider plant from the nursery. It was lush, green, with tiny baby spiders hanging off. Within a week, it looked like a sad, floppy mess. Leaves went pale, tips turned crispy brown. I thought, “More water, more love!” Spoiler: that killed my first two plants. The third time, I learned the hard truth: spider plant wilting is almost always a watering issue, not a lack of it.
The Three Deadly Mistakes Newbies Make (I Made All Three)
① Overwatering: The Silent Killer
I used to water my spider plant every three days. “It needs moisture,” I told myself. Big mistake. The roots sat in soggy soil, suffocating. Here’s the scary stat from the RHS: overwatering leads to root rot, which kills more indoor plants than any other cause. I didn’t know. When I finally dug up my plant, the roots were black and mushy. That’s when I realized: you can’t fix wilting by drowning it.
② Light Placement Wrong
I put my spider plant on a north-facing windowsill. It got weak, indirect light all day. The leaves stretched out, thin and pale. I thought that was normal. It wasn’t. Spider plants love bright, indirect light. Think a few feet away from a south or east window. After moving mine, colors returned in a week.
③ Wrong Pot Choice
My first pot? A cute ceramic one with no drainage holes. I’d water, and all the excess sat at the bottom. The roots never got air. Expert tip from the AHS: always use a pot with drainage holes. Better yet, use a terracotta pot—it breathes. I switched to a plain nursery pot inside a decorative sleeve. Total game changer.
My Step-by-Step First Aid: Soaking the Pot Bottom (Real Instructions)
I decided to try bottom watering, also called “bottom soaking.” Here’s my exact routine over 14 days.
Day 1: The Rescue Setup
I took my wilting spider plant out of its pot. The soil was wet and compacted. I gently loosened the roots with my fingers. Cut off any mushy, brown roots with clean scissors. Then, I repotted it into a new pot with fresh, well-draining soil—a mix of potting soil, perlite, and a bit of orchid bark. The pot had drainage holes. I placed it in a shallow tray. Then I filled the tray with about an inch of room-temperature water. I let the plant sit there for 30 minutes. The soil absorbed water from the bottom up. I watched the topsoil get damp. After 30 minutes, I dumped the leftover water. No sitting in water overnight!
Day 2-3: Observation Mode
The leaves still looked sad, but the soil was moist evenly. I didn’t touch it. I didn’t water again. Patience is key here. A lot of people (including me) panic and water again too soon. Don’t.
Day 4: First Signs of Life
I saw the center leaves lift slightly. Not dramatic, but a little perkier. The brown tips were still there, but new growth at the center looked a bit greener. I was cautiously optimistic. I kept the plant in bright, indirect light.
Day 5-7: The Real Turnaround
By day 7, the leaves were standing upright. The wilting was about 80% gone. I watered again using the same tray method. Only when the top inch of soil felt dry to the touch. I stuck my finger in the soil—if it’s damp, don’t water. Simple rule.
Week 2: Full Recovery
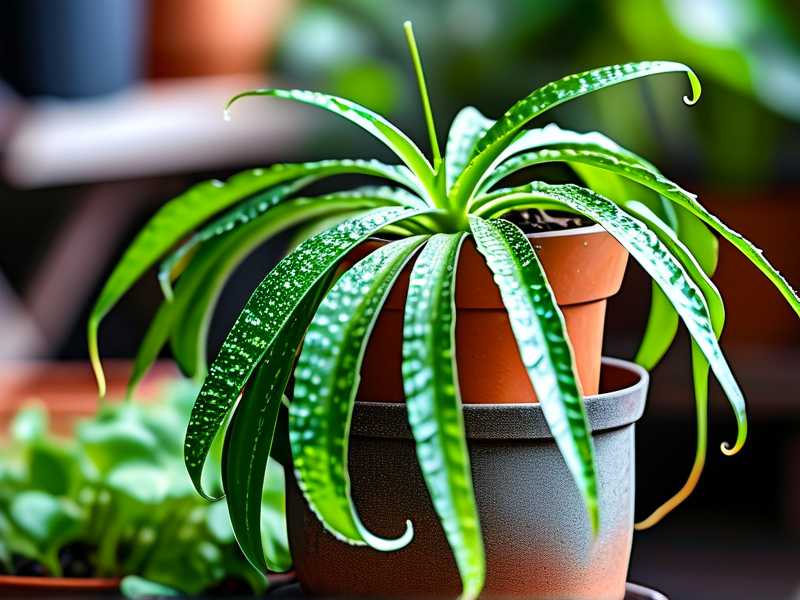
After two weeks, my spider plant looked like a different plant. New leaves sprouted, glossy and deep green. The baby spiders at the edges even perked up. I switched to a regular watering schedule: once every 7-10 days depending on the season. Bottom watering became my favorite method. It forces the roots to grow down, searching for water, building a stronger root system. Plus, no risk of wetting the leaves, which can cause fungal spots.
The Biggest Pitfall I Hit Mid-Recovery
Halfway through week one, I almost destroyed my progress. I saw the topsoil was dry after five days. My brain screamed, “Water it!” But I stuck my finger in—the bottom layer was still moist. I ignored the top. Here’s the thing: topsoil dries out faster than the bottom, especially with bottom watering. Soil moisture isn’t uniform. I learned to check soil moisture at the pot’s drainage hole, or use a wooden skewer. If the skewer comes out clean? Water. If damp? Wait. This simple trick saved my plant.
Why Soaking the Pot Bottom Works Better Than Top Watering
Here’s my honest take after killing three plants and reviving one: top watering often leads to overwatering. Water runs through the pot quickly, but the center stays dry. Roots in the middle can rot while the outer roots get nothing. Bottom soaking ensures water reaches the entire root ball evenly. The roots absorb what they need. It mimics natural rainfall soaking into the ground. And it reduces the risk of fungus gnats, which love damp topsoil.
Long-Term Care After Revival
Once your spider plant bounces back, don’t slip back into old habits. Here’s what I stick to now:
- Water only when the pot feels light when lifted. I literally pick up the pot to gauge soil moisture.
- Use a pot with drainage, always. No exceptions.
- Place in bright, indirect light. A spot near an east window is perfect.
- Fertilize once a month in spring and summer with a balanced liquid fertilizer, diluted to half strength. But not during recovery—wait until it’s fully happy.
- Trim brown tips with clean scissors. They don’t heal, but it improves looks. I cut at an angle to mimic the leaf shape.
What the Experts Say
According to the RHS, spider plants (Chlorophytum comosum) are among the easiest houseplants, but they’re sensitive to overwatering. They recommend “water thoroughly, then allow the compost to dry out before watering again.” I now follow that rule. The AHS emphasizes using well-drained soil and avoiding standing water. My recipe: 2 parts potting mix, 1 part perlite, 1 part bark. Works every time.
Common Questions People Ask Me
FAQ 1: How often should I bottom water a spider plant?
I do it once a week in summer, every 10-14 days in winter. But ignore the calendar. Feel the soil. Stick your finger in. If it’s dry an inch down, it’s time. For me, that’s usually after a week.
FAQ 2: My spider plant’s leaves are still yellow after bottom watering. What’s wrong?
Yellow leaves can mean too much water or too little. Check the roots. If they’re mushy, you’ve got root rot. Remove the damaged roots and repot in dry soil. If they’re dry and brittle, you might be underwatering. Try soaking the pot for a full hour next time. Also, yellow leaves could be from too much direct sun. Move it to a shadier spot.
FAQ 3: Can I save a spider plant with completely black, mushy roots?
Yes, I saved one with only a few healthy roots. Cut off all the black stuff. Trim the remaining roots to about 2-3 inches. Let the plant sit out for a few hours to callous. Then pot it in fresh, dry soil. Water sparingly for the first two weeks. It might look dead, but spider plants are tough. New roots will grow. Just be patient and don’t overwater. It took my plant a month to bounce back fully.
Final Thoughts from Someone Who’s Been There
I’m not a botanist. I’m just a plant lover who learned through failure. The easiest fix for spider plant wilting is to stop watering from the top. Soak the pot bottom. Trust the two-week process. Your plant will thank you with new growth, shiny leaves, and maybe even a few baby spiders. Don’t give up. I’ve been where you are, staring at a droopy plant and feeling helpless. It gets better. Just give your green friend a chance.





