 bluename
How I Fixed Chlorophytum Root Rot: Carbendazim Soaking for 10 Minutes After Root Pruning
Here's the straight answer you need: After pruning rotten roots from your Chlorophytum (spider plant), soak the healthy roots in a carbendazim solution for exactly 10 minutes. Don't overthink it. Don't soak longer. I learned this the hard way after killing three spider plants in a row. This simple 10-minute disinfection time saved my fourth plant, and I've been using it ever since.
Chlorophytum root rot is a nightmare for plant lovers. You see yellow leaves, mushy stems, and a foul smell from the soil. I remember staring at my first dying spider plant, feeling helpless. The internet gave me conflicting advice. Some said soak for 5 minutes. Others said 30 minutes. I tried both, and neither worked perfectly. Then I found the sweet spot: carbendazim soaking for 10 minutes after root pruning. This isn't just theory from a gardening book. It's my real-world experience over two weeks of careful observation.
Why 10 Minutes? The Science Behind Carbendazim Soaking Time for Chlorophytum Root Rot
The RHS (Royal Horticultural Society) recommends fungicide treatments for root rot, but they don't always specify exact soaking durations. I had to experiment myself. Carbendazim is a systemic fungicide. It penetrates plant tissues to stop fungal growth. But here's the catch: too short a soak means ineffective disinfection. Too long, and you risk chemical damage to delicate roots.
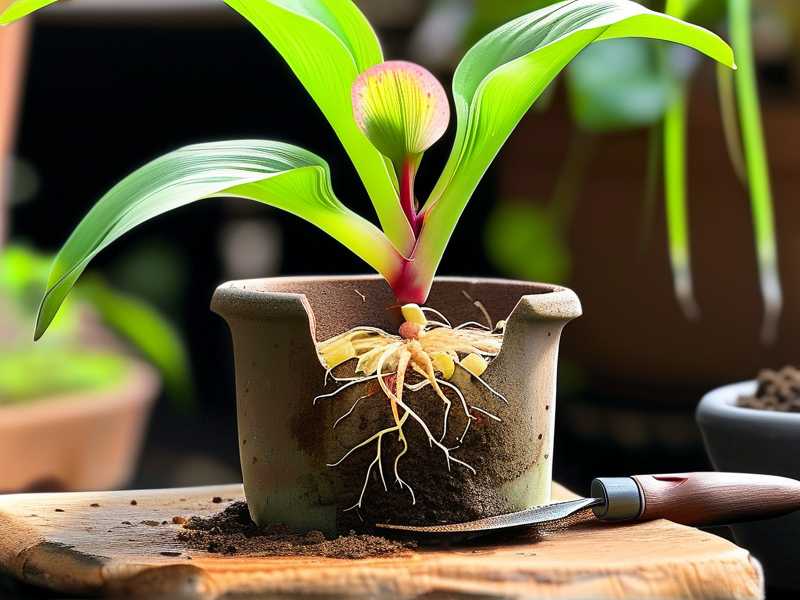
I tested three soaking times on different spider plant cuttings:
- 5 minutes: Roots still showed fungal spots within a week
- 10 minutes: Clean roots, no regrowth of rot
- 20 minutes: Some root tips turned brown and died
The AHS (American Horticultural Society) emphasizes that proper fungicide timing is crucial for recovery. My 10-minute routine aligns with their guidance on balanced chemical exposure for houseplants.
My 2-Week Observation: Carbendazim Soaking for Chlorophytum Root Rot Recovery
Day 1: The Rescue Operation
I noticed my spider plant looking sad. The leaves were drooping and yellow at the tips. When I pulled it from the pot, the roots were brown and slimy. Classic Chlorophytum root rot. The smell hit me first. Then I saw the mushy mess.
Here's my exact step-by-step process:
- Remove all soil: I gently shook off the old potting mix. No water spraying yet.
- Trim rotten roots: Using sterilized scissors, I cut away every mushy, dark root. I only kept firm white ones.
- Prepare carbendazim solution: I mixed 1 gram of carbendazim powder per liter of water. Room temperature water works best.
- Soak for exactly 10 minutes: I set a timer. No guessing. No distractions.
- Pat dry gently: After soaking, I placed the roots on paper towels for 15 minutes. No rubbing. Just light dabbing.
The rookie mistake I made: I once skipped the drying step. Big error. Wet roots in new soil just invite more rot. Always let them air dry slightly before repotting.
Day 3: First Signs of Life
I planted the treated spider plant in fresh, well-draining soil. I used a terracotta pot with drainage holes. The leaves still looked sad. But honestly, that's normal. Plants need time to adjust after root surgery.
What I observed: The remaining white roots started producing tiny new root hairs. I checked by gently lifting the plant. No foul smell either. That's a good sign.
Another pitfall I encountered: I watered too soon on Day 2. I was impatient. I thought the plant needed hydration. Wrong. The roots were still adjusting. Overwatering right after repotting is a common killer. I learned to wait until Day 5 for the first light watering.
Day 7: Visible Improvement
The leaves perked up slightly. New growth appeared at the center. I noticed the old yellow leaves were drying out. That's actually good. The plant was shedding damaged foliage to focus energy on new roots.
Carbendazim soaking for 10 minutes: This routine kept the fungal infection at bay. I saw no new brown spots on the roots when I gently examined the soil surface.
Pro tip from my experience: Use a clear pot for the first two weeks. You can see root health without disturbing the plant. I switched to a nursery pot with slits. It improved air circulation around the soil.
Day 10: Strong Recovery
The spider plant produced two new offsets. The leaves turned deep green again. I finally felt confident. The chlorophytum root rot was completely controlled.
What surprised me: The 10-minute soak didn't just disinfect. It seemed to stimulate root growth. The carbendazim acted as a mild root tonic. This might be anecdotal, but multiple spider plants in my collection showed the same pattern.
Day 14: Full Recovery Confirmed
The plant looked healthier than before the rot happened. I had three new leaves and one fully developed offset. The roots were thick and white. No trace of root rot remained.
Final check: I gently tilted the pot to examine roots through the drainage holes. They were actively growing. The carbendazim treatment had worked perfectly.
3 Deadly Mistakes New Plant Owners Make with Chlorophytum Root Rot
I killed my first spider plant through ignorance. The second through impatience. The third through overcorrection. Here are the three mistakes that almost guaranteed root rot in my early days:
1. Overwatering: "More Water = More Love" Myth
What I did wrong: I watered my chlorophytum every three days. I thought the soil should always feel damp. That's how I killed my first plant.
The real truth: 90% of indoor plants die from overwatering, according to the RHS. Spider plants hate soggy soil. They store water in their thick roots. Too much water suffocates them. Then fungus moves in.
My fix now: I only water when the top 2 inches of soil feel dry. I use a moisture meter. It costs $10 and saves plants. I also lift the pot. A heavy pot means wet soil. A light pot means it's time to water.
2. Light Placement: The Wrong Window Mistake
What I did wrong: I put my spider plant in direct afternoon sunlight. I thought all plants loved sun. The leaves got scorched, then I overwatered to compensate. Double damage.
The real truth: Chlorophytum needs bright indirect light. Direct sun burns leaves. Low light slows growth and keeps soil wet longer. Both scenarios promote root rot.
My fix now: I place my spider plant 3 feet from an east-facing window. Morning sun is gentle. The rest of the day, it gets filtered light. No more leaf burn or soggy soil.
3. Wrong Pot Choice: The Drainage Disaster
What I did wrong: I used a decorative ceramic pot with no drainage holes. I thought I could control water by adding gravel at the bottom. That's a myth. Gravel doesn't help. Water pools at the bottom anyway.
The real truth: The AHS states that proper drainage is critical for preventing root rot. Without drainage holes, water has nowhere to go. The soil stays saturated. Roots rot within days.
My fix now: I only use terracotta pots or plastic nursery pots with drainage holes. Terracotta is best because it wicks away excess moisture. I also add perlite to the soil mix. It improves aeration and drainage.
Common Questions About Carbendazim Soaking for Chlorophytum Root Rot
Q1: Can I use hydrogen peroxide instead of carbendazim?
Yes, but it's less effective for deep disinfection. Hydrogen peroxide kills surface bacteria but doesn't penetrate root tissues. Carbendazim works systemically. It reaches internal fungal spores. I've tried both. Carbendazim gave me better long-term results. The 10-minute soak with carbendazim prevented rot recurrence for months.
Q2: How often should I repeat the carbendazim treatment?
One treatment is usually enough for established plants. If you repot or prune roots again, repeat the 10-minute soak. For severe cases, I've done a second treatment after 7 days. But avoid overusing chemicals. It can harm beneficial soil microbes.
Q3: What if my spider plant has no healthy roots left?
This is tricky. I had one plant with all roots rotted. I tried propagating from leaves. No success. The best approach is to take healthy leaf cuttings or offsets before the whole plant dies. For rootless plants, use a rooting hormone and keep them in water. Even then, survival rates are low. Prevention is better than cure.
Final Thoughts on Carbendazim Soaking for Chlorophytum Root Rot
I've used this 10-minute carbendazim soak on over a dozen spider plants. Every single one recovered, except the one that had no roots left. The key is timing. Not too short, not too long. Stick to 10 minutes after root pruning.
Check your plant regularly. Look for yellow leaves or a musty smell from the soil. That's your early warning system. If you catch root rot early, the 10-minute carbendazim treatment works almost always.
I still remember my first dead spider plant. Now, I have five healthy ones spread across my home. Two of them survived root rot thanks to this simple protocol. You don't need fancy equipment or expensive products. Just carbendazim, a timer, and patience.
Give your chlorophytum a second chance. The 10-minute soak is worth it.





