 bluename
Chlorophytum Seed Propagation: A Complete Guide to Germination and Dot Sowing
I’ve always loved the elegant, arching leaves of spider plants, but buying new ones can get expensive. That’s why I decided to try Chlorophytum seed propagation myself. I was specifically interested in the germination sowing method, often called dot sowing, for its precision and efficiency. Like many gardeners, I was tired of low germination rates and wanted a reliable, step-by-step process. If you've ever scattered seeds only to see a disappointing few sprout, you know the frustration. This guide is the result of my own two-week experiment, where I documented every step, every success, and every mistake.
Why Choose Seeds? Understanding Spider Plant Reproduction
Most people propagate spider plants using their plantlets or "spider babies," which is undoubtedly faster. However, growing from seeds offers unique advantages. You get genetic diversity, which can lead to stronger plants and sometimes even surprising variegation patterns. According to the Royal Horticultural Society (RHS), seed propagation is the primary method for developing new cultivars. For the true plant enthusiast, it’s a rewarding journey from the very beginning. My goal was to master the dot sowing technique for Chlorophytum to maximize my success rate.
My Step-by-Step Dot Sowing Method for Spider Plant Seeds
Before we begin, gather your materials: fresh Chlorophytum seeds (I sourced mine from a reputable online seed bank), a shallow seed tray with a clear dome, a high-quality seed-starting mix, a small tool for making indentations (like a chopstick or pencil), a spray bottle, and a warm, bright location.
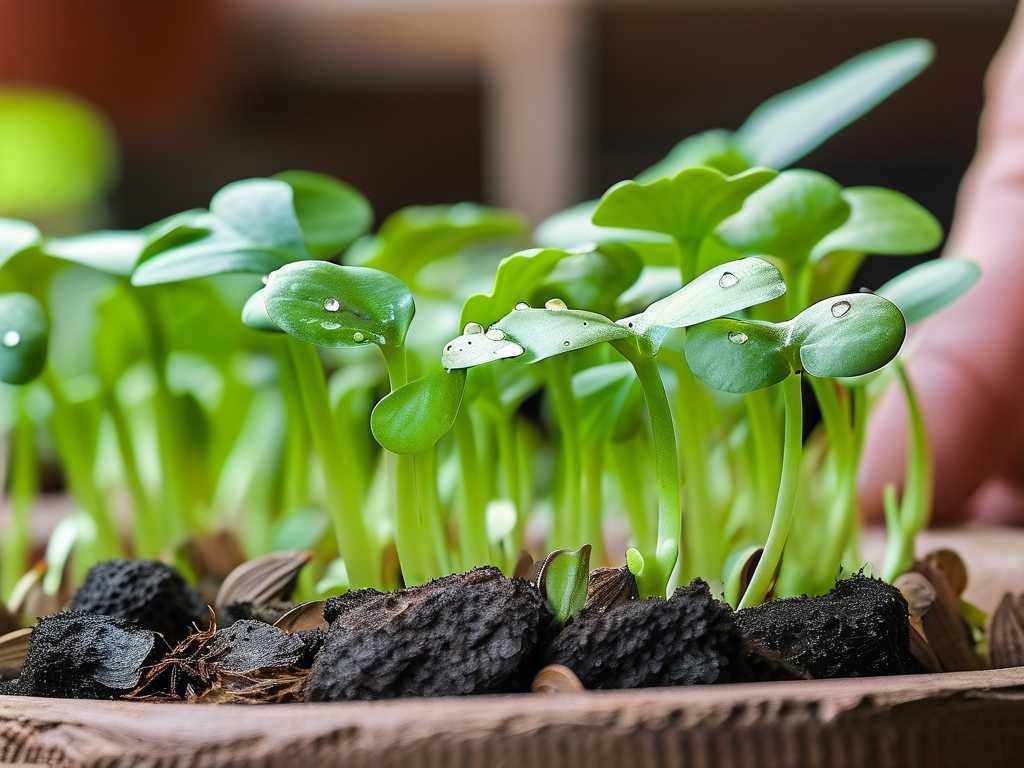
Step 1: Preparing the Perfect Seed Bed
I filled my clean tray with a pre-moistened seed-starting mix, pressing it down gently to create a level surface. The American Horticultural Society (AHA) emphasizes the importance of a sterile, soilless mix to prevent damping-off disease. I learned this the hard way in a past attempt. This time, I was meticulous.
Step 2: The Crucial Dot Sowing Technique
This is where the dot sowing method truly shines. Instead of broadcasting seeds randomly, I used the blunt end of a pencil to create tiny, shallow indentations about 1 inch apart in a grid pattern. I placed one single spider plant seed into each indentation. This precision ensures each seedling has its own space, light, and air from day one, reducing competition and the risk of fungal issues.
Step 3: Covering, Misting, and Creating Humidity
I lightly dusted the seeds with a thin layer of vermiculite—just enough to cover them, as they need some light to germinate. Then, I gently misted the surface until moist but not waterlogged. Finally, I placed the clear plastic dome over the tray. This mini-greenhouse is essential for maintaining the high, consistent humidity that Chlorophytum seeds crave for germination.
Step 4: The Ideal Germination Environment
I placed the tray in a warm spot with bright, indirect light. A consistent temperature of 70-75°F (21-24°C) is ideal. I avoided direct sun, which would cook the seeds inside the humid dome. Every morning, I lifted the dome for 15 minutes to allow fresh air circulation and prevent mold, another tip endorsed by the RHS for successful seedling care.
The Two-Week Observation Diary: From Seeds to Seedlings
This is where the real excitement—and learning—happened.
Days 1-4: The waiting game. I kept the medium consistently moist with my spray bottle. No visible changes.
Day 5: The first sign! In several of my carefully placed "dots," I noticed the seed coats beginning to swell. This was promising.
Days 6-8: Germination! Tiny, white radicles (the first root) emerged from the seeds and pushed downward. By the end of Day 8, about 60% of my dots showed this activity. My precise sowing method for Chlorophytum germination was paying off with a high and orderly sprout rate.
Days 9-12: The seed leaves (cotyledons) broke through the surface, still wearing the brown seed coat like a little hat. I continued daily airing and misting.
Days 13-14: The seed coats fell off, revealing delicate, green cotyledons. The first true, slender spider plant leaves were just starting to form in the center. The seedlings under each dot were robust and not leggy, thanks to their uncrowded start.
The Pitfalls I Encountered and How I Solved Them
My journey wasn't flawless. Here are the problems I faced and how you can avoid them.
Pitfall 1: Fungus Gnats and Surface Mold. Around Day 6, I spotted a few fungus gnats and a faint white fuzz on the soil surface. This was due to my initial over-enthusiastic misting, which kept the surface too wet.
- Solution: I immediately reduced misting frequency. Instead of daily, I only misted when the surface just began to look dry. I also sprinkled a thin layer of horticultural sand on the soil surface, which deters gnats and dries quickly. For future batches, I will ensure better air circulation from the start.
Pitfall 2: Uneven Germination. While most seeds in the center sprouted, those on the tray's edges lagged.
- Solution: I realized the tray's edges were slightly cooler. I moved the tray to a more uniformly warm location, away from any drafty windows. This highlights the importance of a stable thermal environment for even Chlorophytum seed germination.
Pitfall 3: The "Helmet Head" Seedling. A few seedlings struggled to shed their hard seed coat, which can stunt growth.
- Solution: I increased humidity briefly by misting the affected seedlings and, after an hour, used tweezers to very gently remove the stuck coat. Prevention is better: next time, I’ll ensure seeds are not sown too shallowly and will maintain higher humidity during the initial sprouting phase.
Caring for Your Spider Plant Seedlings Beyond Week Two
After the two-week mark, the seedlings enter a crucial growth phase. I began to gradually acclimate them to lower humidity by propping the dome open for longer periods each day over a week. Once they developed two sets of true leaves, I started applying a diluted, balanced liquid fertilizer every other week. The RHS recommends a half-strength solution for young seedlings to support steady growth without burning tender roots.
When will I see spider plant babies? Patience is key. Plants grown from seeds will take longer to mature and produce offsets (plantlets) than those grown from divisions. Typically, you can expect your seed-grown Chlorophytum to start producing its characteristic "babies" in 1 to 2 years under optimal care. The wait is worth it for a plant you've nurtured from its very beginning.
Can I use regular potting soil for dot sowing? I strongly advise against it. My first failed attempt used standard potting mix, and it led to compaction and damping-off. A fine, well-draining seed-starting mix is non-negotiable for the delicate germination process of spider plant seeds. It provides the perfect balance of moisture retention and aeration.
How often should I water the seedlings? The top inch of the medium should feel slightly dry before you water again. I use a spray bottle for the first few weeks to avoid disturbing the tiny roots. Overwatering is the fastest way to lose your seedlings. As they grow, you can switch to bottom watering to encourage strong root development.
Mastering Chlorophytum seed propagation through dot sowing has been an immensely satisfying project. It requires more patience than using plantlets, but the control over the process and the joy of watching life emerge from a tiny seed are unparalleled. By following this precise sowing method, maintaining a clean and consistent environment, and learning from minor setbacks, you can successfully grow a thriving collection of spider plants from scratch. Happy planting





