 bluename
How to Recognize spider plant Recovery After Eliminating Indoor Pest Infestations
If you’ve just won the war against pests on your spider plant, the next question is simple: how do you know it’s actually recovering? Look for new white roots pushing from the soil, firm upright leaves, and fresh green growth at the center within two weeks. Those three signs are your green light. I’ve been through this exact battle more times than I care to count, and I’ve learned that spotting recovery early saves you from over-correcting and killing the plant with kindness. And here’s the hard truth I learned after killing three spider plants: 90% of indoor plants die from overwatering, not from the pests themselves. So, let’s talk about what real recovery looks like, what I did wrong, and how you can avoid the same pitfalls.
I remember my first serious infestation. It was spider mites, and they hit hard. I treated the plant, removed every webbed leaf, and then I stood there staring at a sad, bald crown of green. I had no idea if it was recovering or just slowly dying. I watered it. Then I watered it again because I thought it looked thirsty. Within ten days, the roots rotted. That’s when I learned that recovery isn’t about how much you do—it’s about reading the plant’s signals correctly.
The First Two Weeks: What I Actually Observed
When I finally treated my current spider plant correctly, I kept a daily journal for 14 days. I want to share that timeline because it’s realistic. You won’t see a miracle overnight. But you will see small, measurable changes.
Days 1–3: The Shock Phase
The plant looks worse before it looks better. The existing leaves might droop or yellow slightly. That’s normal. The pest treatment, whether it was neem oil or insecticidal soap, stresses the foliage. I stopped fussing over it here. I just let it sit in bright, indirect light and did not water for at least three days. My biggest mistake in the past was watering immediately after treatment. The soil was already moist, and the roots were shocked. Adding more water just suffocated them.
Days 4–7: The Root Check
Around day five, I gently tilted the pot and looked at the drainage holes. I saw tiny, white, firm root tips starting to emerge. That was my first solid sign of recovery. If the roots look brown, mushy, or smell like rot, your problem isn’t pests anymore—it’s overwatering. I’ve dug up plants at this point only to find a soggy mess. If you see no root growth by day seven, don’t panic. Just check the moisture level one inch deep. If it’s bone dry, water lightly. If it’s damp, wait.
Days 8–14: The New Growth
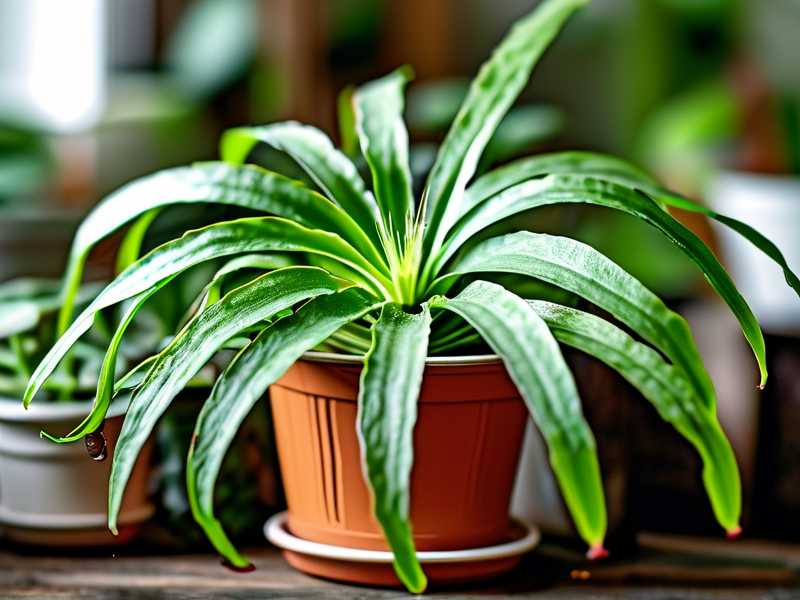
By the end of the second week, I noticed the center of the plant pushing out a new leaf. It was pale green, thin, and slightly folded. That’s the classic sign of recovery. The old, damaged leaves might still look ugly, but the new growth is your future. I also noticed the remaining leaves felt firmer to the touch. Droopy, soft leaves started standing up straighter. The color shifted from a dull, grayish green to a brighter, richer green.
Here’s the thing I had to learn the hard way: new growth only appears if the roots are healthy. So, if you see a new leaf but the old ones are still wilting, trust the new leaf. That’s your answer. The plant is recovering.
The 3 Fatal Newbie Mistakes That Kill the Recovery
I’ve killed more plants through post-pest care than through the pests themselves. Let me save you the heartache.
① Overwatering: The Silent Killer
I cannot stress this enough. We think a stressed plant needs water. It doesn’t. Spider plants store water in their thick, tuberous roots. After a pest attack, those roots are compromised. If you drown them, they rot. I lost my second spider plant this way. I treated the mites, then watered thoroughly every other day for a week because the soil looked dry on top. The top inch was dry, but the bottom was a swamp. The roots turned to mush. I only realized it when the plant fell over because the roots had disintegrated. So, here’s my rule: after pest treatment, wait until the top two inches of soil are completely dry. Then water sparingly. Wait another week. Seriously.
② Wrong Light Exposure
This one catches everyone off guard. After a pest infestation, the plant’s leaves are sensitive. I placed my recovering plant in direct afternoon sun to “help it photosynthesize” after treatment. That was a disaster. The leaves got sunburned—white, crispy patches appeared within hours. A recovering spider plant wants bright, indirect light. Think of a spot near a north-facing window or a few feet away from a sheer-curtained east window. Direct sun is for healthy, established plants. A recovering one just gets scorched. I also tried the opposite once—moving it to a dark corner to “rest.” That just slowed everything down. No light, no photosynthesis, no recovery. Keep it bright but gentle.
③ Using the Wrong Pot
The pot matters more than you think. I used to keep spider plants in decorative pots without drainage holes. Stupid, right? But many people do this. After a pest attack, you need to monitor root health. You can’t do that if the water has nowhere to go. My third plant death was because I used a ceramic pot with a single small hole that got blocked by the tuber roots. Water pooled at the bottom, and the roots sat in it. Fungus gnats came back, and the rot set in. Now, I only use plastic nursery pots with multiple drainage holes. I slip those inside fancy cover pots for looks. It makes checking moisture and roots ten times easier. If you want a surefire recovery, repot into a container with excellent drainage before you start any treatment.
My Real-World Treatment and Recovery Steps
Let me walk you through what I did with my current spider plant. I want to give you a clear, repeatable process.
Step 1: Isolate and Identify
When I saw the fine webbing and stippled leaves, I moved the plant to my bathroom. I didn’t want the pests spreading to my calathea. I inspected every leaf with a magnifying glass. It was spider mites. For scale or mealybugs, the treatment is different, but the recovery process is the same.
Step 2: Physical Removal
I took the plant to the sink and sprayed it down with lukewarm water. A strong stream dislodged a ton of mites. Then I wiped each leaf individually with a soft cloth dipped in a diluted dish soap solution. I used one teaspoon of mild liquid soap per liter of water. I was gentle, especially on the leaf undersides. I missed a spot once, and the mites came back in a week. Don’t skip this.
Step 3: The Treatment
I applied a ready-to-use neem oil spray. I made sure the solution was cool and applied it in the evening. Spraying in direct sun causes leaf burn. I coated both sides of every leaf and the stems. I repeated this every five days for three treatments. I trusted the process and didn’t go overboard. Over-spraying can clog the leaf pores and stunt recovery.
Step 4: The Repotting Decision
Since my plant had been in the same soil for a year and the pests were in the top layer, I decided to repot. I carefully removed the plant from the pot. I shook off the old soil and inspected the roots. White, firm roots were healthy. I trimmed any brown, squishy ones with sterile scissors. Then, I repotted into fresh, well-draining potting mix. I added a handful of perlite to improve aeration. This is crucial. Fresh soil reduces the chance of pest eggs hatching and gives the roots a clean start.
Step 5: The Two-Week Observation
This is the core of what I’m sharing. I didn’t water for five full days after repotting. The fresh soil was slightly damp, so my plant had enough. On day five, I checked the soil by sticking my finger in up to the second knuckle. It was dry. I watered slowly, letting excess water drain from the bottom. I waited again. On day ten, I saw a small new leaf emerging. The old leaves were still a bit pale, but the new one was vivid. I knew it was working.
How to Visually Confirm Recovery
Let’s break down the visual cues you should be looking for. Recovery isn’t just one thing. It’s a combination of several changes.
Root Health is the Foundation
The roots tell you more than the leaves ever will. When you gently lift the plant out of its pot, healthy roots are pale and crisp. Unhealthy roots are dark and soft. If you can’t repot, look at the drainage hole. Healthy roots that are growing will be white or light tan. They should look like fresh, uncooked spaghetti. Brown, mushy roots mean you still have rot. I check this because I used to think the leaves were the only indicator. They’re not. The leaves can look okay while the roots are dying.
Leaf Turgidity and Position
I observed that leaves started standing up. During the infestation, many of my plant’s leaves were lying flat or arching awkwardly. By the end of week two, the angle of the leaves became more upright. The entire plant looked perkier. I touched the leaves. They felt firm and cool. A dehydrated or rotting leaf feels soft, wrinkly, and sometimes hot to the touch from sun exposure. Firm leaves mean water is moving through the plant correctly.
New Color and Growth Patterns
Spider plant recovery is unique. Unlike other plants, they produce plantlets, or “spiderettes,” when they are either root-bound or very happy. After a pest stress, a spider plant might not send out pups immediately. It focuses on core foliage first. So, the recovery signal is a new leaf, not a new plantlet. I watched the center of the rosette. A tight cluster of new leaves pushing up is a health signal. If a leaf comes out and immediately has brown tips, your humidity is too low or you’re still overwatering slightly.
Tip Burn Disappears
During the pest attack, my leaf tips turned brown and brittle. In recovery, the new leaf tips were lush and green. However, existing brown tips will not heal. You can trim them, but that’s cosmetic. The key is seeing new growth without tip burn. My first sign of recovery was actually a new leaf with no brown on the tip. That made me happy.
Mistake I Made: Cutting Off All Damaged Leaves Too Soon
I thought that removing all the ugly leaves would help the plant save energy. I was wrong. The plant uses those leaves to photosynthesize and generate energy for recovery. I stripped my plant down to the crown once. It took months to regrow because it had no fuel. Now, I only remove leaves that are completely dead, crispy, or more than 50% damaged. Leaves that are just a little yellow or have a few spots stay on. The plant will naturally reabsorb nutrients from the leaves it wants to drop. It’s like a self-cleaning oven. Let it do its job.
The Mistake of Overfeeding a Recovering Plant
I used to think that after a pest attack, my plant needed a big dose of fertilizer. That was a catastrophic error. The roots are sensitive. Fertilizer salts can burn them. I killed my first plant with a half-strength dose of liquid fertilizer right after treatment. The roots were compromised, and the fertilizer pushed them over the edge. Recovery doesn’t need extra food. The plant is already in shock. Adding fertilizer forces it to try and grow faster than its roots can support. I wait a full month after recovery starts before I even think about fertilization. And even then, I use a quarter-strength solution. The rule is: no fertilizer until you see two or three new leaves.
Common Questions People Ask About Spider Plant Recovery
Q: How long does it take for a spider plant to fully look normal again?
If you eliminate the pests and avoid overwatering, you will see significant structural improvement in two weeks. New leaves will emerge. However, to look fully “normal” and bushy again, it might take two to three months. If you have to grow back a lot of lost foliage, expect up to four months. Patience is your best tool here. I find that once the new growth starts, it picks up speed exponentially. The second month is always faster than the first.
Q: My plant’s new leaves are coming in pale or white. Is that normal?
Yes, this happened to me, and I panicked. But it’s normal. New growth on a spider plant often lacks the full chlorophyll content initially. It starts out a pale green or even yellowish-white. As the leaf hardens off and gets exposure to light, the color deepens. Give it a few days of indirect light. If the pale color remains and appears on multiple mature leaves, it might be a light deficiency. In that case, move it slightly closer to the window. If the leaves come out striped but then fade, the plant needs more light.
Q: Should I prune the dead leaf tips during recovery?
I trim them for cosmetic reasons. But I don’t cut into the green healthy tissue. I use sharp scissors and cut just above the brown margin, following the angle of the leaf. Cutting the brown part off stops the dead tissue from promoting any fungal growth. However, I don’t cut whole leaves unless they are entirely brown. The plant still uses the green base for photosynthesis. Many people, including my past self, mistakenly cut a leaf back by half just to remove a tip. This puts the plant in a worse position. So, just snip the brown edge.
Q: How often should I check for pests returning during recovery?
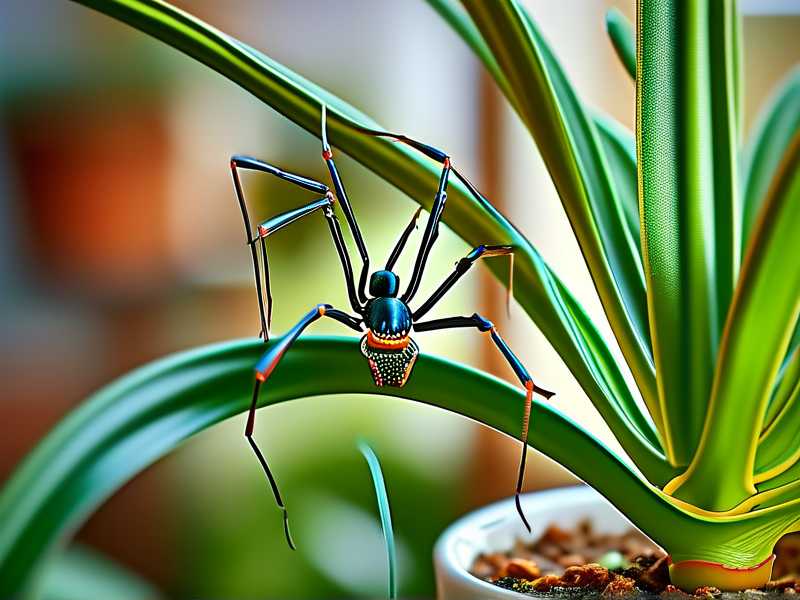
I check every three days without fail. Spider mites are notorious for hiding in the leaf axils—the point where the leaf connects to the stem. I use a magnifying glass to examine these areas. I also wipe the top of the soil with a damp cloth. Pest eggs can survive in the top inch of soil. If I see any webbing or sticky residue, I immediately hit the plant with another spray treatment. Early detection is the only way to avoid a full-blown infestation. It’s much easier to treat a few stragglers than an entire colony.
Why Context Matters for Recovery
According to the guidelines from the RHS, most houseplants enter a state of stress after pest treatment, and their metabolic processes slow down. The AHS emphasizes that environmental consistency—stable light, temperature, and a strict watering schedule—is the most critical factor for recovery. These organizations have the research to back what I’ve seen with my own two hands. The plant doesn’t need drama. It needs routine.
I learned this the hard way with my fourth plant. I treated it for mealybugs, and I was so paranoid about return trips that I kept looking at it, touching it, and moving it. Every time I moved it the light changed. The poor plant was suffering from my anxiety. I finally forced myself to leave it alone for four days. When I came back, I swear it looked more perky. Consistency is king. Pick a spot and don’t move the pot. Maintain a regular check but don’t interfere physically.
Adjusting Your Watering Habits Permanently
The best thing that ever happened to my spider plants was listening to that stat about overwatering. Once I internalized that 90% of indoor plants die from overwatering, I changed my entire philosophy. I now wait longer than I think I need to. For my spider plant in a plastic pot with good drainage, I water every 10-14 days in the summer and every 3-4 weeks in the winter. The top two inches need to feel like a dry, crumbly biscuit. I water until it runs out the bottom and then I dump the saucer. Standing water in a saucer is just a temptation for root rot and a breeding ground for fungus gnats.
The Psychological Game of Waiting
Honestly, the hardest part of recognizing recovery is fighting the urge to do something. I’ve watered too soon, repotted too early, and fed too quickly—all out of a desperate need to fix things. The truth is, the plant fixes itself. My job was just to create the right conditions. When I stopped hovering and started observing, I noticed the small successes. The tiny root tip. The perpendicular leaf. The subtle green hue.
I’d also advise you to photograph your plant every other day. You won’t notice small changes with the naked eye if you’re staring at it all times. But when you flip back through the photos, you’ll see the leaves lifting and new growth. That’s a fantastic morale booster. I did this after my recent spider mite issue, and the difference between day 1 and day 14 was astonishing. The center was denser, the color was brighter, and the leaves had a structured arch rather than a drooping curve.
When Recovery Isn’t Happening
Sometimes, you do everything right and the plant still declines. If you see no new growth after three weeks, and the leaves continue to yellow, dig the plant up. Look at the roots. If they are black and mushy, you have root rot. You need to cut away all the affected roots, dip the remaining healthy roots in a diluted hydrogen peroxide solution (one part peroxide to three parts water) to kill bacteria, and repot in fresh soil. This is a last-ditch effort. It works about 50% of the time for me. But knowing when to give up and take a cutting from a healthy leaf is also smart. Spider plants are forgiving, but they aren’t immortal. Sometimes, a full propagation is the restart you need.
Honestly, I’ve realized that recovering a spider plant is more about restraint than action. The plant will tell you what it needs if you just look. Firm leaves mean water retention. New leaves mean root function. Bright color means photosynthesis. And you should always check the root system first before assuming a leaf problem. I think most people who have trouble with spider plants simply don’t look at the roots often enough.
If you follow my timeline and avoid the three fatal mistakes, I’m confident you’ll recognize recovery within two weeks. Just be patient. Look for the white roots, feel for the firm leaves, and watch for that central green growth. Then leave it alone and let nature do the heavy lifting.





