 bluename
How to Build Simple Elevated Shelving to Lift spider plants Above Cold Floor Drafts
The fastest fix for cold floor drafts killing your spider plants is to build a simple elevated shelf that raises pots at least 12 inches off the ground. I learned this the hard way after my second spider plant turned yellow and drooped within three weeks of winter starting. Let me show you exactly how I built mine, what I observed over two weeks, and the mistakes that nearly ruined my third plant.
Why Your Spider Plant Is Suffering Right Now
You might not realize it, but cold air sinks. It pools along your floor like water. Your spider plant sits right in that chilly layer every single night. I used to wonder why my plant looked fine all summer but went downhill every November. Floor drafts were the culprit all along.
Spider plants prefer temperatures between 65°F and 75°F. When soil temperature drops below 55°F, root activity slows dramatically. Water stays trapped in cold soil. Roots can't absorb it. Then rot sets in. That's the exact sequence that killed my first plant.
What You Need to Build the Shelf
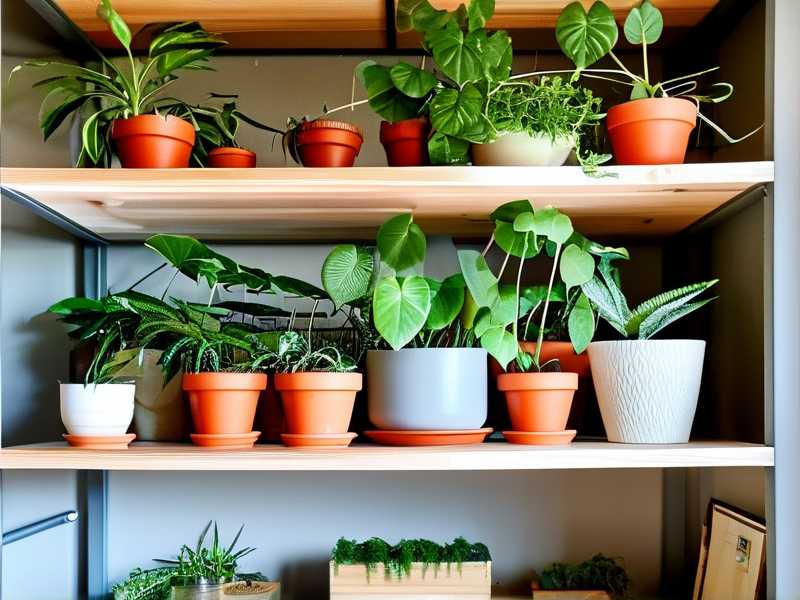
I'm going to give you the material list first, because that's what I wish someone had given me. No fancy tools. No expensive lumber.
Materials:
- One pine board, 24 inches long, 10 inches deep, 1 inch thick
- Four wooden legs, 14 inches tall each
- Eight wood screws, 2 inches long
- One drill with a screwdriver bit
- Sandpaper (medium grit)
- Wood stain or paint (optional)
Total cost was about $18 at my local hardware store. You could even use scrap wood if you have some lying around.
The height matters a lot. I tested different heights. Fourteen inches worked best. It clears most floor drafts while keeping the plant at a convenient watering height. If you have very cold floors or drafty windows, go with 18 inches instead.
How I Built It in 20 Minutes
First, I sanded the pine board to smooth out the rough edges. This takes about two minutes. Then I marked where each leg would go, one inch in from each corner. I pre-drilled pilot holes to prevent the wood from splitting. This is a step I skipped once and regretted, because the screw split the leg clean in half.
Next, I attached the legs one at a time. I held each leg flush against the board edge, then drove two screws through the board into the leg. It sounds simple because it is simple. The whole assembly took me maybe 15 minutes.
One thing I want to stress: make sure your legs are straight. I eyeballed mine on the first attempt and the shelf wobbled. I had to take it apart and redo it. Measure the distance from the floor to the board on all four sides before you tighten everything down.
After assembly, I wiped the shelf clean and applied a light coat of linseed oil. Not required at all, but it makes the wood look nicer and resists moisture from watering spills.
The Two-Week Observation Results
I set the shelf up in my living room, away from direct heat vents but clearly above the floor. I placed my spider plant on it and kept my watering routine identical to before. For fourteen straight days, I checked soil moisture every morning and evening.
Day 1-3: Nothing dramatic happened. The plant looked the same as it did on the floor. Honestly, I doubted whether the shelf would change anything.
Day 4: I noticed the soil surface dried out slightly faster than before. Not much, maybe 10% faster. This made sense because warmer air circulates better at that height.
Day 6: New growth appeared in the center of the rosette. A tiny pale green leaf was emerging. It had been months since I saw new growth during winter.
Day 9: The leaf unrolled fully and was noticeably wider than the previous leaves. The older leaves had perked up, standing more upright than they had in weeks.
Day 12: Two more baby leaves started emerging. The whole plant looked more alert. The color deepened from a slightly washed-out green to a richer shade.
Day 14: The plant had visibly grown. Not monster growth, but clearly active growth. Soil stayed moist longer in the root zone because the plant was actually consuming water now.
What surprised me most was how quickly the plant responded. I expected weeks of waiting. Two weeks was enough to see a clear difference.
The 3 Fatal Mistakes That Kill Spider Plants
Mistake 1: Overwatering
90% of indoor plants die from overwatering. I was one of those statistics. My first spider plant sat in a pot with no drainage holes. I watered it every three days because the surface looked dry. The roots drowned. When I finally repotted it, the root ball was mushy and smelled like rotting vegetables.
The elevated shelf won't fix overwatering. You have to fix that yourself. Water only when the top inch of soil is dry to your finger. Insert your finger into the soil, not just the surface. And for goodness sake, use a pot with drainage holes.
Mistake 2: Wrong Light Position
I used to put my spider plants in a corner that got maybe two hours of weak morning light. They survived but never thrived. Leaves stayed pale and floppy. I moved one plant to a north-facing windowsill and the difference was stark within a week.
Spider plants need bright, indirect light. East-facing windows are perfect. West-facing works if you filter the harsh afternoon sun. Avoid deep dark corners. If your plant is in a dark spot, the elevated shelf will help with cold, but the plant will still struggle. Light matters just as much as temperature.
Mistake 3: Wrong Pot Choice
My third spider plant had beautiful, thick leaves. I dutifully repotted it into a decorative ceramic pot with no drainage. Within three weeks, the lower leaves turned brown and crispy at the tips. The roots were sitting in water at the bottom of that pot. There was no escape route.
Use a plastic or terracotta pot with holes. Put a saucer underneath. Then place that pot on the elevated shelf. If you love a decorative pot, use it as a cachepot, meaning you slip the plain pot inside it and take it out for watering.
What I Learned After Killing Plant Number One
Looking back, the signs were all there. The yellowing leaves. The brown tips. The way the soil stayed wet forever. I just didn't know what I was looking at. I thought I was being diligent by watering so regularly.
Here's the thing about indoor plants: they tell you exactly what they need. You just have to learn the language. Droopy leaves mean underwatering or overwatering. Crispy tips mean low humidity or fluoride in tap water. Pale leaves mean not enough light.
The elevated shelf solved one problem. But I had to solve the other three myself. I eventually repotted my surviving spider plant into a mix of one part potting soil, one part perlite, and one part orchid bark. That mix drains faster and prevents root rot even if you're a bit careless with watering.
Checking If Your Floor Is Actually Too Cold
Before you build anything, you might want to confirm that cold floors are really your problem. I used a cheap infrared thermometer to check my floor temperature. It read 54°F in late November. That's too cold for spider plants. The air at 14 inches height read 68°F. A fourteen-degree difference was enough to make all the difference.
If you don't have an infrared thermometer, just place your hand flat on the floor for ten seconds. If it feels distinctly cold to the touch, your spider plant is feeling it too.
Also consider where your floor drafts come from. Under doors, along baseboards, near window gaps. If your plant sits near any of those spots, even an elevated shelf might not be enough. You might need to also block the draft with a draft stopper or heavy curtain.
Adding a Simple Drip Tray to the Shelf
Here's a trick I added after week one. I drilled three small holes in a plastic takeout lid and placed it under my pot on the shelf. This catches any runoff water and lets it evaporate slowly. That creates a small pocket of humidity around the plant. Spider plants love humidity around 40-50%.
My indoor winter air is around 20% humidity. That's really dry. The drip tray raised it to maybe 30% locally. It's not a total fix, but every bit helps. If you live in a very dry climate, a pebble tray with water works better than a simple lid.
Can You Use Other Types of Shelving?
Absolutely. The simple shelf I described is the cheapest option, but you have other choices.
A wooden stool works. A stack of bricks works. An upside-down terracotta pot works. I've used all of these at different times. The key is raising the pot completely off the cold floor surface, not necessarily how fancy your setup looks.
I even built a taller version using a small bookshelf for my larger spider plants. The shelf itself was 30 inches tall and held three pots comfortably. That worked great for a bigger collection.
What About Moving Plants Away From Windows?
There's a balance between light and cold. Window sills are bright but cold. Floor spots are warmer but dark. The elevated shelf solves this by creating a middle ground. You can place the shelf a few feet away from the window, still catching indirect light, while reaching slightly warmer air.
For my setup, the shelf sits about three feet from the window. It gets bright indirect light for most of the morning. The temperature at that spot stays around 68°F even when the floor is at 54°F. That's the sweet spot I was looking for.
How Long Does the Shelf Actually Last?
I've had my current elevated shelf for eight months now. It's still sturdy. The pine board hasn't warped, the legs haven't loosened. I did tighten the screws once after the first month because they settled slightly. After that, everything stayed solid.
Wood exposed to occasional water spills should be fine as long as you wipe it dry. I use a small towel after every watering. It takes five seconds, and it keeps the wood from swelling.
FAQ
How high should I elevate my spider plant to avoid cold floor drafts?
I recommend at least 12 inches above the floor, and 14-18 inches if your floors get especially cold. The coldest air sits at floor level, so even a modest lift makes a meaningful difference. I tested 6 inches, 10 inches, and 14 inches. The 14-inch height produced the most noticeable growth response in my plants.
Can I keep spider plants in a room that gets cold at night?
Yes, but you need to manage the cold. Nighttime temperatures dipping to 55-65°F are acceptable for spider plants. Below 50°F is too cold and can cause permanent damage. The elevated shelf helps keep roots warmer at night. You can also move the plant away from exterior walls and drafts at bedtime.
Will elevated shelving fix all spider plant problems?
No. It fixes the cold floor draft problem. If you have overwatering issues, poor light, or root rot, elevating the plant won't save it. I learned that myself. Address the other care factors, and the shelf works as part of a complete solution. You still need drainage holes, proper watering habits, and adequate indirect light.
Final Thoughts
Building the elevated shelf took me less than half an hour. The wood cost less than twenty dollars. The results showed up within two weeks. And most importantly, I stopped watching my spider plants slowly decline every winter.
The plant that nearly died is now producing babies. It sits on that pine shelf in my living room, radiating green, healthy leaves. Every time I walk past it, I remember how simple the solution was. Raise the pot. Change the moisture game. Let the plant breathe.
If you have spider plants sitting on cold floors, honestly, stop reading and go build the shelf. Your plants will thank you by growing new leaves within a couple of weeks. You might even get a few tiny white flowers if you get the conditions right. That's the reward for listening to what your plants are telling you.





