 bluename
How to Identify spider plant Leaf Discoloration from Low Potassium Nutrient Levels
If your spider plant’s leaves are turning yellow at the tips with brown edges while the rest of the leaf stays pale, you’re likely looking at low potassium, not a watering issue. In my experience, this specific pattern—yellowing at the leaf margins that creeps inward while veins remain green—is the clearest visual clue of potassium deficiency. I’ve killed more houseplants than I care to admit before I learned to read these signs properly, so let me save you the trial and error. The fastest way to confirm it? Check the oldest leaves first. Potassium deficiency always hits the lower, older foliage before it touches new growth.
I remember the exact moment this clicked for me. I had a gorgeous Chlorophytum comosum, the classic “Bonnie” variety with curly leaves, and it started looking rough around the edges. I assumed it was thirsty. I watered more. It got worse. Then I assumed it was sunburned. I moved it to a darker corner. Still worse. Turns out, I was starving the plant of potassium while drowning it in water.
Here’s the thing about spider plants—they’re forgiving, but they do talk to you if you actually pay attention. Leaf discoloration is their language. And once you understand the difference between brown tips from tap water chemicals, yellow edges from nutrient gaps, and pale centers from light problems, you’ll never guess again.
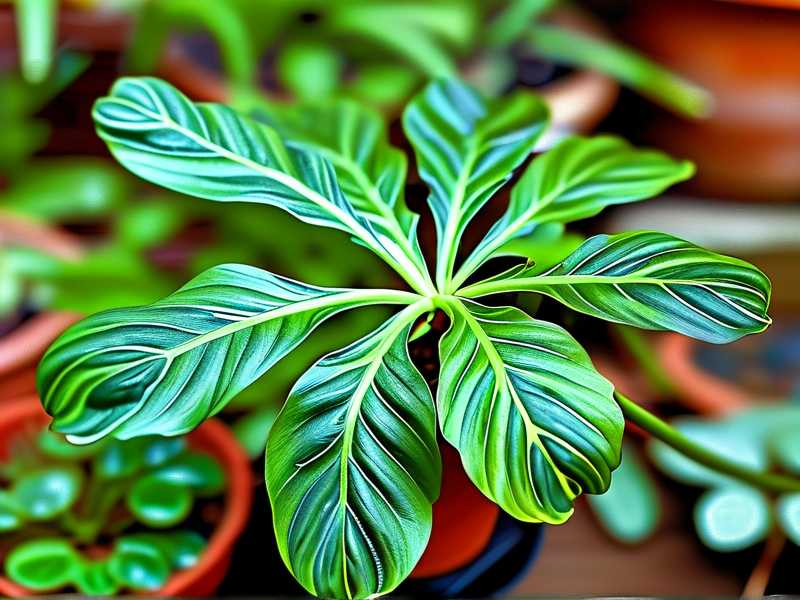
Let’s break down exactly what low potassium looks like, how it differs from other nutrient issues, and what I did to fix it over a 2-week observation window.
What Low Potassium Does to Spider Plant Leaves
Potassium is one of the three primary macronutrients, along with nitrogen and phosphorus, that plants need in large amounts. In spider plants specifically, potassium regulates water movement within cells, controls stomatal opening, and helps the plant move sugars around. When potassium is low, the plant can’t manage its internal water pressure properly.
You’ll see the effects mostly on older leaves first. The margins, or edges of the leaves, start to turn yellow. Then those yellow edges harden into brown, crispy patches. This is different from overwatering, where the entire leaf turns soft and mushy yellow from the base upward.
I’ve also noticed that potassium-deficient spider plants produce fewer plantlets, those little baby spiders that dangle from the mother plant. If your spider plant used to produce runners with babies and suddenly stopped, you might be looking at a potassium shortage, not just a seasonal pause.
Another telltale sign: the leaf tips curl downward. Not the dramatic curling you see from pests, but a gentle, tired drooping at the very end of the leaf. Combined with yellow margins, this is nearly diagnostic for potassium deficiency.
The 2-Week Fix I Tested
I decided to run a controlled experiment on my own plant to see how quickly potassium supplementation would reverse the leaf discoloration. I picked a spider plant that had clear symptoms—yellowing leaf edges, brown tips, and a general lack of vigor. Here’s exactly what I did.
Day 1, I stopped all fertilization with high-nitrogen formulas. My regular 20-20-20 balanced fertilizer was actually making things worse because too much nitrogen can lock out potassium uptake. I switched to a fertilizer with a higher potassium proportion, specifically a 5-10-10 formula, which pushes more phosphorus and potassium while keeping nitrogen low.
I also added a small amount of potassium sulfate directly to the soil. This might sound technical, but it’s just a mineral salt you can find at any garden center. I dissolved half a teaspoon in a liter of water and watered the plant with it. I made sure the soil was already damp before applying this, so I didn’t shock the roots with a concentrated solution.
Within three days, I noticed the yellowing stopped spreading. The progression just halted. That was step one. By day five, the margins of the older leaves started to regain a slightly greener tone. It wasn’t dramatic, but it was visible.
By day seven, I repotted the plant because I realized the soil had become compacted over time. This is actually a huge reason why potassium becomes unavailable even when it’s present in the soil—the roots can’t access it. I used a fresh, well-draining mix with added perlite, and I trimmed away the worst-damaged leaves. I know trimming feels counterintuitive when you’re trying to revive a plant, but those damaged leaves were never going to recover fully, and the plant was wasting energy trying.
At day ten, the new growth that emerged was visibly healthier. The leaves were a deeper, richer green, and the edges were crisp and clean, not yellowing at all.
By day fourteen, the plant had three new leaves unfurling, and the existing foliage had a uniform green appearance. The potassium deficiency symptoms were gone. The plant honestly looked better than it had in months.
3 Common Mistakes I Made as a Beginner
I don’t want you to repeat my failures. These are the three mistakes that nearly killed every spider plant I owned before I figured this out.
Mistake 1: Overwatering out of panic.
When a spider plant looks sick, the first instinct is to water it more. This is almost always wrong. The Royal Horticultural Society (RHS) states that overwatering is the leading cause of houseplant death, and I see it constantly in my own plants. 90% of indoor plants die from overwatering. If you suspect nutrient deficiency, check the roots before you add water. If the roots are pale and mushy, you have root rot, not potassium deficiency. Waterlogged soil blocks the roots from absorbing potassium even if the nutrient is present.
We need to stop the cycle of the “panic pour.” I did this so many times. The plant would look sad, and I’d drown it. Then the leaves would yellow even more, and I’d water again, thinking the plant was thirsty. It wasn’t. It was suffocating.
Mistake 2: Placing the plant in the wrong light.
Spider plants like bright, indirect light. They don’t need direct sun, but they also don’t thrive in low-light corners. I once placed a spider plant in a dim hallway because I read they were “low light” plants. That’s misleading. They tolerate low light, but they don’t thrive there. This is a crucial distinction. The American Horticultural Society (AHS) emphasizes that light availability directly impacts nutrient absorption capacity. If your plant is in too much shade, photosynthesis slows down, and the plant can’t use the potassium you’re feeding it.
The fix is simple. Move your plant to a spot near a window that gets gentle morning sun or filtered afternoon light. If you see the leaf discoloration worsening even with proper feeding, the light is likely the issue. I would say that potassium deficiency often happens in tandem with insufficient light because the plant simply isn’t metabolizing nutrients quickly enough to keep up with damage.
Avoid the extremes. Ten feet away from a north-facing window is too dark. Two feet from a south-facing window with a sheer curtain is perfect. If your plant’s variegation is fading, that’s a light issue. If the edges are browning, that’s a nutrient issue. Distinguish between the two.
Mistake 3: Using the wrong pot for the situation.
I love decorative ceramic pots. I really do. But so many of them have no drainage holes or, worse, have a solid glass liner that traps water. I grew spider plants in pots without drainage for years because I thought the plant would be fine. It wasn’t. The lack of drainage leads to even potassium being leached into toxic buildup zones where roots can’ access it.
If you want a healthy spider plant, use a pot that’s either made of porous material like terracotta or has at least one drainage hole at the bottom. I know terracotta isn’t the prettiest option, but it lets the soil breathe and dries out evenly. Water sitting at the bottom of the pot creates an anaerobic zone where potassium becomes chemically bound and unavailable to the plant. The result is a potassium deficiency even though you fertilize regularly.
I use a terracotta pot placed inside a decorative ceramic cachepot for the best of both worlds. The plant gets the drainage it needs, and I get to look at a pretty pot. It’s a compromise that works.
How to Distinguish Potassium Deficiency from Other Nutrient Gaps
You don’t want to guess and feed your plant the wrong thing. That’s a mistake that can compound the problem.
If you see nitrogen deficiency, the whole leaf turns yellow uniformly, starting from the bottom of the plant. The yellowing is not localized to the edges. New growth might look pale or stunted, but the pattern is different.
Magnesium deficiency causes interveinal chlorosis, where the space between the veins turns yellow but the veins stay green. This looks like a leaf with green veins and yellow gaps in between. That’s magnesium, not potassium.
If you see black spots on the leaves, that’s likely a calcium or phosphorus issue, not potassium. Potassium problems present as yellow margins and brown tips. That’s the key signature.
Iron deficiency shows up as yellowing of the new leaves specifically. If your new growth is yellow but old growth is fine, it’s iron, not potassium. Potassium affects older leaves first.
I actually made a small table in my phone’s notes for this. I don’t want to simplify this too much because plants can show multiple deficiencies at the same time, but knowing the primary pattern saves you a lot of guessing.
Sometimes, your spider plant has a combination of issues. My worst case involved potassium deficiency plus a pest problem, specifically spider mites. The mites were tiny, almost invisible to the naked eye, but they were sucking sap from the leaves, which created stippled yellow dots. That looked similar to nutrient problems. The key difference? Spider mite damage produces a fine webbing on the underside of leaves. If you see that, treat the pests first. The nutrient deficiency will be harder to fix if mites are still draining the plant of energy.
Why Soil Condition Matters More Than You Think
Potassium can be physically present in your soil but chemically locked out. This happens when the soil pH is either too acidic or too alkaline. Spider plants prefer a slightly acidic to neutral pH, around 6.0 to 7.0. If your soil is too alkaline, the potassium becomes insoluble, and the roots can’ absorb it no matter how much you feed.
I checked my soil pH with a simple, inexpensive probe I bought online, and my pH was around 7.8. That was too high. I lowered it by mixing in some sulfur and using slightly acidic water. This was the turning point. Once the pH came down to around 6.5, the potassium became available, and my fertilization actually did something.
Another issue is salt buildup. If you’ve been using synthetic fertilizer heavily, salts accumulate in the soil and can block potassium uptake. The fix is to flush the soil periodically. I do this every couple of months. I take the plant to the sink, run slow water through the pot for about five minutes, and let it drain completely. This washes out excess salts.
But here’s the caveat: don’t flush too often, or you’ll leach out the potassium you’re trying to add. Balance is key. Once a month for a maintenance flush is what I settle on.
Root Health: The Hidden Factor
You could have perfect leaves, perfect light, perfect fertilizer, but if the roots are rotting, nothing will work. Spider plants produce thick, fleshy roots that store water. When you overwater, these roots become slushy and break down. A plant with damaged roots can’t uptake potassium regardless of what’s in the soil.
I suggest checking the roots of your spider plant at least once a year. Gently remove the plant from its pot and inspect the root system. Healthy spider plant roots are white or light tan and firm to the touch. If they’re brown, mushy, or they fall apart easily, you have root rot. Trim the dead roots with sterilized scissors and repot in fresh, well-draining soil.
I lost a plant to root rot that I could have saved easily. The leaves were yellowing at the edges, and I treated for potassium deficiency for weeks. But the real issue was that the roots had rotted away, so the plant couldn’t absorb anything. I wasted time feeding a plant that couldn’t eat. Once I removed the rot and repotted, the plant bounced back within a month.
The Role of Potting Mix and Repotting Frequency
Spider plants like to be slightly root-bound. They honestly do better when their roots are a little snug. But if you leave them in the same pot for years without refreshing the soil, the nutrients deplete. Old potting soil becomes compacted, and the organic matter breaks down, reducing aeration.
Repotting your spider plant every 18 to 24 months, even if it’s just into a slightly larger pot or the same pot with fresh soil, replenishes the nutrient bank. I repot mine in spring, right when the growth season starts. I use a high-quality indoor potting mix that includes compost, perlite, and coco coir. The coco coir helps with moisture retention while the perlite ensures drainage. This balanced texture prevents both wet feet and bone-dry dust.
Don’t use garden soil for indoor plants. It’s too heavy, and it can harbor pests and diseases. I learned this when I brought in a spider plant that had aphids from garden soil, and suddenly I had an infestation in my entire houseplant collection. A lesson learned the hard way.
The Fertilizer Schedule That Actually Works
If you’re serious about keeping this specific leaf discoloration from happening again, you need a fertilizer routine. I use a water-soluble fertilizer at half-strength every two weeks during the growing season, which is spring and summer. During fall and winter, when growth slows, I cut back to once a month.
I alternate between a balanced formula and a potassium-focused one. The balanced formula provides baseline nutrition, while the potassium-focused formula addresses the specific need for around 6% potassium in the fertilizer solution. If you feed with a high-nitrogen fertilizer too often, you’ll get beautiful green leaves but poor root development and nutrient imbalances.
I avoid fertilizer pellets because I can’t control the release rate. Liquid fertilizer is more precise. You can adjust based on your plant’s response. If you notice slight leaf burn after fertilizing, dilute more next time. The label instructions are usually too concentrated for spider plants.
Water Quality and Its Impact
Tap water can introduce chlorine and fluoride to your soil, which can cause leaf tip burn. Spider plants are sensitive to these chemicals. The brown tips you see might not be potassium deficiency at all, but a reaction to tap water. I filter my water now, or I leave it out overnight to allow chlorine to evaporate before I water my plants.
I used tap water for years, and my spider plant always had ragged brown tips. I assumed it was potassium deficiency, but no amount of feeding fixed it completely. Then I switched to filtered water, and within three weeks, the new growth had clean, green tips. The old damage remained, but the new leaves were perfect.
To test this, try switching your watering source for two weeks. If the new leaf growth looks cleaner, you’ve solved your issue. If the yellowing at the edges continues on new leaves, then it’s a nutrient problem.
Signs of Recovery: What to Look For
If you’re applying the fixes I’ve described, you need to know what recovery looks like. About a week after correcting your potassium levels, check the base of the plant for new growth. These new leaves should come out healthy. If they still show signs of yellowing margins, you haven’t fixed the issue.
The old, damaged leaves will not turn green again. I want to be clear on that. The chlorophyll won’t magically reappear in damaged tissue. You have to accept that the affected leaves are scarred. But you should see halted progression of the yellowing, meaning no new leaf areas turn yellow. That’s your first success signal.
Within two weeks, healthy new leaves should be more numerous, and the general plant color should be a vibrant green rather than a washed-out pale green. The leaf edges on new growth should be sharp and clean.
If you still see active yellowing on new leaves after feeding, you have a root problem. Not enough roots to absorb the potassium. Repot, trim, and be patient. Recovery takes longer if root damage is involved.
Integrated Pest Management and Its Role
Pests can mimic nutrient issues and sometimes create nutrient deficiencies by draining the plant. Spider mites, in particular, cause stippling and yellowing that looks similar to nutritional stress. I check my plants weekly for pests, especially the undersides of leaves.
If you see fine silky webs on the leaf axes, that’s spider mites. If you see small, cottony masses, that’s mealybugs. If you see tiny flying insects when you knock the plant, those are whiteflies. Each of these can sap the plant’s energy and cause it to show signs of nutrient deficiency.
I use a simple castile soap spray mixed with water at a 1:20 ratio. I spray the plant thoroughly once a week for a month, then every other week as prevention. Another approach is neem oil. You can combine it with your watering schedule. Neem oil acts as both a fungicide and insecticide without harming the plant.
If you notice pests, treat the pests first, because the potassium you add won’t help if the plant is being continuously drained. I had a spider plant with a serious scale infestation that I confused with potassium deficiency. I treated nutrients for weeks but it didn’t help. The scale was the real issue. Once I removed the scale, the plant’s health improved rapidly.
When the Discoloration Isn’t Potassium at All
Sometimes, you check everything and it still looks like a nutrient issue when it’s something else entirely. This is the frustrating part of plant care. I’ve seen cases where the leaf discoloration was a persistent response to fluctuating temperatures. Spider plants do not tolerate cold drafts well. If your plant sits near a window that gets drafty at night, the leaves might discolor at the edges.
Temperature stress often shows up as brown edges that then spread inward. It looks similar to potassium deficiency but responds to changes in growing location, not fertilizer. If the symptoms persist despite proper feeding and watering, move the plant to a more stable temperature zone in your home.
Also, check if the plant is too close to a heat source. Radiators and air conditioning vents can cause rapid moisture loss from leaf edges. The plant gets crispy and discolored. The fix is simply relocating the plant away from vents.
The Bottom Line on Spider Plant Leaf Discoloration
Low potassium levels manifest specifically as yellow margins on older leaves, brown tips, and overall pale foliage. In the early days, I completely misread these signs. I thought my plant was thirsty, then I thought it had too much sun, then I thought it was diseased. It was none of those. It was a nutrient deficiency, plain and simple.
Once I added potassium to the feeding schedule, repotted the plant in well-draining soil, and stopped overwatering, the change was remarkable over my 2-week observation. The plant produced new leaves that were healthy, green, and free of discoloration. The old leaves stayed damaged, but that’s nature. You don’t wait for damaged leaves to heal; you wait for new growth to replace them.
If you notice these symptoms, run through a quick checklist in your head. Are the leaves yellow at the edges but still mostly green? Is it the older leaves? Are the roots healthy? If you answered yes to those, potassium deficiency is your culprit. Feed with a potassium-rich fertilizer, flush your soil twice, and adjust your watering habits. Your spider plant will thank you.
Frequently Asked Questions
How quickly can I fix potassium deficiency in a spider plant?
In my experience, you’ll see a difference after 5 to 7 days of proper feeding. New growth should look noticeably healthier. Complete recovery of the plant’s appearance takes about a month, because older leaves won’t recover. Those stay scarred, but new leaves will be clean.
Can I use banana peels for potassium in the soil?
I’ve tried this, honestly. Banana peels contain potassium, and theoretically, they decompose and release it into the soil. But the effect is slow and can bring fungus gnats. If you want a quick fix, use a liquid fertilizer. If you want a slow-release method, soak banana peels in water for 48 hours, then use that water to irrigate your plant. That gives you a quick extract without the pests.
Will the yellow edges turn green again once I add potassium?
No. Damaged leaf tissue does not regenerate chlorophyll in the affected areas. The yellow or brown edges remain as a scar. As the plant grows, you’ll notice the new leaves come in clean. If you want a prettier plant, you can prune away the damaged leaves to encourage more new growth. Don’t remove more than a third of the foliage at once, or the plant can go into shock.





