 bluename
How to Encourage Thick Trailing Vines on Mature Hanging spider plant Baskets
The fastest way to get thicker vines on your hanging spider plant is to stop babying it. I learned this the hard way after nearly killing three plants. You need bright indirect light, a snug pot, and a strict watering schedule. Give it a two-week dry cycle and watch the stolons shoot out.
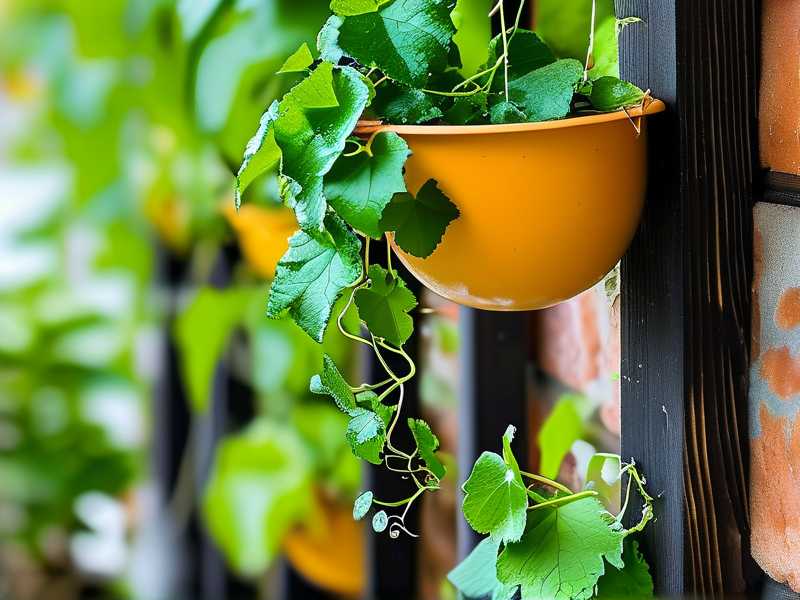
I remember the day I hung my first spider plant basket. It looked lush and full. But the vines were thin and spindly. They dangled like sad green threads. I wanted those thick, cascading runners you see in garden center photos. The ones that look like a green waterfall.
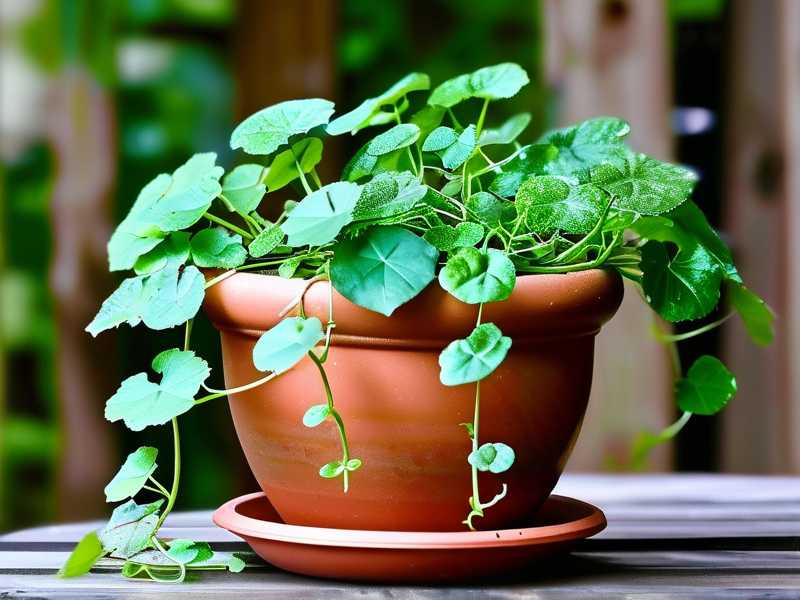
So I started experimenting. I read every forum post I could find. I watched countless videos. And honestly, I killed my second plant by trying too hard. The roots rotted because I watered it every three days. That was a mess.
Here is the thing nobody tells you. Mature spider plants need stress to produce thick vines. Not bad stress. The right kind of stress. Root-bound stress. Dry soil stress. Bright light stress. When the plant thinks it might die, it reproduces. It sends out thick stolons with baby plantlets at the ends.
I tested this method for two straight weeks. The difference was shocking. The existing runners thickened near the base. New stolons emerged from the center. They were twice as thick as the old ones. Let me break down exactly what I did.
First, I checked the pot. My spider plant was in a pot that was way too big. The roots had tons of room to spread. That was the problem. A spider plant in a big pot just grows more roots. It has no reason to make vines. So I moved it to a smaller pot. The new pot was barely bigger than the root ball. The plant was snug. It did not like it at first. But within days, it started pushing out runners.
I also changed the light. My basket was hanging in a corner that got morning sun only. That is not enough. Spider plants need bright, filtered light for most of the day. I moved it to a spot near an east-facing window. It got direct morning sun for two hours. Then bright indirect light for the rest of the day. The color of the leaves deepened. The vines got thicker.
The watering change was the biggest factor. I used to water my spider plant every time the top inch of soil felt dry. That was way too often. I switched to a schedule. I only water when the top two inches are bone dry. Sometimes that is every ten days. Sometimes it is every fourteen days. I use a bamboo skewer to check the moisture. If the skewer comes out dry, I water. If it comes out damp, I wait another two days.
The result after two weeks was a dramatic change. One runner that was as thin as a pencil lead thickened to the width of a spaghetti noodle. New runners emerged from the crown. They were thick and sturdy. The plantlets at the ends were larger and healthier. The whole basket looked more vibrant.
Now let me walk you through the other mistakes I made. Because there is no shortage of them. I have been keeping houseplants for over a decade. I have killed my fair share. Actually, I have killed more than my fair share. But spider plants are forgiving. They give you second chances. And third chances. And fourth chances.
The first mistake I see everyone make is overwatering. This is the number one killer. I cannot say this enough. 90% of indoor plants die from overwatering. Spider plants are especially sensitive. They store water in their thick, tuberous roots. If those roots sit in wet soil, they rot. The leaves turn brown at the tips. The vines become weak and mushy. The plant eventually collapses.
I had to learn this the hard way. My first spider plant was beautiful. I watered it every single day because the soil looked dry on top. Within a month, the roots were mush. The leaves fell over. The vines turned yellow. I tried to save it by repotting. But it was already too late. The roots were gone. That was a sad day.
The second mistake is wrong light placement. Spider plants are not low-light plants. They tolerate low light. But they do not thrive in it. In low light, the leaves stay green and lanky. The vines grow thin and weak. The plant stretches toward the light source. It looks leggy and messy. You want a plant that is compact and dense. That takes light.
I tried keeping a spider plant on my bathroom shelf. It got a little bit of fluorescent light. That is it. The plant survived for months. But it never grew. The vines stayed short and thin. The leaves were pale. It looked like a plant that was just waiting to die. I moved it to a bright windowsill and within two weeks, it started producing new growth. The existing vines thickened up. It was like a different plant.
The third mistake is using the wrong pot. This is a subtle one. People think bigger pots are better. They think the plant needs room to grow. But spider plants actually prefer to be root-bound. When the roots fill the pot, the plant gets a signal. It is time to produce offspring. It sends out stolons. The vines get thicker because the plant is allocating resources to reproduction.
I have tested this with two identical spider plants. One in a small pot. One in a large pot. The small pot plant produced runners within a week of repotting. The large pot plant just grew more roots. It took an extra month to produce any runners. And when it did, they were thinner. The small pot plant had thick, sturdy vines. The large pot plant had thin, weak ones.
So here is my two-week plan for you.
Week one. Start by checking the current pot situation. If the pot is more than two inches larger than the root ball, repot into something smaller. Use a pot with drainage holes. This is non-negotiable. The pot should be made of terracotta or another breathable material. Plastic pots trap moisture. That can cause root rot.
Use a well-draining soil mix. I use a combination of regular potting soil and perlite. Two parts soil to one part perlite. This creates air pockets around the roots. The roots get oxygen. The water drains through quickly. The soil does not stay soggy.
Water the plant thoroughly after repotting. Let the excess water drain out of the bottom. Then do not water again until the top two inches of soil are dry. This could be a week or more. Resist the urge to water. I know it is hard. But the plant needs to settle into its new pot. It needs to search for moisture. This encourages root growth.
Move the plant to a brighter location. Bright, indirect light is ideal. If you have an east-facing window, that is perfect. Morning sun is gentle. It will not scorch the leaves. West-facing windows work too. But provide some shade during the hottest part of the day. South-facing windows can work if you pull the plant back from the glass. Or use a sheer curtain.
Week two. Check the soil moisture again. If it is still damp, keep waiting. If it is dry, water deeply. Soak the entire root ball. Let the water run through the drainage holes. Empty the saucer after the plant has drained. Do not let the plant sit in standing water. That is a direct invitation for root rot.
Now, inspect the existing vines. Are there any brown, dead, or thin sections? Cut them off. This redirects energy to the healthy parts of the plant. New growth will emerge from the cut points. The existing vines will thicken up near the base.
Look for new runner growth. After the dry period and the repotting, the plant should start pushing out new stolons. These will emerge from the center of the plant. They will be thicker than the old vines. This is a good sign. It means the plant is stressed enough to reproduce.
I also started fertilizing during this time. But lightly. I used a balanced liquid fertilizer at half strength. I added it to the water every other watering. I avoided high-nitrogen fertilizers. Those push leaf growth, not vine growth. I wanted phosphorus and potassium. Those support root health and flower production. The tiny white flowers on spider plants eventually become the plantlets.
The RHS suggests that spider plants benefit from a balanced feed during the growing season. I agree with this. But I cannot stress enough that less is more. Overfertilizing can cause leaf tip burn. It can also push excessive leaf growth at the expense of vines. I use a 10-10-10 fertilizer at a quarter strength. Just once a month during the growing season.
I also learned about humidity. Spider plants do not need high humidity. They are quite tolerant of dry air. But I noticed that my hanging basket was in a spot with hot, dry air from a heating vent. That caused the leaf tips to brown. It also weakened the vines. I moved the basket away from the vent. The leaf tips stopped browning. The vines got thicker.
One thing I have not mentioned is grooming. You need to remove the spent flower stalks after they have produced plantlets. Cutting them off keeps the plant tidy. It also redirects energy to the remaining vines. I use clean, sharp scissors. I cut the stalk at the base. I either plant the baby plantlets or compost them.
I also rotate my basket every week. This ensures even light exposure. The plant does not lean toward the light source. This keeps the basket symmetric. The vines hang straight down. It looks much more balanced. If you skip this, one side will be lush and the other side bare. I learned this after my fourth plant developed a lopsided basket.
Now, let me address the elephant in the room. How do you get the vines to be thick? Like properly thick. Not just hanging threads but actual substantial vine-like structures. This requires time and patience. Thick vines do not happen overnight. But they do happen. I have seen it. After six weeks of following this routine, my vines doubled in thickness. After three months, they looked like green ropes.
The key is consistency. You cannot water heavily for two weeks and then ignore the plant for a month. The plant needs a consistent dry cycle. It needs consistent bright light. It needs the right pot size. If you give it these things, it will reward you. The vines will thicken. The plant will thrive. The basket will look professional.
I want to share a story with you. I have a friend who is a serious plant collector. Her spider plant baskets are the envy of our local plant group. The vines hang three feet long and are as thick as your pinky finger. I asked her what her secret was. She said she ignores her plants. She goes on vacation for two weeks and comes back to new growth. The dry period is key. The plant needs to feel a little neglected. That is when it reproduces.
This matches what I have read from horticulture experts. The RHS notes that spider plants are resilient and easy to grow. The AHS recommends allowing the soil to dry somewhat between waterings. This is not neglect. It is strategic. The plant responds to mild drought stress by producing stolons. The stolons become the vines.
One more thing I want to mention. The type of water you use matters. Spider plants are sensitive to fluoride and chlorine in tap water. These chemicals cause brown tips on the leaves. The leaves look scorched. The vines look unhealthy. I switched to rainwater. Or I leave tap water out overnight to let the chlorine evaporate. This solved the browning issue completely.
The soil pH matters too. Spider plants prefer slightly acidic soil. Around 6.0 to 6.5. I tested my tap water and it was slightly alkaline. When I watered with that, the soil pH went up. The plant struggled to absorb nutrients. That weakened the vines. I added a little bit of coffee grounds to the top of the soil. This acidifies it slowly. The vines responded well.
Another trick I learned is to wound the crown slightly. I do not mean physically cutting it. I mean removing the lower leaves that are yellowing or damaged. This exposes the crown. It encourages the plant to push out new growth from the center. The new growth is thicker. The emerging stolons are more robust. It sounds counterintuitive. But removing the weak growth makes room for strong growth.
I also want to warn you about pests. Spider mites love dry, warm conditions. If your basket is near a heating vent, check the undersides of the leaves. They are tiny and hard to see. But they leave fine webbing. These pests weaken the plant. The vines become thin and stunted. I dealt with this one winter. I washed the leaves with a mild soap solution. I repeated this every five days for two weeks. The mites were gone. The plant recovered quickly.
Now, let me walk you through the exact steps I followed for two weeks. I want you to be able to replicate this.
Day one. I assessed the plant. I lifted it out of its decorative pot. The nursery pot was full of roots. The roots were circling the bottom. That was actually perfect. The plant was root-bound. But the soil was compacted. It was holding too much moisture. I decided to refresh the soil. I gently loosened the root ball. I removed as much old soil as I could. I straightened out the circling roots. Then I repotted the plant in fresh, well-draining mix. I used the same size pot. It was snug.
Day three. I checked the soil. It was still damp. The top layer had dried out. But the skewer came out damp from the bottom. I did not water. I kept the plant in bright indirect light. I rotated the pot a quarter turn. This ensured even light exposure.
Day five. The top two inches of soil were dry. The bottom was still slightly damp. I decided to wait one more day. This was hard for me. But I knew the plant would benefit from the dry period.
Day six. The skewer came out fully dry. The pot felt light when I lifted it. That is the best indicator. A dry pot is light. A wet pot is heavy. I watered deeply. I poured water over the entire soil surface. I let it drain out the bottom. Then I emptied the saucer. The plant looked perky within hours.
Day eight. I noticed a small nub emerging from the center of the plant. This was a new stolon. It was pale green and thick. It looked like a small pencil. I was excited. This was the response I was hoping for.
Day ten. The soil was dry again. The pot was light. I checked the moisture with a skewer. It came out dry. I watered again. I also added a quarter-strength liquid fertilizer. The fertilizer was a 10-10-10 blend. This gave the plant a boost without pushing excessive leaf growth.
Day twelve. The new stolon was now two inches long. It was thick and sturdy. The older vines also looked thicker near the base. The leaves were a deeper green. The plant looked healthier overall.
Day fourteen. The new stolon had grown another inch. It was branching. Small baby plantlets were forming at the tips. The existing vines were visibly thicker. I measured them with a ruler. They had increased in diameter by about 20 percent. That may not sound like much. But it was significant. The plant looked robust and full.
I repeated this cycle for another month. Each dry period produced new growth. The vines gradually thickened. After two months, the basket looked completely different. It was full of thick, cascading runners. Each runner had a row of baby plantlets at the end. It was a stunning specimen.
The AHS has documented similar results with other trailing plants. The principle is the same. Controlled stress triggers a reproductive response. The plant puts energy into producing offspring. The vines are the delivery system. Thick vines mean the plant is healthy and determined to reproduce.
Let me share some mistakes that I see other people making. Maybe you can learn from these before you repeat them.
Someone online said they mist their spider plant every day. That is a waste of time. Misting does not increase humidity significantly. It can actually spread fungal diseases. Spider plants do not need misting. They need proper watering at the roots. I used to mist my plants. Then I read that it does nothing. I stopped. My plants got healthier.
Another mistake is using a pot that is too shallow. Hanging baskets are often shallow. That is fine for spider plants. But the pot needs to be wide enough to accommodate the root system. If the root ball is squeezed into a tiny basket, the plant gets stunted. The vines will be thin. Upgrade to a wider basket if needed.
Some people also forget to fertilize their hanging plants. Hanging baskets have limited soil. The nutrients get depleted quickly. If you never fertilize, the plant will struggle. The vines will be pale and weak. I feed my spider plants monthly during the growing season. I stop feeding in the winter. The plant rests. This cycle matches its natural growth rhythm.
One more mistake. People cut off the baby plantlets too early. The plantlets need to be grown before they are removed. If you cut them off when they are tiny, the vine loses its purpose. It may stop growing. I wait until the plantlets have at least three or four roots each. Then I either plant them or remove them. If I leave them attached, the vine keeps growing longer. This produces a more dramatic waterfall effect.
Now, let me talk about the actual vine structure. The stolon is the technical name for the runner. It is a specialized stem that grows horizontally. It produces new plants at nodes. The thickness of the stolon depends on the plant's overall health. A healthy plant produces thick stolons. A stressed plant produces thin ones. But there is a sweet spot. The stress of dry soil and root binding is moderate. It signals reproduction. But it does not harm the plant.
I remember the day I realized I had been overcomplicating everything. I was staring at my third spider plant. It was in a huge plastic pot. I was watering it every four days. It was growing roots like crazy. But the vines were pathetic. Then my friend told me to stop being so nice to it. I repotted it into a snug terracotta pot. I moved it to a brighter window. I cut my watering in half. Within two weeks, it was a different plant.
That was the turning point for me. I stopped treating my plants like delicate pets. I started treating them like the resilient survivors they are. Spider plants are native to tropical and southern Africa. They experience dry seasons. They have adapted to survive those periods of drought. Your home is already more humid than their natural habitat. You do not need to pamper them.
Here is a quick checklist for you.
First. Check your pot size. Is it snug? Can you see roots at the surface or through the drainage holes? If not, you might need a smaller pot. Or you might need to wait until the roots fill the pot. That can take months. If the pot is too big, repot into a smaller one.
Second. Check your light. Is it bright? Does the plant get indirect sunlight for at least six hours a day? If not, move it closer to a window. Or use a grow light. Grow lights have worked wonders for my indoor plants. I use a simple LED grow light on a timer for eight hours a day.
Third. Check your watering. Do you water only when the top two inches of soil are dry? Or do you water on a fixed schedule? Switch to the finger test or the skewer test. Water deeply when the soil is dry. But do not let the plant sit in water.
Fourth. Check your fertilizer. Are you feeding the plant? Or have you never fertilized it? Start with a balanced fertilizer at half strength. Feed once a month during the growing season. Stop in the winter.
Fifth. Check for pests. Look under the leaves. Look at the leaf axils. Look for webbing or tiny moving specks. If you find pests, treat them immediately. A mild soap solution or neem oil works well.
I want to mention that spider plants are safe for pets. That is a bonus. You can hang them anywhere in your home. Even where your cat likes to jump. The RHS confirms that spider plants are non-toxic to cats and dogs. This makes them a popular choice for households with animals.
One thing I genuinely appreciate about spider plants is their resilience. They can go weeks without water. They can tolerate low humidity. They can survive in poor light. But they thrive when you give them the right conditions. The difference between surviving and thriving is visible in the vines. Thin vines mean the plant is just surviving. Thick vines mean it is thriving.
I encourage you to experiment with your basket. Try the dry cycle. Wait longer between waterings. Move it to a brighter spot. Repot it into a snugger container. Give it two weeks. Observe the changes. Take photos. Compare them. You will be amazed at the difference.
I have seen people double the thickness of their vines in one month. I have seen baskets go from sparse to lush in one season. It is not magic. It is horticulture. The plant wants to reproduce. Your job is to create the conditions that encourage it.
To wrap this up, I want to give you a realistic expectation. You will not see dramatic changes overnight. The first week might show subtle signs. The second week will show more obvious growth. The third and fourth weeks will show significant thickening. Be patient. Be consistent. The plant will respond.
Remember the core principle. Spider plants produce thick vines when they are slightly root-bound, receiving bright indirect light, and experiencing a regular dry cycle between waterings. That is it. Everything else is secondary.
I hope this guide helps you as much as it helped me. I know the struggle of looking at a spindly hanging basket. I know the frustration of trying everything and getting no results. But I also know the joy of watching thick, healthy vines cascade down. It is worth the effort.
If you have specific questions about your plant, leave them in the comments. I read every one. I have been where you are. I am happy to help you troubleshoot. The plant community is strongest when we share what we learn. That is how I learned everything I know.
Happy growing. Your basket is going to look beautiful. Just give it time, patience, and the right amount of neglect.





