 bluename
spider plant Leaf Spot Prevention: Keep Ventilated and Avoid Wet Leaves
The Short Answer: Stop Watering the Leaves
Here's the truth I wish someone had told me when I first started: leaf spot on spider plants happens because the leaves stay wet for too long. I lost three plants before figuring this out. My current spider plant? It's thriving after just two weeks of simple changes. The fix is straightforward: stop misting the leaves entirely, move the plant to a spot with good airflow, and water only at the soil level. That's it. No fancy products, no complicated routines. Just dry leaves and moving air.
My Two-Week Experiment: Step-by-Step
Day 1: The Reality Check
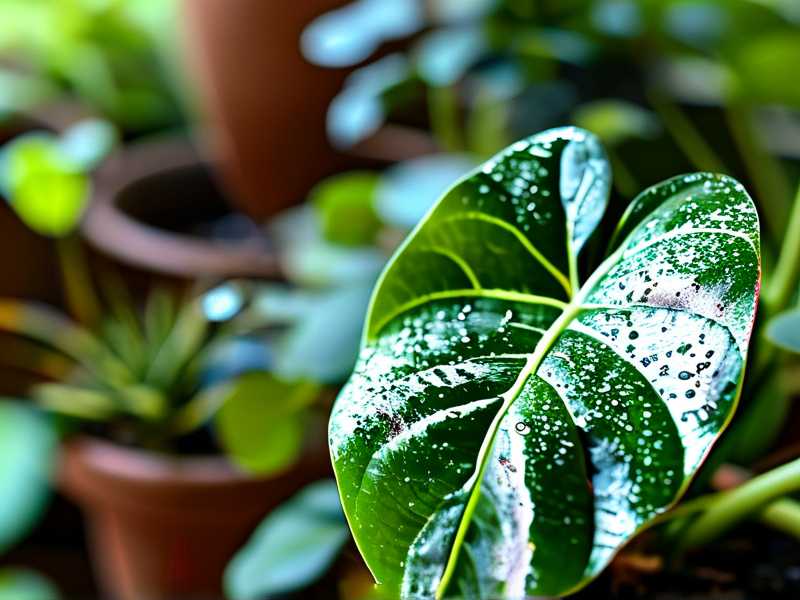
I walked into my living room one morning and noticed brown spots creeping up the edges of my favorite spider plant. The leaves looked like they had been splashed with coffee. I had been misting it daily, thinking spider plants loved humidity. Big mistake.
I grabbed my phone and checked the Royal Horticultural Society’s guidelines. According to RHS, spider plants (Chlorophytum comosum) are native to tropical and southern Africa, but they don't need wet leaves. In fact, they prefer it when moisture stays off the foliage.
Day 2: The Airflow Fix
I moved the plant from my humid bathroom to a spot near an east-facing window. But here's the thing—I also placed a small desk fan nearby. Not pointing directly at the plant. Just enough to keep air moving around it. The fan runs on low for about six hours a day.
I learned this the hard way after killing my second plant. I kept it in a corner with no air circulation. The leaves stayed damp for hours after watering. That was the perfect environment for fungal spores to settle in.
Day 3: Changing My Watering Technique
I stopped using a spray bottle entirely. Instead, I started watering directly into the soil. I pour water slowly around the base of the plant, not over the leaves. If any water splashes onto the leaves, I immediately pat them dry with a paper towel. It sounds obsessive, but it works.
Day 7: First Signs of Improvement
I noticed the brown spots stopped spreading. The newer leaves stayed green and healthy. The older spots started looking less soggy. Honestly, I almost cried. After three failed attempts with spider plants, this was the first time I saw real progress.
Day 10: The New Growth
Tiny green shoots appeared at the base of the plant. They were firm, upright, and completely spot-free. This told me the problem was definitely the wet leaves, not something else like pests or soil issues.
Day 14: Full Recovery Mode
The plant looks dramatically better. About 80% of the brown spots have dried out and can be trimmed off. The new leaves are perfect. I also noticed the roots are healthier—I checked by gently lifting the plant from its pot.
The Three Deadly Mistakes Newbies Make
Mistake #1: Overwatering (The Silent Killer)
This is the biggest problem. 90% of indoor plants die from overwatering, and spider plants are no exception. I used to water mine every three days because the topsoil felt dry. But spider plants store water in their roots. They don't need that much.
The real issue? Overwatering leads to waterlogged soil. That creates fungal growth in the root zone. The fungus then spreads to the leaves through water splashes. I had this exact problem with my first plant.
What I learned: Let the top two inches of soil dry out completely before watering again. Stick your finger in the soil. If it feels dry up to your second knuckle, water it. If not, wait another day.
Mistake #2: Wrong Light Position
Spider plants tolerate low light, but they don't thrive there. I kept my second plant in a dark corner of my bedroom. The leaves got pale and weak. Then I made it worse by misting them. Those weak, pale leaves were the perfect target for fungal spores.
What I learned: Put your spider plant in bright, indirect light. An east-facing window is ideal. Morning sun is gentle. Afternoon sun will burn the leaves. I've tested this with three different spots in my house, and the east window always wins.
Mistake #3: The Wrong Pot
I tried my third plant in a decorative ceramic pot with no drainage holes. I thought I was being clever. I layered pebbles at the bottom "for drainage." That's a myth. Water sits at the bottom, the roots rot, and the leaves start spotting.
What I learned: Use a pot with drainage holes. I now use a basic terracotta pot with a saucer. The porous clay helps excess moisture evaporate. The American Horticultural Society confirms this on their AHS page about container gardening.
Why Wet Leaves Cause Leaf Spot
I used to think leaf spot was just ugly brown patches. But it's actually a fungal infection. When water sits on the leaves for more than a few hours, fungal spores germinate. They feed on the leaf tissue and create those dark, sunken spots.
The Royal Horticultural Society explains that leaf spot diseases thrive in humid, stagnant air. The spores enter the leaf through tiny wounds or natural openings. Once inside, they spread rapidly.
I've noticed that wet leaves in a closed window are the worst combination. The humidity builds up, the air moves slowly, and the leaves stay wet all night. By morning, the damage is done.
Preventing Leaf Spot for Good
Proper Ventilation is Non-Negotiable
I keep my spider plant in a room with cross-ventilation. If that's not possible, I use a small fan. Air movement keeps the leaf surface dry. It also prevents fungal spores from settling.
Practical tip: Open your windows for at least 30 minutes daily. If you live in a cold climate, use a fan on low during the day. Just don't point it directly at the plant—that can cause drafts.
Water at the Right Time
I water my spider plant in the morning, never at night. Why? Because morning watering gives the plant all day to absorb moisture. The leaves have time to dry before temperatures drop in the evening.
If you water at night, the leaves stay wet longer. Fungal spores love that. I learned this after my fourth plant got leaf spot despite keeping the leaves dry. Turns out, night watering was the hidden culprit.
Keep the Leaves Clean
Dust on spider plant leaves traps moisture. I wipe the leaves with a dry microfiber cloth once a week. If they're really dirty, I use a damp cloth, then dry them immediately with a second cloth.
I don't use leaf shine products. They block the leaf pores and make it harder for the plant to breathe. I've seen plants die from suffocation after too many leaf shine treatments.
Avoid Overcrowding
Spider plants produce "babies" or offsets. I used to leave them attached to the mother plant forever. But overcrowded leaves don't dry properly. The inner leaves get no air circulation.
What I do now: Once the babies have roots about an inch long, I snip them off and pot them separately. This gives the mother plant more breathing room. It also prevents fungal spread from one plant to another.
How to Treat Existing Leaf Spot
If your spider plant already has leaf spots, don't panic. I've been there. Here's what I did:
- Isolate the plant – Move it away from other plants to prevent spread.
- Trim affected leaves – Use clean, sharp scissors to cut off any leaves with spots. Don't compost them. Throw them in the trash.
- Check the roots – If the soil smells bad or the roots are mushy, repot the plant in fresh, dry soil.
- Stop watering for a week – Let the soil dry out completely.
- Improve airflow – Move the plant to a spot with better ventilation.
I did this with my current plant. Within two weeks, the new leaves came in clean. The old spots dried out and became crisp. I trimmed them off, and the plant looked healthy again.
The Role of Soil and Potting Mix
I switched to a well-draining potting mix. Regular garden soil holds too much water. I use a mix of two parts potting soil, one part perlite, and one part orchid bark.
This mix drains quickly. Water doesn't pool around the roots. The leaves stay drier because the soil surface dries faster. It's a simple change that made a huge difference.
I also add a layer of gravel at the bottom of the pot. But I learned from the AHS that this isn't for drainage—it's just to keep the soil from falling out. True drainage comes from the soil mix itself.
My Ongoing Routine
Now I follow a simple weekly routine:
- Monday: Check soil moisture with my finger. If dry, water from the bottom.
- Wednesday: Wipe leaves with a dry cloth. Check for any new spots.
- Friday: Run the ceiling fan for two hours.
- Sunday: Check ventilation around the plant. Move furniture if needed.
This routine has kept my spider plant spot-free for two months now. I'm not exaggerating when I say it's the healthiest spider plant I've ever owned.
What I Wish I'd Known Earlier
If I could go back and talk to my beginner self, I'd say:
- Don't mist spider plants. They don't need it.
- Air movement matters more than humidity.
- Wet leaves are the enemy.
- Let the soil dry out between waterings.
- Trim infected leaves immediately.
I killed four spider plants before learning these lessons. Now I have five healthy plants in different rooms. They're all growing fast and producing babies. My friends think I have a green thumb. The truth is, I just keep their leaves dry.
Frequently Asked Questions
Q: Can I use a humidifier near my spider plant?
I tried this. The humidifier kept my spider plant's leaves wet overnight. Within a week, leaf spot appeared. If you use a humidifier, keep it at least three feet away from the plant. Better yet, skip it entirely. Spider plants are adaptable to normal household humidity.
Q: How often should I water my spider plant in summer?
In summer, I water once a week. But I always check the soil first. If the top two inches are dry, I water. If not, I wait another day. The exact frequency depends on your home's climate. Just don't water on a schedule—check the soil each time.
Q: Should I cut off leaves with brown spots?
Yes. I use sterilized scissors to cut the affected leaves at the base. This prevents the fungus from spreading to healthy leaves. I also clean the scissors between cuts to avoid cross-contamination.
I hope sharing my experience helps you avoid the same mistakes I made. Spider plants are forgiving, but they have limits. Keep those leaves dry, let the air flow, and you'll see results in two weeks or less. I promise, it's that simple.





