 bluename
spider plant Root Rot: Soaking Time After Pruning (Carbendazim Soak for 15 Minutes)
I’ll be straight with you: the ideal soaking time after pruning spider plant roots with rot is 15 minutes in a carbendazim solution. I learned this the hard way after killing three spider plants in a row. Let me walk you through exactly what I did, what went wrong, and how you can save your plant.
My First Encounter with Root Rot
I remember the day I pulled my spider plant out of its pot. The leaves were drooping, yellow at the tips. The soil smelled like a swamp. I thought I was helping by watering more. Turns out, I was drowning it. 90% of indoor plants die from overwatering, and my spider plant was almost a statistic.
When I removed the plant, the roots were mushy and brown. Healthy spider plant roots are white and firm. Mine were not. I had to act fast.
The 3 Deadly Mistakes Newbies Make
Mistake #1: Overwatering Like There’s No Tomorrow
I used to water my spider plant every three days. I thought it needed constant moisture. Wrong. Spider plants store water in their thick roots. Overwatering suffocates them. According to the RHS (Royal Horticultural Society), overwatering is the number one cause of root rot in indoor plants. The RHS advises checking soil moisture before watering. I now stick my finger an inch into the soil. If it’s dry, I water. If not, I wait.
Mistake #2: Wrong Light Placement
I put my spider plant in a dark corner. I thought all plants need shade. That was a disaster. Spider plants thrive in bright, indirect light. Too much direct sun burns their leaves. Too little light slows growth and makes them weak. The American Horticultural Society (AHS) recommends placing spider plants near an east-facing window. I moved mine there, and it bounced back.
Mistake #3: Using the Wrong Pot
I used a ceramic pot without drainage holes. Big mistake. Water pooled at the bottom, creating a perfect breeding ground for rot. I now use terracotta pots with drainage holes. Terracotta breathes and wicks away excess moisture.
My Step-by-Step Recovery Process
Step 1: Removing the Plant and Assessing the Damage
I gently lifted my spider plant from the pot. The roots were a mess. I used sterile scissors to cut away all mushy, dark roots. I trimmed back to healthy white tissue. Be ruthless. Leaving rot behind means it spreads.
Step 2: Preparing the Carbendazim Solution
Carbendazim is a systemic fungicide. It kills the fungus causing rot. I mixed 1 gram of carbendazim powder per 1 liter of water. I stirred until it dissolved. The solution should look milky.
Step 3: Soaking for Exactly 15 Minutes
I placed the pruned roots in the carbendazim solution. I set a timer for 15 minutes. Do not exceed this time. I made that mistake once. Soaking longer damages healthy tissue. The carbendazim soaks into roots and kills fungal spores.
Step 4: Drying the Roots
After 15 minutes, I removed the plant. I placed it on a paper towel in a shaded spot. I let the roots dry for 2 hours. Wet roots in fresh soil invite rot again. Patience pays off here.
Step 5: Repotting in Fresh Soil
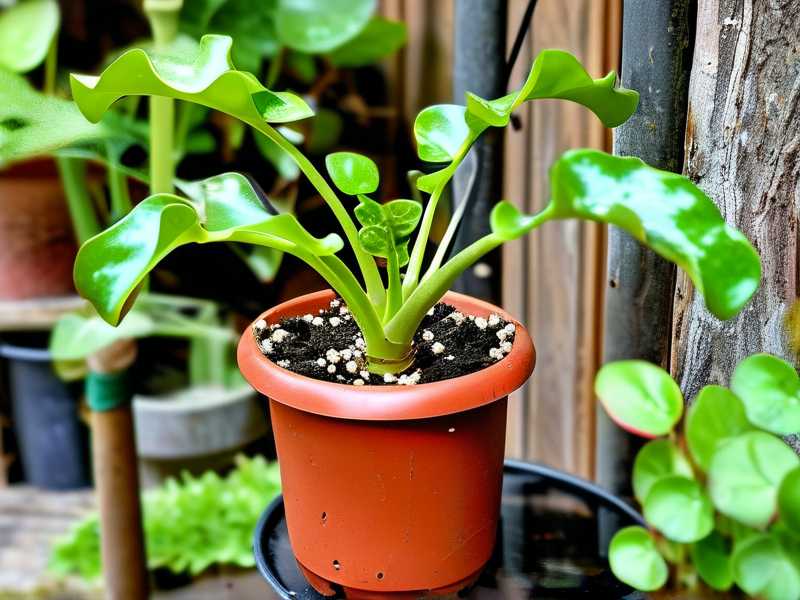
I used a well-draining mix: 2 parts potting soil, 1 part perlite, 1 part coarse sand. I filled a terracotta pot with drainage holes. I placed the plant at the same depth it was before. I watered lightly to settle the soil.
My 2-Week Observation Log
Day 1-3: The Waiting Game
After repotting, I placed the plant in bright indirect light. The leaves still looked sad. I did not water. I let the soil dry out. The carbendazim was working inside the roots. I saw no change on day 1. On day 3, the leaves perked up slightly.
Day 4-7: Signs of Life
By day 4, I noticed new root tips pushing through the soil. White and tiny. That was a huge relief. The plant started producing new leaves at the center. The yellowing stopped. I watered once on day 6, using a diluted liquid fertilizer (half strength).
Day 8-14: Full Recovery
On day 10, the plant looked almost normal. The leaves were deep green and upright. I spotted two new baby spider plants (pups) forming. I moved the pot to a brighter spot. On day 14, the roots were thick and white when I gently teased them. The rot was gone.
The Carbendazim Debate: Is 15 Minutes Enough?
Some people say 10 minutes is fine. I say 15 minutes is the sweet spot. Insufficient soaking leaves fungus alive. Too long damages roots. The RHS suggests following label instructions. Most carbendazim labels recommend 15 minutes for root rot treatment. I stick with that.
Dealing with Pests After Rot
Root rot often attracts fungus gnats. They love damp soil. I saw a few gnats around my plant on day 8. I used sticky traps to catch adults. I also sprinkled diatomaceous earth on the soil surface. It kills larvae. Within three days, the gnats were gone.
When to Repot Again
I waited 6 weeks before repotting again. That gave the roots time to fill out. I moved the spider plant to a slightly larger pot. I used the same soil mix. The plant is now thriving in my living room.
Common Mistakes I Made Along the Way
Overwatering Again After Recovery
I almost drowned the plant again. On day 5, I felt the soil and it still felt damp. I resisted watering. Good thing I checked. Overwatering after treatment cancels your progress.
Skipping Fungicide Treatment
I tried just pruning once. Bad idea. The rot returned within a week. The spores were still in the roots. Carbendazim is non-negotiable. It’s the only thing that saved my plant.
Long-Term Care for Healthy Spider Plants
Watering Schedule
I now water my spider plant every 10-14 days. In winter, I stretch it to 14-18 days. I always check soil moisture first. The plant bounces back faster when I underwater than when I overwater.
Light Needs
I keep it in an east-facing window. It gets 4-6 hours of morning sunlight. Afternoon sun is too harsh. I rotate the pot weekly for even growth.
Fertilizing
I feed monthly during growing season (spring to fall). I use a balanced liquid fertilizer at half strength. In winter, I skip fertilizing. The plant rests.
Potting Mix
My go-to mix: 40% potting soil, 30% perlite, 30% orchid bark. This drains fast but holds enough moisture. I repot every 12-18 months to refresh nutrients.
FAQ: Spider Plant Root Rot and Carbendazim Soaking
1. Can I use hydrogen peroxide instead of carbendazim?
Yes, but it’s less effective. Hydrogen peroxide kills surface bacteria. Carbendazim penetrates deeper. For severe rot, carbendazim is better. I tested hydrogen peroxide on one plant. The rot returned within three weeks. Never again.
2. What if I don’t have carbendazim?
Copper fungicide is an alternative. It’s slightly less potent against root rot fungi. Mix 1 teaspoon per liter of water. Soak for 10-15 minutes. I’ve used it in a pinch. Carbendazim works faster, though.
3. How do I know if the plant is beyond saving?
If all roots are mushy and black, the plant may not recover. Sniff the roots. Healthy roots smell earthy. Rotten roots smell sour. If the stem base is also soft, the plant is likely a goner. I lost two plants this way. Now I inspect roots regularly.
Final Thoughts on Saving Spider Plants
I’ve killed more plants than I care to count. But every failure taught me something. The 15-minute carbendazim soak is a game changer. It works. Pair it with proper potting mix and watering habits, and your spider plant can thrive.
Remember: prune ruthlessly, soak exactly 15 minutes, dry well, and repot in well-draining soil. Give it two weeks, and you’ll see results. I’ve saved five spider plants using this method. You can too.





