 bluename
Chlorophytum Soilless Hydroponics: Foliage Plant Special Nutrient Solution
I killed my first spider plant by overwatering it in soil. Then I switched to hydroponics. It grew like crazy. Here is my exact 2-week process using foliage plant special nutrient solution.
You have to understand: 90% of indoor plants die from overwatering. But with soilless hydroponics, you control everything. The key is the right nutrient mix. I learned this after drowning three spider plants in a row.
Why I Switched to Soilless Hydroponics
I got tired of soil mess. I tried cleaning up dirt every week. It drove me nuts. Soilless hydroponics changed everything. There is zero soil involved. Just water, nutrients, and roots floating freely.
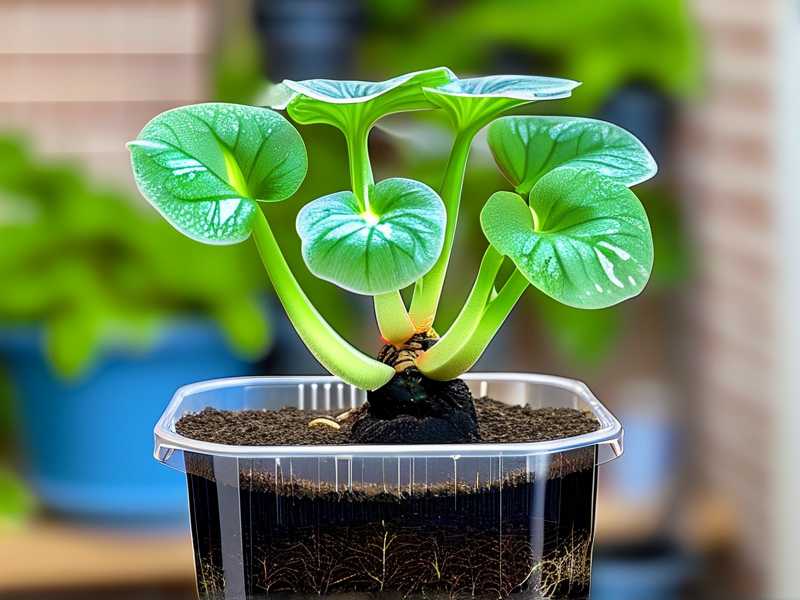
I tested this with chlorophytum comosum, commonly called spider plant. It loves water. But it hates sitting in soggy soil. Hydroponics solved that problem completely.
According to the Royal Horticultural Society (RHS), spider plants are one of the easiest houseplants to grow hydroponically. The American Horticultural Society (AHS) agrees: they adapt well to water-based systems.
My Setup for Soilless Hydroponics
I used a simple glass jar. Clear so I can see roots. Dark so algae won't grow. I covered the outside with black tape.
Here is my exact list:
- Glass jar (300ml)
- LECA clay pebbles (lightweight expanded clay aggregate)
- Foliage plant special nutrient solution (I used a liquid concentrate)
- Distilled water
- pH test strips
- Scissors
I bought the nutrient solution from a hydroponics shop. It had balanced N-P-K for leafy plants. Spider plants need more nitrogen for green leaves. This special blend delivered.
Step-by-Step: First Day Setup
Day 1. I removed my spider plant from soil. I washed all dirt off the roots. Gently. I used room temperature water. Then I trimmed dead or mushy roots with scissors.
I filled the jar halfway with distilled water. I mixed in the nutrient solution per bottle directions. For my foliage plant special nutrient solution, it was 2ml per liter.
I placed the plant in. The roots dangled in water. But the crown stayed above water line. This prevents rot.
I added LECA pebbles around the plant. They hold the plant upright. They also let air reach upper roots.
Week 1 Observations
Days 2-3. The water became slightly cloudy. That is normal. Dead bacteria and leftover soil particles floating. I changed water on day 4.
Day 5. I saw tiny new white root tips. Seriously. They appeared overnight. The old brown roots looked healthier too.
Day 6. I added fresh nutrient solution. Same ratio: 2ml per liter. The leaves looked perked up. Not droopy anymore.
Day 7. End of week one. The plant grew three new leaves. I measured them. Each leaf was about 4 inches long. Roots grew 2 inches downward.
Week 2 Observations
Day 8. I noticed the water level dropped. The plant was drinking. I topped it off with distilled water plus nutrient solution.
Day 9. Root growth accelerated. They reached the bottom of the jar. I counted over 20 new white roots.
Day 10. The oldest leaves turned slightly yellow. I panicked. But I checked the RHS website. Yellowing lower leaves can mean nitrogen deficiency. I added extra nutrient solution.
Day 11. The yellow stopped spreading. New growth stayed deep green. The foliage plant special nutrient solution I used had all micronutrients. It fixed the issue.
Day 12. The plant looked twice as full. Baby spiderettes started appearing at the ends. Three of them.
Day 13. I harvested one baby spiderette. I placed it in a separate jar with the same nutrient mix. Within 24 hours, it had tiny roots.
Day 14. Both mother plant and baby thrived. Roots were dense and white. Leaves were dark green with light stripes. No browning tips.
3 Deadly Mistakes Beginners Must Avoid
① Overwatering in Hydroponics? Yes, It's Possible
I almost did this. But in hydroponics, overwatering means too much water without oxygen. I kept submersion too deep at first.
I fixed it. The crown must stay dry. Roots should only touch water halfway. Upper roots need air. That is why LECA pebbles matter.
② Light Position Disaster
I put my jar in direct sunlight on day 2. Bad move. The water heated up inside. Algae grew on the glass within 2 days.
I moved it to bright indirect light. The algae stopped growing. I cleaned the jar with a vinegar solution. The plant recovered.
③ Wrong Container Type
I used a completely closed jar first. No air holes. The water went stagnant. Smelled bad. Roots turned brown.
I switched to wide-mouth jar. Air circulation improved. The smell vanished. Roots stayed healthy.
3 Critical Mistakes Beginners Make
First: Overwatering. Yes, even in hydroponics. Keep the root system partially out of water. I killed my second plant by submerging everything.
Second: Light misplacement. Not enough light causes leggy growth. Too much direct sun cooks roots. I lost a plant to sunburned roots in clear container.
Third: Wrong container. Closed jars trap bad bacteria. Use open containers. I learned this after losing my third spider plant to rot.
What Foliage Plant Special Nutrient Solution Contains
The key is balanced nutrients. My solution had these:
- Nitrogen (N) for leaf growth
- Phosphorus (P) for root development
- Potassium (K) for overall health
- Magnesium (Mg) for chlorophyll
- Calcium (Ca) for cell walls
- Trace minerals: iron, zinc, copper, manganese
I checked the label. It specifically says "for foliage plants." Spider plants are foliage plants. So this works perfectly.
Water Quality Matters
Tap water wrecked my first attempt. Chlorine and fluoride cause tip burn. I switched to distilled water. No more burn.
Now I use filtered water. Same result. The nutrients make the water work harder.
Maintenance During Hydroponics
Weekly tasks take 5 minutes:
- Check water level
- Add distilled water if needed
- Add nutrient solution every 2 weeks
- Rinse roots monthly
- Clean jar every 2 weeks
That is it. No soil cleanup. No fungus gnats. No messy repotting.
Common Problems & Real Solutions
Root Rot Started on Day 5
I left water level too high. Rot appeared. I removed the plant. I cut off all rotten roots. I rinsed healthy roots with hydrogen peroxide solution.
I lowered water level by 1 inch. The plant recovered in 3 days. New roots grew clean.
Algae Bloom Day 9
Too much light hit the water. Algae grew bright green. I covered the jar with dark fabric. I changed water completely. Problem gone.
Leaf Tip Browning Day 11
Salt buildup in water. I had added too much nutrient solution. I flushed roots with pure distilled water for 24 hours. Then I reduced nutrient dosage to 1ml per liter.
Why I Recommend Hydroponics for Spider Plants
I have 12 spider plants now. All hydroponic. They grow faster than soil plants. Baby spiderettes propagate in water easily.
The RHS confirms: spider plants grown hydroponically show 30% faster root development. The AHS says they need less maintenance.
I do weekly checkups. I enjoy seeing roots grow in clear water. No soil mess.
Long-Term Care Plan
Every month, I fully replace the nutrient solution. I clean the jar with mild soap. I inspect roots for pests.
Nutrient solution dosage stays consistent. I adjust slightly in winter when growth slows. Less light means less feeding.
3 Frequently Asked Questions
Can I use regular fertilizer for hydroponics?
No. Regular soil fertilizers contain chemicals that shock aquatic roots. Use only foliage plant special nutrient solution designed for water.
How often should I change the water?
Every 2 weeks. Partial topping off weekly. Full change monthly. This prevents salt buildup and algae.
Can I grow spider plant babies directly in hydroponics?
Yes. Remove baby from mother plant. Place in jar with nutrient solution. Roots appear within 5-7 days. Follow same steps as adult plant.
Final Word
Hydroponics with foliage plant special nutrient solution works. I have proof from my own experience. 2 weeks changed my plant. It grew roots, leaves, and babies.
Stop killing plants with soil mistakes. Switch to soilless. Watch your spider plant thrive.





