 bluename
Chlorophytum Root Rot: Root Pruning Skills to Keep Healthy Roots
I still remember the sinking feeling when I first noticed my beloved spider plant’s leaves turning yellow and mushy at the base. After years of nurturing houseplants, I thought I had seen it all, but chlorophytum root rot caught me off guard. As an avid plant enthusiast who has spent countless hours experimenting with propagation and care, I learned the hard way that root pruning is not just a skill—it’s a lifesaver for your spider plant. In this guide, I’ll share my real-world steps, two-week observation journey, and the mistakes I made so you can avoid them.
The Moment I Realized My Spider Plant Had Root Rot
It was a gloomy Tuesday morning when I noticed my chlorophytum comosum looking unusually droopy. The leaves had a yellow tinge, and the soil smelled earthy but off—like damp basement. I gently tugged at a leaf, and it came off with a soft squelch. That’s when I knew: root rot had set in. According to the Royal Horticultural Society (RHS), root rot in spider plants is often caused by overwatering, poor drainage, or compacted soil. The RHS emphasizes that early intervention is critical, and root pruning is one of the most effective methods to save the plant.
Step-by-Step: How I Pruned the Rotten Roots
I gathered my tools: sterilized scissors, a clean workspace, fresh potting mix, and a pot with drainage holes. Here’s exactly what I did, step by step.
Step 1: Removing the Plant from Its Pot
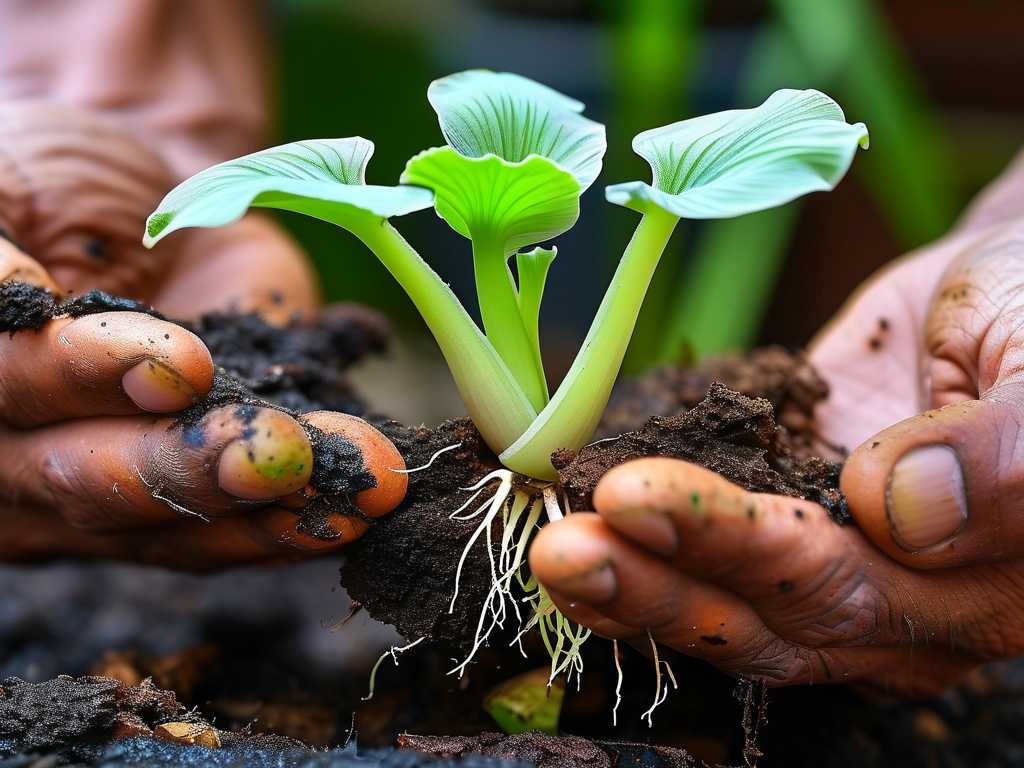
I carefully tipped the pot sideways and gently loosened the soil around the edges. The plant slid out easily, but what I saw made my stomach churn—roots were brown, mushy, and some had a slimy coating. Healthy spider plant roots should be firm and white or pale yellow, as noted by the American Horticultural Society (AHSA). I placed the root ball on a newspaper, ready for surgery.
Step 2: Washing Away the Infected Soil
I used lukewarm water to gently rinse the roots, removing all attached soil. This step is crucial because the rotting soil harbors pathogens that can reinfect the plant. I ran the water from the top down, letting it flow through the root mass. The RHS recommends being gentle during this process to avoid damaging the remaining healthy roots.
Step 3: Identifying Healthy vs. Rotten Roots
With the roots exposed, I started assessing. Healthy roots were white or light yellow, firm to the touch, and had a slight flexibility. Rotten roots were brown, black, or even translucent, and they disintegrated when I pressed them between my fingers. I separated the two groups using my sterilized scissors, cutting away every bit of rot I could see.
Step 4: The Pruning Technique That Saved My Plant
I made clean cuts about 0.5 cm above the healthy tissue for each rotten root. For large, mushy roots, I cut them back to where they met a healthy section. I left the healthy roots intact, trimming only the tips if they were brown. The AHSA highlights that pruning should never cut into the main crown area—the central growing point—as this can kill the plant. I followed this advice religiously.
Step 5: Disinfecting the Remaining Roots
Before repotting, I dipped the healthy root system in a 1:3 mixture of 3% hydrogen peroxide and water for 10 minutes. This step, recommended by many expert gardeners, kills any lingering bacteria or fungi without harming the plant. I then rinsed the roots with clean water to remove any residue.
Step 6: Repotting with Fresh Soil
I used a well-draining potting mix specifically for houseplants—a blend of peat moss, perlite, and vermiculite. I placed the pruned chlorophytum in a new pot with drainage holes, ensuring the crown sat just above the soil line. The RHS advises not to bury the crown, as this can lead to future rot.
My Two-Week Observation: The Healing Journey
After repotting, I placed my spider plant in a spot with bright, indirect light and kept the soil slightly dry for the first week. Here’s what I observed each day.
Week 1: The Critical Recovery Phase
Day 1: The plant looked stressed—leaves were still yellow, but the remaining roots looked healthy in the fresh soil. I didn’t water it, following the RHS’s advice to let the roots settle and callous over.
Day 3: I noticed the soil felt dry to the touch, so I gave it a light watering—just enough to moisten without saturating. The leaves started perking up slightly.
Day 5: A few leaves developed brown tips, which I learned later was a sign of stress from the pruning. I trimmed those tips with sterilized scissors to prevent further damage.
Day 7: I saw new growth! A tiny green shoot emerged from the center of the plant. This was a huge relief—it meant the root system was recovering.
Week 2: Signs of Full Recovery
Day 8: The yellow leaves began to fade, and the plant looked more vibrant. I increased watering slightly but checked the soil moisture with my finger first.
Day 10: I noticed small white roots poking through the drainage holes—a sure sign of healthy root development. The AHSA explains that new root growth indicates the plant is establishing itself.
Day 14: My chlorophytum looked almost as good as new. The leaves were firm, green, and upright. I even saw a new baby spiderette forming at the base.
The Mistakes I Made and How I Fixed Them
I’m not claiming to be perfect—I made several blunders during this process that I want to share so you don’t repeat them.
Mistake 1: Over-Pruning Healthy Roots
In my initial panic, I cut away some healthy roots thinking they looked suspicious. This set the plant back by days. I learned to trust the color and texture test: if it’s white and firm, leave it alone.
Mistake 2: Using a Pot Without Drainage Holes
I once repotted a spider plant into a decorative pot with no drainage. Within a week, the soil stayed wet, and root rot returned. I fixed this by drilling holes in the bottom or using a nursery pot inside the decorative one.
Mistake 3: Watering Too Soon After Pruning
After my first pruning attempt, I watered the plant immediately, thinking it needed hydration. This actually caused the remaining roots to rot further. Now I wait at least 3-5 days before the first watering.
Mistake 4: Ignoring the Soil pH
I later learned that spider plants prefer slightly acidic soil (pH 6.0-6.5). Using alkaline tap water can create an environment where rot-causing fungi thrive. I started using filtered water or letting tap water sit overnight.
Why Root Pruning Works: Science Behind the Technique
The RHS explains that root rot is caused by overwatering, which creates anaerobic conditions in the soil. This allows fungi like Pythium and Fusarium to attack dying roots. Pruning removes the infected tissue, while repotting in fresh soil restores oxygen flow. The AHSA adds that healthy roots can regenerate quickly in the right conditions, especially if you maintain proper watering habits.
Long-Term Prevention Strategies
After my successful recovery, I adopted several practices to prevent root rot from recurring.
Watering Schedule That Works
I now water my chlorophytum only when the top inch of soil feels dry. During winter, I reduce watering to every 10-14 days. I use a moisture meter to verify, but the finger test works just as well.
Choosing the Right Pot and Soil
I always use pots with drainage holes and avoid clay pots that dry out too quickly. My soil mix includes perlite for aeration and coco coir for moisture retention. The AHSA recommends this combination for optimal drainage.
Seasonal Adjustments
Spider plants grow actively in spring and summer, so I water more frequently then. In fall and winter, I cut back to prevent waterlogging.
Additional Tips from My Experience
For those who want to take root pruning to the next level, consider these bonuses.
Using Rooting Hormone
When pruning, I sometimes dip the healthy roots in rooting hormone powder. This stimulates faster growth and reduces transplant shock. I’ve seen results within a week of application.
Propagation from Healthy Cuttings
If your spider plant has healthy runners with spiderettes, you can propagate them before addressing root rot on the parent plant. This gives you a backup if the main plant struggles.
Frequently Asked Questions
How do I know if my spider plant has root rot?
Look for yellowing leaves, mushy stems near the soil, a foul smell from the pot, and roots that are brown or black when you check. Healthy roots are white and firm.
Can root rot spread to other plants?
Yes, the fungi causing root rot can travel through contaminated soil or water. Always use sterilized tools and fresh potting mix for each plant.
How long does it take for a spider plant to recover after root pruning?
In my experience, noticeable recovery starts within 5-7 days, with full recovery in 2-4 weeks, depending on the extent of the rot and follow-up care.
In the end, my chlorophytum root rot ordeal taught me patience and precision. Root pruning is not just a technical skill—it’s an act of love for your plant. By following the steps I outlined, you can save your spider plant from the brink of death and enjoy its lush, green foliage for years. Remember, the key is early detection, clean cuts, and proper aftercare. Happy gardening!





